Mastering Portrait Photography: 15 Essential Tips for Razor-Sharp Images
Capturing a portrait that is truly “sharp” is often the dividing line between an amateur snapshot and a professional masterpiece. For many beginners, the frustration of returning from a shoot only to find that the subject’s eyes are slightly out of focus is a common rite of passage. However, achieving tack-sharp clarity is not a matter of luck; it is a combination of technical knowledge, the right equipment settings, and physical technique.
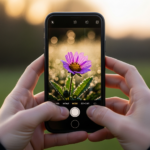
In this comprehensive guide, you will learn the fundamental portrait photography tips for sharp images. Whether you are using a basic entry-level DSLR or the latest mirrorless system, these principles will help you elevate your craft and produce images that pop with detail and professional polish.
Understanding the Science of Sharpness in Portraits
Before diving into the settings, it is crucial to understand what “sharpness” actually means in photography. It is a combination of resolution (the amount of detail your sensor can capture) and acutance (the transition between edges in an image). In portraiture, sharpness is most critical in the eyes, as they are the focal point of human connection.
Many factors can degrade sharpness, including camera shake, subject movement, incorrect focus points, and lens limitations. To master this art, you must address each of these variables systematically.
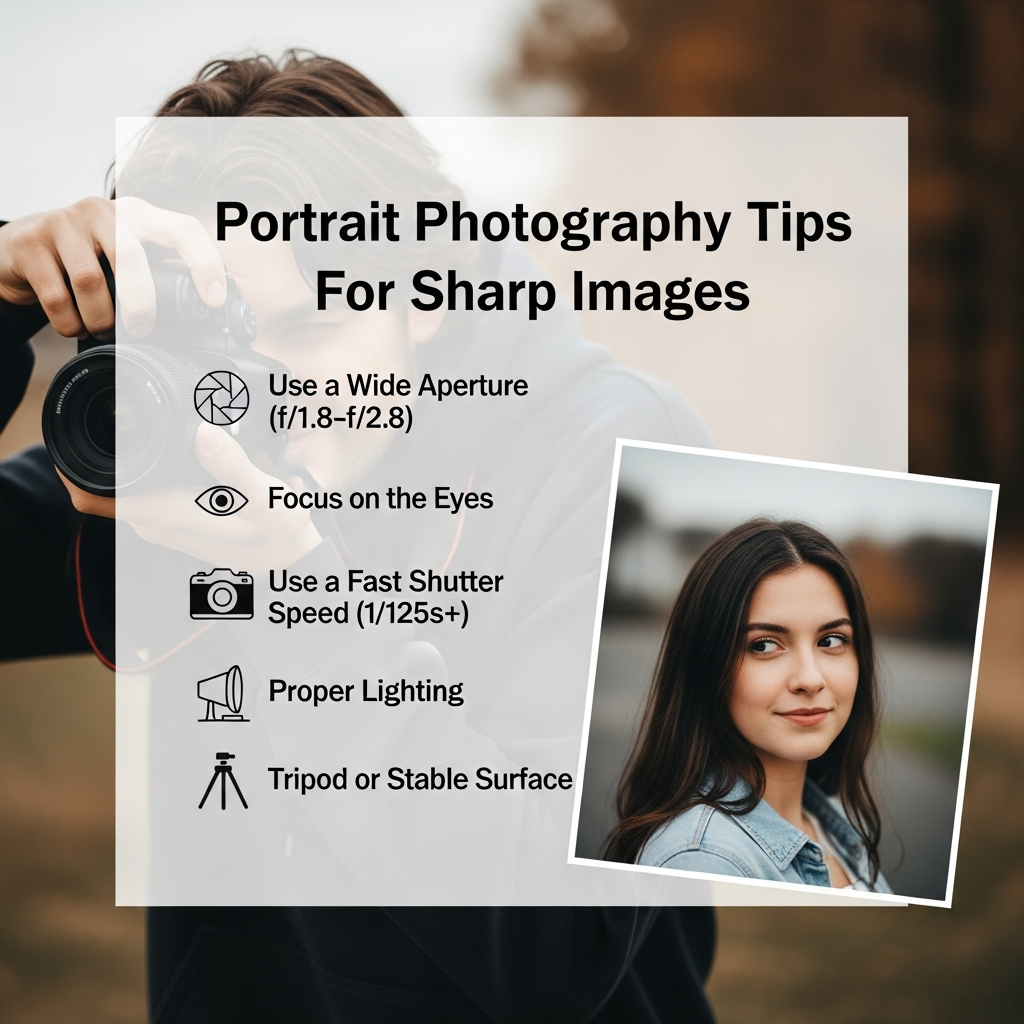
1. Prioritize the Eyes Above All Else
If the eyes are not sharp, the portrait is generally considered a failure. The human brain is wired to look at the eyes first when viewing a face. If the nose is sharp but the eyes are soft, the image will feel “off” to the viewer.
Pro Tip: Always place your active focus point directly on the eye closest to the camera. This creates a sense of depth and ensures the most important part of the face is in perfect clarity.
2. Master Your Aperture Settings
The aperture (f-stop) controls the depth of field. While many portrait photographers love the “bokeh” effect (a blurry background) created by wide apertures like f/1.8 or f/1.4, these settings make the plane of focus incredibly thin.
- Wide Aperture (f/1.4 – f/2.8): Great for blurring backgrounds but very difficult to nail focus. A slight tilt of the head can put one eye out of focus.
- Medium Aperture (f/4 – f/5.6): Often the “sweet spot” for beginners. It provides enough depth of field to keep the entire face sharp while still offering some background separation.
- Small Aperture (f/8 and above): Used for group portraits where multiple people need to be sharp.
3. Use a Faster Shutter Speed than You Think
One of the biggest causes of “soft” images is motion blur. This can come from your hands shaking or your subject moving slightly. Even if you think you are steady, micro-movements can ruin a high-resolution shot.
A good rule of thumb for beginners is the Reciprocal Rule: your shutter speed should be at least double your focal length. For example, if you are using an 85mm lens, your shutter speed should be at least 1/200s to ensure sharpness.
4. Leverage Eye-Autofocus (Eye-AF)
If you own a modern mirrorless camera, Eye-Autofocus is your best friend. This technology uses AI to detect and lock onto the subject’s eye in real-time. It is significantly more accurate than manual point selection, especially when the subject is moving.
Make sure your camera is set to Continuous AF (AF-C or AI Servo) when using Eye-AF. This allows the camera to keep readjusting the focus even if the model breathes or sways slightly forward or backward.
5. Find Your Lens’s “Sweet Spot”
Not all lenses are equally sharp at every aperture. Most lenses are slightly “soft” when shot wide open (at their lowest f-number). Usually, a lens is at its sharpest two to three stops down from its maximum aperture.
For example, if you have a 50mm f/1.8 lens, you might find it is significantly sharper at f/2.8 or f/4 than it is at f/1.8. Experiment with your gear to find where it performs best.
6. The Power of Prime Lenses
While zoom lenses are convenient, prime lenses (lenses with a fixed focal length) are generally sharper. They have fewer internal glass elements and are optimized for a single focal length.
Popular prime lenses for portraits include:
- 35mm: Good for environmental portraits (showing the subject and their surroundings).
- 50mm: The “Nifty Fifty,” versatile and affordable.
- 85mm: The gold standard for headshots, offering beautiful compression and sharpness.
7. Optimize Your ISO for Maximum Detail
ISO measures your camera sensor’s sensitivity to light. While increasing ISO allows you to shoot in dark environments, it introduces digital noise (grain). This noise fills in fine details and makes the image look “muddy” rather than sharp.
Always aim for the Base ISO (usually ISO 100 or 200) whenever possible. If you must increase ISO to maintain a fast shutter speed, try not to exceed the point where noise begins to destroy the texture of the skin.
8. Perfect Your Lighting Technique
Sharpness is highly dependent on contrast. If your lighting is flat and dull, the camera’s autofocus system will struggle to find edges to lock onto. High-quality light creates “micro-contrast” on the skin and hair, which enhances the perception of sharpness.
Directional light (light coming from the side) is often better for sharpness than flat, front-facing light because it creates shadows that define the subject’s features. Additionally, ensure there is a “catchlight” (a reflection of the light source) in the eyes to make them look alive and focused.
9. Use a Single Focus Point
If your camera does not have reliable Eye-AF, do not use “Auto Area AF” where the camera chooses what to focus on. The camera will often choose the closest object, which might be the subject’s hand or nose.
Switch to Single Point AF. This gives you total control. Move the point manually using the joystick or D-pad to align it exactly with the eye. This ensures the camera isn’t “guessing” your intent.
10. Hold Your Camera Correctly
Physical stability is often overlooked. To minimize camera shake:
- Tuck your elbows into your ribs.
- Place one hand under the lens barrel to support the weight.
- Exhale slowly before pressing the shutter button.
- Stand with your feet shoulder-width apart for a stable base.
11. Consider Using a Tripod
For studio portraits or static poses, a tripod is the ultimate tool for sharpness. It eliminates human error regarding camera shake. When using a tripod, you can use lower shutter speeds and lower ISO settings, resulting in a cleaner, more detailed image.
Note: If you use a tripod, remember to turn off Image Stabilization (IS) or Vibration Reduction (VR) on your lens, as the system can sometimes create blur by trying to compensate for movement that isn’t there.
12. Shoot in RAW Format
JPEG files are processed in-camera, and the camera often applies aggressive “noise reduction” that can smear fine details like eyelashes or skin pores. RAW files preserve all the data captured by the sensor.
By shooting in RAW, you have much more control during post-processing to apply targeted sharpening without introducing artifacts or losing detail.
13. Master the “Back Button Focus” Technique
Many professionals decouple the focus function from the shutter button. By assigning focus to a button on the back of the camera (usually labeled AF-ON), you can focus once and then take multiple shots without the camera trying to re-focus every time you press the shutter. This prevents the camera from “hunting” and missing the focus at the critical moment.
14. Avoid “Focus and Recompose” at Wide Apertures
A common mistake is focusing on the eye with the center point and then moving the camera to frame the shot. When you tilt the camera, the plane of focus shifts. At wide apertures (like f/1.8), this shift is often enough to move the focus from the eye to the ear. Instead of recomposing, move your focus point to the desired area while maintaining your composition.
15. Post-Processing: The Final Touch
Even the sharpest raw image can benefit from a bit of digital sharpening. Use software like Adobe Lightroom or Capture One to enhance the details.
- Masking: In Lightroom, hold the ‘Alt’ key while moving the Masking slider in the Sharpening panel. This allows you to apply sharpening only to the edges (eyes, hair, lips) while leaving the skin smooth.
- Clarity and Texture: Use these sliders sparingly. Too much will make the skin look unnaturally harsh, but a small boost can make the eyes pop.
Common Mistakes to Avoid
Even with these tips, you might still encounter issues. Here are the most common culprits for soft portraits:
- Dirty Lens: Fingerprints or dust on the rear or front element can create a hazy, soft look. Always clean your glass before a shoot.
- Cheap Filters: A low-quality UV filter can degrade the resolving power of a high-end lens. If you want sharpness, use high-quality filters or none at all.
- Subject Movement: If your subject is talking or laughing, you need a shutter speed of at least 1/400s to freeze that motion perfectly.
Frequently Asked Questions (FAQ)
What is the best lens for sharp portraits?
Generally, an 85mm f/1.8 or 50mm f/1.8 prime lens offers the best balance of sharpness and affordability for beginners.
Why are my photos sharp on the camera screen but blurry on my computer?
The small screen on your camera makes images look sharper than they are. Always zoom in to 100% on your camera’s LCD to check the focus on the eyes immediately after taking the shot.
Is f/1.8 too blurry for portraits?
It isn’t “blurry,” but the depth of field is very thin. It is great for artistic shots, but for guaranteed sharpness across the whole face, f/2.8 or f/4 is safer for beginners.
Does higher megapixels mean sharper portraits?
Higher megapixels allow for more detail, but they also make camera shake more visible. If you have a high-resolution sensor, you must be even more diligent with your shutter speed and stability.
Conclusion
Achieving sharp images in portrait photography is a skill that combines technical precision with artistic intent. By focusing on the eyes, choosing the right aperture, maintaining a fast shutter speed, and understanding your gear’s limitations, you will see a dramatic improvement in your results.
Remember, photography is a journey. Don’t be discouraged by a few blurry shots. Use them as a learning tool to analyze what went wrong—was it the shutter speed? Was the focus point off? With practice and the portrait photography tips outlined in this guide, you will soon be capturing professional-grade, razor-sharp portraits consistently.