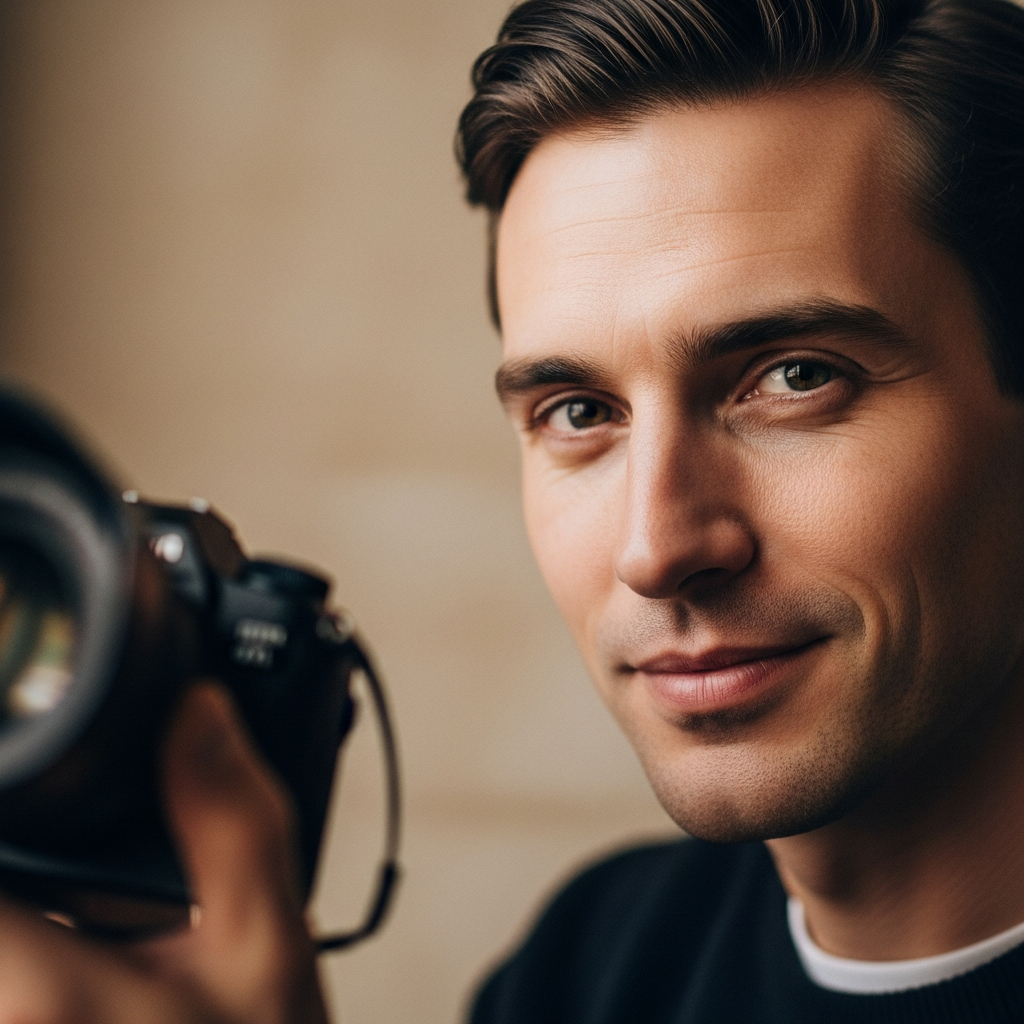
Achieving tack-sharp focus in portraiture is the ultimate goal for any photographer, yet it remains one of the most frustrating challenges. Many believe sharpness is solely a function of expensive lenses, but in reality, it is a deliberate combination of technical settings, precise focus control, and careful camera handling. Mastery of these elements will dramatically improve the clarity and detail in your images. The best Portrait Photography Tips for Sharp Images focus on minimizing unwanted movement and maximizing the resolving power of your equipment.
This comprehensive guide will break down the exact strategies professional photographers use to ensure every eye, every texture, and every strand of hair is rendered with breathtaking clarity. By implementing these expert techniques, you will consistently capture stunning, detailed portraits that stand out. Mastering these Portrait Photography Tips for Sharp Images is the clearest path to elevating your entire body of work.
The Essential Trio: Perfecting Camera Settings for Clearer Portraits
The journey toward razor-sharp images begins long before you even compose the shot; it starts with the fundamental exposure settings. Aperture, shutter speed, and ISO must work in harmony to produce an image that is not only well-exposed but also critically sharp. Ignoring the delicate balance of this trio is one of the most common reasons why portraits appear soft or blurry. These foundational Portrait Photography Tips for Sharp Images must be understood intimately.
Aperture: The Key to Depth and Detail
Aperture controls two critical factors: the amount of light hitting the sensor and the depth of field (DoF), which is the area of acceptable sharpness within the image. For portraits, the ideal aperture choice can be highly situational, depending on whether you are shooting a single subject or a group.
The Optimal Aperture Range for Sharp Portraits
| Subject Scenario | Recommended Aperture (f-stop) | Primary Goal Achieved |
| :— | :— | :— |
| Single Subject Close-Up | f/1.8 – f/2.8 | Maximum background blur (bokeh) and subject isolation. Critical sharpness is only on the eyes. |
| Full-Body Portrait | f/4.0 – f/5.6 | Ensures both eyes and a portion of the body (e.g., shoulders) are sharp, minimizing risk. |
| Small Group (2-3 People) | f/5.6 – f/8.0 | Adequate depth of field to keep all faces sharp, compensating for slight focus errors. |
| Large Group (4+ People) | f/8.0 – f/11 | Maximizes DoF to ensure every person in the row is in focus, balancing overall image sharpness. |
The f-stop you select fundamentally dictates the sharpness of your final portrait. For most photographers seeking to isolate their subject, an aperture like f/2.8 is standard, creating a beautiful separation from a blurred background. However, using the maximum aperture (e.g., f/1.4) often forces you to shoot at the least sharp point of your lens. Lenses typically perform their best sharpness between two and three stops down from their widest aperture—this is known as the lens’s “sweet spot.” So, if you have a f/1.4 lens, the sweet spot for overall optical sharpness might be closer to f/4.0 or f/5.6. Understanding this technical detail is one of the most important Portrait Photography Tips for Sharp Images you can learn.
When shooting a small group, for example, choosing f/2.0 might result in the person at the front being sharp while the person slightly behind them is already out of focus. This is a common portrait mistake. Therefore, increasing your aperture to f/5.6 provides a wider plane of focus, making it easier to ensure all critical elements—the eyes of everyone in the group—remain acceptably sharp. This careful modulation of aperture is one of the essential Portrait Photography Tips for Sharp Images.
Shutter Speed: Freezing the Moment and Camera Shake
Motion blur is the single biggest enemy of a sharp portrait, and it comes from two sources: the subject moving and the photographer (camera) moving. Your shutter speed is the only variable that directly combats both issues.
A standard, non-negotiable rule in general photography to counteract camera shake is the Reciprocal Rule: your shutter speed should be at least the reciprocal of your focal length. For instance, if you are shooting at 100mm, your shutter speed should be 1/100th of a second or faster.
However, in portrait photography, we must also account for subject movement, which is often unpredictable. The minimum recommended shutter speed for a stationary subject is 1/125th of a second. For added security, especially if your subject is animated, laughing, or moving their head, it is highly recommended to increase that speed. A setting of 1/200th or 1/250th of a second is far safer and provides a greater margin of error against even subtle, involuntary human motion.
- For highly active subjects, such as children playing or a spontaneous lifestyle portrait, consider speeds of 1/500th of a second or faster to truly freeze the action. The decision to prioritize a faster shutter speed, even if it requires a slight increase in ISO, is a professional-level choice that guarantees sharper results. This focus on maximizing shutter speed is one of the most effective Portrait Photography Tips for Sharp Images.
If you rely on a slow shutter speed—say, 1/60th of a second—to maximize light, you are introducing a significant risk of blur. While image stabilization (IS/VR/OS) in your lens or camera can help with camera shake, it does nothing to stop the movement of your subject. Therefore, always err on the side of speed when determining the best Portrait Photography Tips for Sharp Images.
ISO: Clarity vs. Noise
ISO represents your sensor’s sensitivity to light. A low ISO (like 100 or 200) produces the cleanest, most detail-rich image, which is paramount for sharpness. A high ISO (like 3200 or 6400) amplifies light but introduces digital noise, which looks like grain and directly compromises the perceived and actual sharpness of the image.
The cardinal rule for any genre of photography prioritizing quality is: Keep your ISO as low as possible. You should only increase your ISO as a last resort, after maximizing the potential of your aperture and shutter speed. This is a crucial element of the core Portrait Photography Tips for Sharp Images.
Think of your ISO adjustment in this order:
- Set Aperture based on your desired depth of field (f/2.8 for bokeh, f/8 for groups).
- Set Shutter Speed based on movement (minimum 1/200th).
- Adjust ISO to achieve a correct exposure.
Modern cameras have greatly improved high-ISO performance, often producing very usable images at ISO 800 or 1600, but the clearest images will always come from the base ISO (often 100). The most demanding Portrait Photography Tips for Sharp Images will tell you to use flash or continuous lighting to keep that ISO down, rather than compromising on clarity.
The choice is always a technical trade-off: is a perfectly exposed, but slightly noisy, image better than an underexposed, perfectly clean one? Usually, a slightly higher ISO (e.g., 800) is better than a blurry image from a too-slow shutter speed. However, for a truly sharp image, prioritizing low ISO is one of the essential Portrait Photography Tips for Sharp Images.
Precision Focusing: The Technical Backbone of Sharpness
Even with optimal settings, a portrait will look soft if the focus point is missed by a millimetre. Focusing is the single most important technical step for achieving critically sharp portraits. The subtle distance between the subject’s eyelashes and their ear can mean the difference between a captivating portrait and a throwaway shot. Applying precise focus control is a foundational pillar of successful Portrait Photography Tips for Sharp Images.
The Focus Point is Paramount: Eyes, Always the Eyes
In any portrait, the eyes are the gateway to the subject’s soul and the undisputed focal point. If the eyes are not sharp, the entire image fails, regardless of what other elements are perfectly in focus. This concept is non-negotiable among professional Portrait Photography Tips for Sharp Images.
- Rule of Thumb: Always focus on the eye closest to the camera. If both eyes are equidistant, choose the eye on the side where the light is most compelling or the one that is most centered in the frame.
The biggest revolution in modern portraiture technology is Eye-Detection Autofocus (Eye-AF). This feature, available on most mirrorless camera systems, automatically identifies and tracks the subject’s eye in real-time. Photographers in 2024 have reported a dramatic increase in their “keeper rate” (the percentage of sharp images) simply by using Eye-AF. If your camera has this feature, you should use it religiously, as it eliminates most human focus error. These high-tech Portrait Photography Tips for Sharp Images remove much of the guesswork.
Another crucial technique to avoid is the Focus-and-Recompose method, especially when shooting with wide apertures (like f/1.8). This technique involves focusing on the eyes, then moving the camera to recompose the shot. This physical movement changes the distance between the lens and the subject, often shifting the focus point off the eyes and onto the nose or forehead, especially with shallow depth of field. Instead:
- Use Single-Point or Spot Autofocus.
- Move the focus point directly onto the subject’s eye using the joystick or touch screen.
- Take the shot without moving the camera.
For action-oriented or lifestyle portraits, employing a continuous autofocus mode (AF-C or Servo AF) is key. This mode constantly adjusts the focus as your subject moves, making it one of the most powerful Portrait Photography Tips for Sharp Images for dynamic shots.
AF Microadjustment: Calibrating for Perfection
Even brand-new camera bodies and high-quality lenses can suffer from subtle focusing inaccuracies, a phenomenon known as “front-focus” (focus is slightly in front of the intended target) or “back-focus” (focus is slightly behind the intended target). This microscopic error, often invisible in casual viewing, becomes critically apparent when you look for tack-sharp detail in a high-resolution portrait, especially when shooting wide open (e.g., f/2.8).
AF Microadjustment (AFMA), also called AF Fine-Tune, is a camera menu setting that allows you to manually correct this slight factory misalignment. This involves testing your lens on a calibration chart and telling the camera to consistently shift the focus forward or backward by a specific numerical value.
For photographers serious about consistent, perfect sharpness, calibrating their lenses is non-negotiable. While this process might seem daunting, it is a one-time adjustment that pays dividends forever. For instance, a professional portrait photographer who invests heavily in high-end prime lenses will calibrate each one to their camera body to maximize the potential of the equipment. If you feel you are doing everything right but your portraits are still consistently soft, applying this highly technical approach to Portrait Photography Tips for Sharp Images is likely the solution.
If your camera has a mirror (a DSLR), this calibration is essential, as the separate sensor for autofocus can sometimes be misaligned from the main image sensor. Mirrorless cameras, which use the main imaging sensor for focusing, are often more accurate out of the box, but even they can benefit from micro-adjustments for older or non-native lenses. The application of these precise Portrait Photography Tips for Sharp Images turns ‘good enough’ into ‘perfectly sharp.’
Stability and Support: The Unsung Heroes of Crispness
The camera’s internal workings—the mirror flipping, the shutter blades firing—actually generate a subtle, momentary vibration that can momentarily degrade image sharpness. Minimizing all movement, both internal and external, is crucial for achieving the cleanest possible detail. These often-overlooked elements are some of the most effective Portrait Photography Tips for Sharp Images because they deal with movement the exposure triangle cannot fix.
The Proper Tripod and Head Technique
A tripod is not just for landscapes or long exposures; it is a critical tool for maximum sharpness in the studio and on location. A stable tripod acts as the ultimate stabilizer, removing the most significant source of motion blur: the photographer’s hands.
When selecting and using a tripod for portraiture, consider a few points:
- Weight Matters: A heavier tripod absorbs vibration more effectively. For extra stability in windy conditions, many photographers hang a bag of sand or their camera bag from the central column hook. This simple weight addition dramatically improves stability, which is a core technical component of Portrait Photography Tips for Sharp Images.
- Release Mechanism: Using a remote shutter release (wireless or wired) or the camera’s self-timer (the 2-second delay) is essential when shooting on a tripod. Pressing the shutter button manually, even lightly, can introduce enough vibration to ruin a shot.
- Height and Lock: Ensure all leg locks are tightly secured, and try to avoid raising the central column to its maximum height, as this is the least stable part of the tripod.
For critical product portraits or fine art portraits where every detail must be perfect, the use of a professional-grade tripod is non-negotiable. By stabilizing the camera completely, you ensure that any blur is due only to the subject’s movement, allowing you to focus purely on the technical Portrait Photography Tips for Sharp Images related to focus and settings.
Mirror Lock-Up and Electronic Shutter
In older DSLR cameras, the mirror flips up milliseconds before the shutter fires. This movement creates a brief ‘mirror slap’ vibration, known as shutter shock, which can soften an image when using mid-range shutter speeds (e.g., 1/30s to 1/250s).
To counteract this, the feature Mirror Lock-Up was introduced. It requires two button presses: the first locks the mirror up, and the second releases the shutter, allowing time for the vibration to subside. This process is slower but dramatically improves technical sharpness, especially when shooting from a tripod.
In modern mirrorless cameras, the shutter shock problem has been largely solved by the Electronic Shutter. When enabled, the electronic shutter captures the image without any physical moving parts, eliminating all mechanical vibration. This is one of the most powerful and easy-to-use Portrait Photography Tips for Sharp Images for mirrorless camera users. When shooting portraits in a controlled environment like a studio, the electronic shutter should be your default choice for maximum clarity and detail. This technological advancement simplifies the pursuit of sharp portraits considerably.
The Art of Light and Composition for Visual Clarity
Sharpness is not only a matter of resolving detail; it is also about perceived sharpness. A well-lit image with strong visual contrast often appears sharper to the human eye, even if the absolute technical sharpness is the same as a flatly-lit image. The thoughtful application of lighting and composition is a core creative element of effective Portrait Photography Tips for Sharp Images.
Lighting Quality: Defining the Edges
Light is what defines the edges and textures on your subject’s face. Without definition, the image appears flat, and the details seem soft.
Hard Light and Detail: Light that is hard (e.g., direct sunlight or a small, bare strobe) creates very distinct, sharp shadows. These clear boundaries between light and shadow increase the perceived sharpness* of the subject’s features. While it can be dramatic, be mindful that it can also emphasize unwanted textures.
- Soft Light and Texture: Light that is soft (e.g., light through a large window or a big softbox) wraps gently around the subject, smoothing texture but still retaining a pleasing level of contrast. This is the preferred look for most commercial and fashion portraits.
A popular technique for adding dimension and perceived sharpness is Rembrandt Lighting. This method uses a single light source placed to create a small, inverted triangle of light on the shadowed side of the face. The resulting high contrast and defined shadow line make the features pop, lending an overall sense of critical sharpness to the portrait. Therefore, the strategic placement and quality of light is just as vital as the camera settings when considering Portrait Photography Tips for Sharp Images.
If you rely on continuous, dim ambient light, your camera settings will likely suffer—you will be forced to use a high ISO or a slow shutter speed, sacrificing technical clarity. Professional Portrait Photography Tips for Sharp Images involve using powerful, controlled light (like studio strobes or off-camera flash) that allows you to shoot at a low ISO (100) and a fast shutter speed (1/250s), thus achieving the best of all worlds: perfect exposure, low noise, and frozen motion.
Background and Subject Separation (Bokeh)
The visual contrast between a sharp subject and a beautifully blurred background (bokeh) creates an illusion of exceptional sharpness. When the background is a mass of soft, unrecognizable colour and light, the viewer’s eye is immediately drawn to the sharpest part of the image—your subject’s eyes. This psychological trick is one of the most effective compositional Portrait Photography Tips for Sharp Images.
To achieve maximum separation, you need three things:
- A Wide Aperture: As discussed, f/1.8 to f/2.8 is ideal.
- Distance between Subject and Background: The farther your subject is from the wall or trees behind them, the softer the background will become. Even at f/4.0, a background 20 feet away will be beautifully blurred.
- Longer Focal Length: Telephoto lenses (85mm, 105mm, 135mm) compress the scene and amplify the effect of the wide aperture, generating significantly more background blur than a 35mm lens at the same f-stop.
For example, a portrait shot with an 85mm lens at f/1.4 will feel dramatically sharper than one taken with a 35mm lens at f/1.4, primarily because the former creates such a compelling visual focus on the subject. Therefore, choosing a portrait-specific focal length is one of the most strategic Portrait Photography Tips for Sharp Images for enhancing the perception of clarity.
Post-Processing Finesse: The Final Step in Achieving Sharpness
Even after mastering the in-camera techniques, almost every professional portrait receives a final polish in editing software. Post-processing doesn’t magically fix a blurry image, but it can enhance, refine, and optimize a technically sharp image for its final display. This is the last layer of the complete set of Portrait Photography Tips for Sharp Images.
Selective Sharpening and Noise Reduction
The goal of post-processing sharpening is to accentuate the fine detail that is already present in the image. It is a subtle tool, not a blunt instrument. Over-sharpening an image creates an ugly effect known as “halos”—bright, noticeable lines around contrasting edges, which immediately makes the image look unnatural and processed.
- Global vs. Local Sharpening: Apply minimal global sharpening (to the entire image) to recover any loss of detail from the raw conversion process. The true magic lies in local sharpening. Use adjustment brushes or masks to apply sharpening selectively, focusing only on the most critical sharp areas: the eyes, the eyelashes, and the lips. This way, you enhance the focal point without introducing noise or artifacts into the smooth skin tones or the blurred background.
- The Noise-Sharpening Balance: If you were forced to shoot at a higher ISO (e.g., 3200), you will need to apply noise reduction. Noise reduction, by its nature, blurs fine detail to remove the grain. You must find the optimal balance where noise is minimized without sacrificing too much of the detail you captured. The latest Portrait Photography Tips for Sharp Images suggest dedicated software that uses sophisticated algorithms to distinguish between noise and actual detail, allowing for much finer control.
Applying these precise adjustments is crucial for the final visual punch. It takes a sharp image and makes it pop off the screen.
Viewing and Exporting for Optimal Display
A portrait can look perfectly sharp on your high-resolution editing monitor but soft when viewed on a phone or printed. The final step in achieving truly successful Portrait Photography Tips for Sharp Images is optimizing the image for its intended output.
- Monitor Calibration: Before you even begin editing, your monitor must be calibrated. If your screen is too soft or too bright, your sharpness and exposure edits will be incorrect when viewed by others. A calibrated monitor ensures that what you see is what your audience will see.
Resolution and File Size: When exporting for the web, downscaling your image to a common viewing size (e.g., 2048 pixels on the long edge) is essential. A photograph that looks razor-sharp at full resolution can look mushy when resized improperly. A final, gentle pass of sharpening after* resizing for web or print is often necessary to compensate for the detail loss during the downscaling process.
- Print Sharpening: Printing requires a slightly different sharpening approach, often requiring more aggressive sharpening than a screen image. The amount depends entirely on the paper type and the viewing distance. The biggest takeaway here is that you cannot use the same sharpness settings for a web-ready file and a large print.
Understanding that sharpness is a variable, context-dependent concept is one of the most advanced Portrait Photography Tips for Sharp Images. The image must look sharp where it is consumed.
Embracing Modern Trends for Authentically Sharp Portraits
Current trends in portraiture lean heavily toward authenticity and a “lifestyle” aesthetic, moving away from overly stiff or staged shots. Ironically, this desire for spontaneity often makes the technical challenge of achieving sharpness more difficult, as the subjects are more prone to unpredicted movement.
The best professional Portrait Photography Tips for Sharp Images integrate technical precision with this genuine, unposed style:
- Prioritizing Continuous Autofocus (AF-C): When capturing a candid moment—like a genuine laugh or a child running—switching to continuous autofocus with eye tracking is the only way to ensure the subject remains sharp as they move through the frame. The spontaneity of a lifestyle portrait must be frozen by an extremely fast shutter speed (1/500s or faster) to keep the eyes sharp.
- Using Vintage Lenses: A growing trend in 2024 is the use of vintage lenses, which add a unique, character-rich aesthetic, often with pleasing chromatic aberrations and unique flares. However, these lenses often lack the clinical sharpness of modern glass. To overcome this, photographers shooting with vintage glass must compensate by shooting in their lens’s sweet spot (f/4-f/8) and focusing manually with the aid of modern focus-peaking features to maximize the limited sharpness they offer. For a classic, slightly softer look that still retains key detail, these are the Portrait Photography Tips for Sharp Images to consider.
- The Rise of the Self-Portrait: The increasing popularity of high-quality self-portraits (often requiring the photographer to be their own model) forces a mastery of remote focusing. Setting a fixed focus point (manual focus) on the expected spot, using a fast shutter, and relying on a small aperture (f/8) to provide a wider margin of focus error are all techniques essential for these shots.
The core principle remains constant: no matter the style or the trend, the final image must be focused on the intended subject. By combining the technical fundamentals with the artistic demands of modern trends, you can produce compelling, authentic, and perfectly sharp portraits. These comprehensive Portrait Photography Tips for Sharp Images are your foundation.
Conclusion
Achieving consistent, razor-sharp portraits is a journey built upon technical mastery and disciplined execution. It is the result of a deliberate workflow: from precisely calibrating your equipment and meticulously setting your exposure to confidently focusing on the eye closest to the camera. Every setting, from choosing the proper aperture to managing the threat of camera shake, plays a role in the final image clarity.
We have explored the foundational importance of a fast shutter speed (1/200s minimum), the critical role of AF Microadjustment, and the visual power of light to enhance perceived sharpness. By applying these in-depth Portrait Photography Tips for Sharp Images, you move beyond hoping for a sharp image to guaranteeing one. Embrace these techniques, and your portraits will command attention with a level of clarity and detail that defines professional quality. Continuously practicing these Portrait Photography Tips for Sharp Images will solidify your reputation as a master of detail.
FAQ (Frequently Asked Questions)
How can I make my photos instantly sharper without buying a new lens?
You can make your photos instantly sharper by addressing motion blur, which is the most common cause of softness. Always use a faster shutter speed than you think you need—aim for 1/200th of a second or faster, even for still subjects. Additionally, stop down your aperture to f/5.6 or f/8 to hit the ‘sweet spot’ of your current lens, which is the point of its peak optical performance. Finally, ensure you are using a single, specific focus point directly on the subject’s closest eye. These three basic Portrait Photography Tips for Sharp Images will provide immediate, noticeable results.
What is the ideal aperture for the sharpest portrait images?
The “ideal” aperture is a balance between subject isolation (bokeh) and maximizing optical sharpness. For maximum subject isolation, f/1.8 to f/2.8 is common, focusing solely on the eye. However, for maximum optical sharpness across the entire focal plane, most lenses perform best between f/5.6 and f/8. For group portraits where you need everyone to be sharp, you should certainly aim for f/8.0 to guarantee enough depth of field. This is a critical factor in consistently capturing sharp Portrait Photography Tips for Sharp Images.
Why are my portraits blurry even when I use a tripod?
If your portraits are blurry on a tripod, the issue is likely either subject movement or shutter shock/vibration. A tripod eliminates camera shake but cannot stop your subject from moving. Ensure your shutter speed is fast enough (e.g., 1/125s minimum). If subject movement is not the issue, try using a remote shutter release or the 2-second self-timer to eliminate the vibration caused by manually pressing the shutter button. If using a DSLR, also engage the Mirror Lock-Up feature to eliminate vibration. These advanced Portrait Photography Tips for Sharp Images address internal and external movement.
Does post-processing sharpening ruin image quality?
No, post-processing sharpening is a necessary final step, but it must be applied judiciously. When used correctly, it enhances the existing details and makes a sharp image look sharper. Sharpening only ruins quality if it is over-applied, which introduces unnatural artifacts known as “halos” (bright edges) or emphasizes digital noise. Professionals use selective sharpening—only applying the effect to key areas like the eyes—to enhance clarity without degrading overall image quality. The proper use of this technique is one of the highly specialized Portrait Photography Tips for Sharp Images.
How does lens calibration help with sharp portraits?
Lens calibration, or AF Microadjustment (AFMA), corrects a slight front-focus or back-focus error that is inherent in the manufacturing tolerances of most camera-lens combinations. When shooting wide open (e.g., f/1.4), a tiny error means the sharpest point might land on your subject’s nose instead of their eyes. By performing a precise AFMA, you teach your camera to slightly adjust its focus point, ensuring that the point you select (the eye) is the truly sharpest point in the final image. This is one of the most technical yet effective Portrait Photography Tips for Sharp Images for prime lens users.