The world of oil painting often appears daunting, shrouded in the mystique of Old Masters and complex rules. However, it is a remarkably forgiving and rewarding medium, perfect for those eager to express their creativity on canvas. This comprehensive Oil Painting Techniques For Beginners Guide For Beginners aims to demystify the process, offering clear, actionable steps to help you confidently dip your brush into this vibrant art form. You’ll discover the essential materials, foundational techniques, and valuable insights needed to begin your oil painting adventure with enthusiasm and knowledge.
For beginners, mastering oil painting involves understanding fundamental materials and a few core principles. The most crucial techniques include preparing your canvas, mixing colors effectively, and adhering to the “fat over lean” rule to ensure your artwork lasts. Essential supplies include a basic set of oil paints (primaries, white, earth tones), pre-primed canvases, a selection of brushes, a palette, and appropriate solvents or mediums.
My First Steps into the World of Oils
I remember the first time I decided to try oil paints. For years, I had dabbled in watercolors and acrylics, but oil felt like stepping into a grand, intimidating tradition. The slow drying time, the talk of solvents, and the sheer volume of information available felt overwhelming. My initial attempt involved squeezing out every color imaginable, mixing them into a muddy mess, and then wondering why my masterpiece looked more like a brown puddle than a vibrant landscape. It was frustrating, to say the least.
However, a wise old artist once told me, “Every great painter started by making mud.” That simple phrase resonated deeply. It freed me from the pressure of perfection and allowed me to embrace the learning process. What I quickly discovered was that the perceived complexity of oil painting truly unravels into a logical and immensely satisfying experience once you grasp a few core Oil Painting Techniques For Beginners Guide For Beginners. This medium’s unique ability to stay workable for days, allowing for seamless blending and intricate layering, became its greatest appeal, transforming my initial apprehension into genuine excitement. It taught me patience and observation in a way no other medium had.
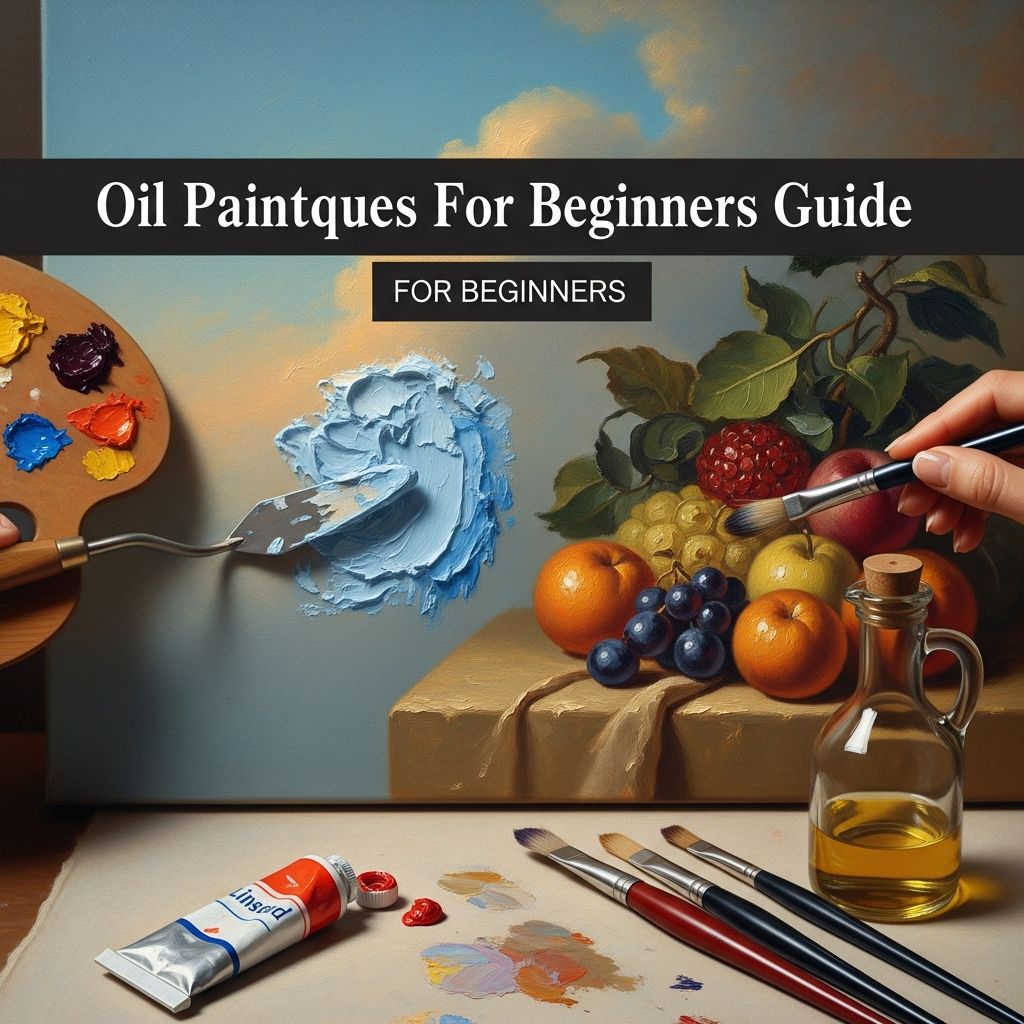
Understanding Your Materials: The Foundation of Oil Painting
Before diving into the vibrant world of color and brushstrokes, it is essential to familiarize yourself with the tools of the trade. Choosing the right materials, especially when exploring Oil Painting Techniques For Beginners Guide For Beginners, can significantly impact your learning experience and the quality of your finished artwork. You don’t need to break the bank for professional-grade supplies right away, but understanding what each item does will empower your creative choices.
The Heart of Your Palette: Oil Paints
Oil paints are comprised of pigments suspended in a drying oil, most commonly linseed oil, but sometimes walnut, poppy, or safflower oil. This oil binder is what gives oil paints their distinct slow-drying property and rich, vibrant appearance. For anyone looking for a comprehensive Oil Painting Techniques For Beginners Guide For Beginners, selecting a foundational set of colors is paramount.
When starting, resist the urge to buy every color tube available. A limited palette is often recommended for beginners as it forces you to learn how to mix colors, which is a fundamental skill. A good starting point includes:
- Primary Colors: Red (like Cadmium Red Light or Alizarin Crimson), Yellow (like Cadmium Yellow or Lemon Yellow), and Blue (like Ultramarine Blue or Phthalo Blue). Having both a warm and cool version of each primary can greatly expand your mixing possibilities.
- White: Titanium White is a must-have due to its opacity and strong tinting power, making it excellent for lightening colors and creating highlights. Zinc White is more transparent but less opaque.
- Earth Tones: Burnt Umber, Raw Umber, and Yellow Ochre are invaluable. They are fast-drying, affordable, and excellent for underpaintings and creating natural shadows and muted tones.
When purchasing, you’ll encounter “student grade” and “artist grade” paints. Student-grade paints are more affordable, containing less pigment and more filler. While they are perfectly suitable for practice, artist-grade paints offer superior pigment concentration, vibrancy, and permanence. Many artists recommend starting with quality student-grade paints and gradually upgrading as you progress, as even these can blend smoothly and provide good color strength.
Your Canvas: The Surface for Your Creations
The surface you paint on, often referred to as a support, is just as important as the paint itself. For those embarking on their journey with Oil Painting Techniques For Beginners Guide For Beginners, pre-primed canvases are generally the easiest and most convenient option. These come ready to use, eliminating the need for you to prepare the surface yourself, which can be a complex process involving sizing and priming.
You can choose from several types of pre-prepared surfaces:
- Stretched Canvas: This is a classic choice, offering a springy surface that many artists enjoy. They are available in cotton or linen, with linen being considered a premium option.
- Canvas Boards or Panels: These are rigid, lightweight, and often more affordable than stretched canvases. They are excellent for practice, studies, or when painting outdoors.
- Oil Paper: Specifically designed for oil paints, this is a very economical option for sketches and learning.
Regardless of your choice, ensure the surface is adequately primed with gesso. Gesso creates a barrier between the canvas fibers and the oil paint, preventing the oil from soaking into the fabric and causing it to rot over time. It also provides a consistent surface texture for paint adhesion.
The Essential Tools: Brushes and Palette Knives
Brushes are an extension of your hand, and choosing the right ones is crucial for implementing various Oil Painting Techniques For Beginners Guide For Beginners. You don’t need a vast collection initially, but a few key types will serve you well.
- Natural Bristle Brushes: Often made from hog hair, these are stiff and durable, making them ideal for holding thicker paint and creating textured brushstrokes. They are excellent for blocking in large areas and applying impasto.
- Synthetic Brushes: These are softer and more flexible, allowing for smoother applications, fine details, and blending.
Look for a variety of shapes and sizes to cover different needs:
- Flats: Rectangular with a straight edge, good for bold strokes and covering large areas.
- Rounds: Pointed tip, useful for details, lines, and controlled strokes.
- Filberts: A flat brush with an oval-shaped tip, offering a versatile blend of control and soft edges, often recommended as an all-purpose brush for beginners.
- Liners/Riggers: Long, thin brushes for very fine lines and delicate details.
Palette knives are not just for mixing paint; they can also be used to apply paint directly to the canvas, create interesting textures, scrape off excess paint, or even clean your palette. Experimenting with a palette knife can add a dynamic and expressive quality to your work.
Solvents and Mediums: Controlling Your Paint
Oil paint, straight from the tube, can be stiff. Solvents and mediums are used to alter its consistency, flow, drying time, and finish. For new artists learning Oil Painting Techniques For Beginners Guide For Beginners, understanding these additives is vital.
- Solvents (Thinners): Traditionally, turpentine was used, but many artists now opt for odorless mineral spirits (OMS) due to its reduced toxicity and less pungent odor. Solvents thin the paint, making it “leaner” and faster drying, which is crucial for initial layers and brush cleaning. However, solvents should always be used in a well-ventilated area due to their fumes.
- Oils (Drying Oils): These are added to make paint “fatter,” slower drying, and more flexible.
- Linseed Oil: The most common and versatile, increasing gloss and transparency. It dries to a strong, stable film.
- Walnut Oil: Dries slower than linseed oil and yellows less, preferred by some for its clarity.
- Safflower Oil: Even slower drying and less yellowing than linseed, often used in white paints.
- Stand Oil: A thickened linseed oil, excellent for smooth glazes and holding brushstrokes.
- Alkyd Mediums: Products like Liquin (Winsor & Newton) or Galkyd (Gamblin) are popular alkyd-based solutions that significantly speed up drying time and increase paint viscosity, making them ideal for layering and achieving impasto effects. They can also be used to thin paint and create glazes.
It’s important to use mediums sparingly, as overdoing it can weaken the paint film. Many artists recommend practicing with just paint for a while before exploring the vast array of mediums to understand the paint’s natural properties first.
Essential Oil Painting Techniques For Beginners Guide For Beginners to Master First
With your materials ready, the next step is to explore the foundational Oil Painting Techniques For Beginners Guide For Beginners that will form the backbone of your practice. These techniques are not rigid rules but rather guiding principles that help ensure your paintings are structurally sound and visually compelling.
Laying the Groundwork: Priming and Underpainting
One of the most intimidating aspects for a beginner is often the stark, white canvas. It can feel like a blank page waiting for a profound statement, leading to what artists call “white canvas paralysis.” This is where preparing your surface and underpainting come in.
Most commercially prepared canvases are pre-primed with acrylic gesso. However, some artists prefer to add an additional coat or two for a smoother, more absorbent surface, which helps the paint adhere better and prevents uneven absorption.
An underpainting, also known as a toned canvas or imprimatura, is a monochromatic (single-color) layer applied to the entire canvas before you begin the main painting. This initial wash helps immensely:
- Eliminates the White Canvas: It provides a middle ground to work with, making the task less daunting and allowing you to judge values and colors more accurately. Painting straight onto a white canvas can warp your sense of value.
- Establishes Values and Composition: You can sketch out the basic shapes, shadows, and highlights of your subject, creating a blueprint for the final piece. This focuses your attention on the underlying structure and tonal relationships, rather than getting lost in color too early.
- Adds Tone and Harmony: By starting with a specific color, you can influence the overall mood and harmony of your painting. Earth tones like raw umber or burnt sienna are popular choices as they dry quickly and blend well with subsequent layers. You can also use cool tones to balance warmer layers or vice-versa.
To create an underpainting, thin your chosen oil paint (e.g., burnt umber) with a solvent like odorless mineral spirits until it’s a thin, transparent wash, similar to watercolor. Apply it loosely, blocking in major shapes and values, then wipe away paint in areas that will be lighter to establish highlights. Let this layer dry completely before proceeding.
The Magic of Mixing: Color Theory Basics
Understanding how colors interact is a cornerstone of Oil Painting Techniques For Beginners Guide For Beginners. Color theory isn’t just about memorizing the color wheel; it’s about understanding how pigments behave and how to achieve the desired hues and moods in your artwork.
The fundamental concepts include:
- Primary Colors: Red, Yellow, and Blue. These cannot be created by mixing other colors.
- Secondary Colors: Orange, Green, and Purple. These are created by mixing two primary colors. (Red + Yellow = Orange, Yellow + Blue = Green, Blue + Red = Purple).
- Complementary Colors: Colors opposite each other on the color wheel (e.g., Red and Green, Blue and Orange, Yellow and Purple). When mixed, complementary colors neutralize each other, creating grays or browns. This is a powerful technique for muting intense colors or creating natural-looking shadows without using black.
A common challenge for beginners is creating “muddy” colors. This often happens when too many colors are mixed together, or when pigments with conflicting biases are combined. For instance, mixing a warm red (leaning towards orange) with a warm blue (leaning towards purple) might result in a dull brown because the hidden yellow in the red and yellow-green bias in some blues essentially mix all three primaries.
To overcome this, consider a “split-primary palette”:
- Instead of just one red, yellow, and blue, have a warm and a cool version of each. For example:
- Warm Red (Cadmium Red Light) & Cool Red (Alizarin Crimson/Quinacridone)
- Warm Yellow (Cadmium Yellow Deep) & Cool Yellow (Lemon Yellow)
- Warm Blue (Ultramarine Blue) & Cool Blue (Phthalo Blue)
This approach allows for cleaner, more vibrant secondary and tertiary mixes.
Furthermore, focus on value (how light or dark a color is) over pure hue initially. A painting with strong values will often be more successful than one with vibrant colors but poor value structure. Practice in black and white or with a monochrome palette to train your eye to see values correctly.
Applying Paint: Brushes, Impasto, and Glazing
The way you apply paint dramatically affects the final look and feel of your artwork. Oil Painting Techniques For Beginners Guide For Beginners should cover various application methods to help you find your unique artistic voice.
- Direct Painting (Alla Prima / Wet-on-Wet): This technique involves applying wet paint directly onto wet paint, often completing a painting in a single session or before previous layers have fully dried. It allows for spontaneous, expressive brushwork and seamless blending. When working wet-on-wet, it’s often advised to work from dark to light, laying in shadows first, then mid-tones, and finally highlights.
- Layering (Indirect Painting): This method involves building up a painting in successive layers, allowing each layer to dry before applying the next. This creates depth, luminosity, and allows for precise control over color and detail. This approach is where the “fat over lean” rule becomes absolutely critical.
- Impasto: Applying paint thickly, often with a brush or palette knife, to create visible texture and give the painting a three-dimensional quality. Fast-drying alkyd mediums like Liquin Impasto Gel can be used to help thick applications dry faster.
- Glazing: Applying thin, transparent layers of paint (thinned with an oil medium) over a dry underlayer. Glazes modify the color and tone of the layers beneath, creating rich, luminous effects and enhancing color depth. Stand oil is particularly good for creating smooth glazes.
Experiment with these different methods to see which ones resonate with your personal style.
Building Layers: The “Fat Over Lean” Principle
Among all Oil Painting Techniques For Beginners Guide For Beginners, the “fat over lean” rule is arguably the most important for ensuring the longevity and stability of your artwork. Ignoring it is a common cause of cracking and paint film failure.
What does “fat over lean” mean?
In simple terms, each successive layer of paint you apply to your canvas should contain more oil (fatter) and less solvent (leaner) than the layer beneath it.
- Lean Paint: Contains little or no added oil, typically thinned with a solvent like odorless mineral spirits. It dries faster and forms a more rigid paint film.
- Fat Paint: Contains more oil, either from the paint itself (some pigments are naturally richer in oil) or from added oil mediums (linseed, walnut, stand oil). It dries slower and remains more flexible.
Why is it important?
Oil paint dries through a process called oxidation, where it hardens by absorbing oxygen from the air. This process involves a slight expansion and contraction of the paint film.
- If a fast-drying, rigid (lean) layer is applied over a slower-drying, flexible (fat) layer, the bottom layer will continue to move and dry beneath the already hardened top layer. This differential drying and movement will cause the rigid top layer to crack.
- Conversely, when you paint fat over lean, each successive layer is more flexible than the one beneath. The entire paint film can move together as it dries, preventing stress and cracking.
How to implement it:
A simple way to remember the “fat over lean” rule for Oil Painting Techniques For Beginners Guide For Beginners is to follow this general progression:
- First Layers (Underpainting/Blocking In): Use paint thinned primarily with solvent (e.g., odorless mineral spirits). This makes the paint very lean and fast-drying.
- Middle Layers: Use paint straight from the tube (which contains its inherent oil binder) or slightly thinned with a mixture of solvent and a small amount of oil medium.
- Final Layers (Details/Glazes): Use paint mixed with a higher proportion of oil medium (e.g., linseed oil, stand oil, or alkyd mediums like Liquin). This makes the paint fatter and slower drying.
Remember, if you are painting wet-on-wet (alla prima), the “fat over lean” rule is less critical because all layers are drying simultaneously. However, for layered paintings, it’s a non-negotiable principle.
Blending and Softening Edges
Oil paints’ slow drying time makes them exceptional for seamless blending and creating soft, subtle transitions between colors and values. This is a significant advantage when exploring Oil Painting Techniques For Beginners Guide For Beginners.
- Wet-on-Wet Blending: While the paint is still wet on the canvas, you can gently merge colors directly on the surface using a clean, soft brush. This allows for smooth gradients and delicate shifts in hue and value.
- Dry Blending (Scumbling/Feathering): Once a layer is touch dry, you can apply a very thin, almost dry brushstroke of another color on top, gently blending it with the underlying layer. This can create atmospheric effects or soften harsh edges.
A common mistake for beginners is overblending, which can lead to a flat, lifeless appearance and muddy colors. Allow some brushstrokes to show, embrace the texture, and vary your edge quality. Not every edge needs to be perfectly blended; some sharp edges can add visual interest and define form.
Setting Up Your Workspace and Mindset
Beyond the technical Oil Painting Techniques For Beginners Guide For Beginners, establishing a conducive workspace and adopting a supportive mindset are equally important for a positive painting experience.
Your Artistic Sanctuary: The Workspace
- Ventilation: If using solvents like turpentine or odorless mineral spirits, a well-ventilated area is crucial to disperse fumes. Open windows, use a fan, or consider solvent-free mediums.
- Lighting: Natural light is ideal, but if unavailable, choose neutral-colored artificial lights (daylight-balanced bulbs) that won’t distort your colors.
- Organization: A tidy workspace fosters a clear mind. Keep your brushes, paints, and palette organized and easily accessible.
- Easel: While not strictly essential for absolute beginners (you can work on a flat surface initially), an easel allows you to paint vertically, which helps prevent glare and allows for a better perspective on your work as it dries.
Cultivating the Artist’s Mindset
- Patience is a Virtue: Oil painting demands patience, especially with its drying times. Embrace the process; it’s part of the medium’s charm. Working on multiple paintings simultaneously can help you stay productive while layers dry.
- Embrace Imperfection: Every artist makes mistakes. The beauty of oil painting is its forgiving nature; wet paint can be wiped away, and dried errors can be painted over. See mistakes as learning opportunities.
- Start Simple: Don’t tackle an overly complex subject for your first few paintings. Begin with still life arrangements, simple landscapes, or basic color studies.
- Practice Consistently: Like any skill, painting improves with practice. Even short, regular sessions are more effective than infrequent long ones.
Overcoming Common Challenges in Oil Painting
Even with a solid Oil Painting Techniques For Beginners Guide For Beginners, you’ll likely encounter common hurdles. Recognizing these and knowing how to address them will save you frustration.
- Muddy Colors: This frequently happens from overmixing colors, using too many pigments in one mix, or poor understanding of color bias.
- Solution: Use a limited palette. Learn about warm and cool primaries and how they mix. Avoid mixing more than three pigments if possible. If a color gets muddy, scrape it off and start fresh.
- Cracking Paint: Almost always a result of violating the “fat over lean” rule.
- Solution: Strictly adhere to applying fatter, more flexible layers over leaner, faster-drying ones. Ensure layers are sufficiently dry before applying the next, especially if using different drying rates.
- Slow Drying Time: While inherent to oils, sometimes you need to speed it up.
- Solution: Work in thinner layers. Use fast-drying pigments (earths, umbers, Prussian Blue). Add alkyd mediums like Liquin or Galkyd to your paint. Ensure good air circulation in your studio.
- Brush Care: Neglecting brushes can quickly ruin them.
- Solution: Clean your brushes immediately after each painting session. Scrape off excess paint, then wash them thoroughly with solvent, followed by soap and water. Reshape the bristles and allow them to dry flat or brush-side up.
Remember, continuous learning and experimentation are key to growth. Don’t be afraid to try new approaches or troubleshoot problems as they arise.
Project Ideas and Practice for Beginners
Once you’ve grasped the foundational Oil Painting Techniques For Beginners Guide For Beginners, it’s time to put them into practice. Starting with structured exercises can help build confidence and reinforce your understanding.
- Monochrome Studies: Pick a single earth tone (like burnt umber) and white. Paint simple objects or landscapes focusing solely on value. This exercise strengthens your understanding of light and shadow without the complexity of color.
- Limited Palette Still Life: Set up a simple still life with 2-3 objects. Challenge yourself to paint it using only a very limited palette (e.g., the three primary colors plus white). This will push you to explore color mixing thoroughly.
- Value Scales: Create charts exploring how colors lighten with white, darken with complementary colors (instead of black), and how their saturation changes. This is excellent for understanding the nuances of color.
- Copying Masterworks (Studies): Choose a section of a master painting you admire and try to replicate it. This is a time-honored tradition for learning composition, color choices, and brushwork. You’re not trying to create an original, but rather to learn from the masters.
The goal of these projects is not necessarily to create finished masterpieces, but to internalize the techniques and develop your observational skills. The more you practice these Oil Painting Techniques For Beginners Guide For Beginners, the more intuitive they will become.
Continuing Your Journey: Growth and Experimentation
The world of oil painting is vast and endlessly fascinating. This Oil Painting Techniques For Beginners Guide For Beginners provides a solid starting point, but your artistic journey truly begins when you embrace continuous learning and personal exploration.
- Observe the World Around You: Train your eye to see light, shadow, color, and form. Analyze how artists you admire achieve their effects.
- Experiment with Different Styles and Subjects: Don’t limit yourself. Try portraits, landscapes, abstracts, or still life. Each will teach you something new.
- Document Your Progress: Keep an art journal or photograph your paintings. Seeing how far you’ve come can be incredibly motivating.
- Seek Inspiration: Visit museums, browse online galleries, and connect with other artists. Art is a community.
Ultimately, oil painting is a deeply personal endeavor. There are countless Oil Painting Techniques For Beginners Guide For Beginners available, but the most important guide is your own intuition and desire to create. Allow yourself to play, to make mistakes, and to discover the joy of bringing your visions to life with this beautiful, enduring medium. With patience and persistence, you will develop your skills and unlock the rich potential that oil painting offers.
—
FAQ
What are the absolute essential oil painting supplies for beginners?
The essential supplies for anyone learning Oil Painting Techniques For Beginners Guide For Beginners include a basic set of oil paints (red, yellow, blue, white, and an earth tone like burnt umber), a few good quality brushes (e.g., a flat, a round, and a filbert), a palette for mixing, a pre-primed canvas or canvas boards, and odorless mineral spirits (OMS) as a solvent for thinning paint and cleaning brushes.
How long does oil paint take to dry for beginners?
Oil paint drying times vary significantly depending on thickness, pigment, environment, and mediums used. Thin layers can be touch dry in 6-8 hours, while thicker layers might take days or even weeks. Some pigments, like umbers, dry faster (around 2 days), while others, like Cadmiums or Permanent Rose, dry slower (more than 5 days). Full cure for varnishing typically takes 3-6 months or longer.
What does “fat over lean” mean in oil painting?
“Fat over lean” is a fundamental principle where each successive layer of paint should contain more oil and be more flexible than the layer beneath it. This ensures that slower-drying, more flexible layers are on top of faster-drying, more rigid layers, preventing cracking as the paint film dries and contracts.
Should beginners use solvents in oil painting?
While some artists prefer a solvent-free approach, solvents like odorless mineral spirits (OMS) are traditionally used by beginners to thin paint for initial layers (making it “lean”) and for cleaning brushes. If using solvents, ensure your workspace is well-ventilated to avoid inhaling fumes.
How can beginners avoid muddy colors in oil painting?
To avoid muddy colors, a key aspect of Oil Painting Techniques For Beginners Guide For Beginners, focus on a limited palette of high-quality pigments. Learn basic color theory, including warm/cool primaries and complementary colors. Avoid overmixing too many different pigments, and if a color becomes muddy, it’s often better to scrape it off and remix.
—