Oil painting is a deeply rewarding medium, prized for its rich color, buttery texture, and the unique ability to be blended and manipulated over long periods. Learning the fundamental Oil Painting Techniques for Beginners opens up a world of creative expression that has captivated artists for centuries, from the Old Masters to contemporary creators. This comprehensive guide will walk you through the essential tools, core brushwork, and modern methods you need to confidently begin your journey.

Getting Started: The Essential Foundation for New Artists
What are the most fundamental Oil Painting Techniques for Beginners? Mastering the essentials begins not with a brushstroke, but with preparation and a clear understanding of the materials. The core foundational Oil Painting Techniques for Beginners involve setting up your workspace correctly, understanding the “Fat Over Lean” rule for layering, and learning how to properly thin and handle the paint.
Many new artists feel intimidated by the history and perceived complexity of oil paint. However, the first step in learning Oil Painting Techniques for Beginners is realizing that the basic actions—mixing paint, applying it to a canvas, and cleaning your brushes—are simple, repeatable steps. By mastering these fundamentals, you set the stage for success in all future techniques. We will break down each element so that you can jump right into practicing the best Oil Painting Techniques for Beginners with confidence. The transition from theory to practice is often the hardest part, and having the right knowledge makes the jump much smoother.
Essential Supplies: What You Really Need (And What to Skip)
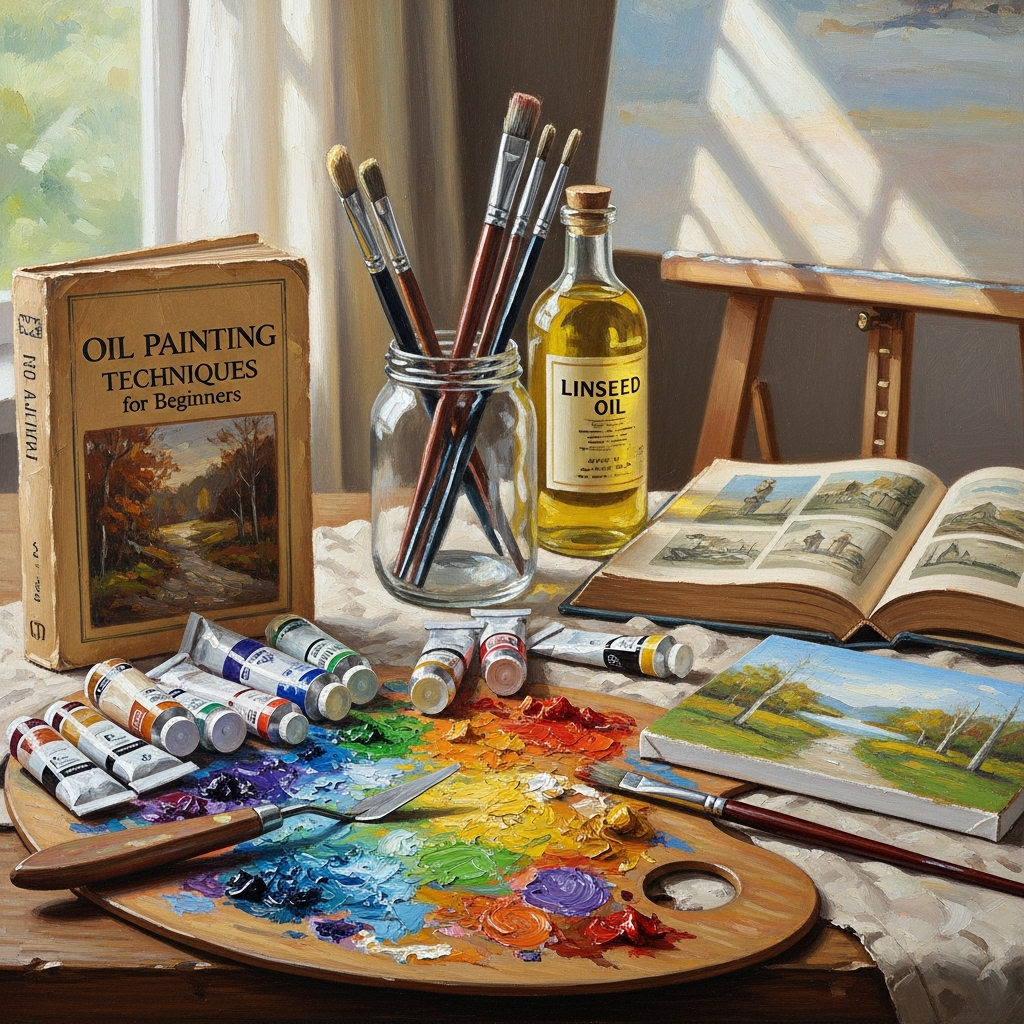
Before diving into the detailed Oil Painting Techniques for Beginners, you need a basic, non-intimidating kit. The biggest mistake a beginner can make is overspending on too many colors or expensive mediums they do not yet understand. Focus on a minimal palette and good quality basics.
The Minimal Palette: Colors and Quality
To start practicing Oil Painting Techniques for Beginners, you do not need a twenty-tube set. A limited palette is actually one of the best Oil Painting Techniques for Beginners for improving color mixing skills. A focused palette teaches you more about color theory than an overwhelming array of pre-mixed hues.
- Paints: Choose artist-grade paint, but a student-grade line is perfectly acceptable for starting out. Focus on a primary triad plus white and one earth tone: Titanium White, Cadmium Yellow Light, Alizarin Crimson, Ultramarine Blue, and Burnt Umber. This selection allows you to mix a vast range of secondary and tertiary colors.
- Medium: Forget complex solvent mixtures. All you need is a single, slow-drying oil to thin the paint and improve flow. Refined Linseed Oil is the traditional standard, but many contemporary artists learning Oil Painting Techniques for Beginners now prefer less-toxic alternatives like Walnut Oil for its slow-drying properties and non-toxicity.
- Solvent (for Cleaning Only): While the old masters used turpentine, modern Oil Painting Techniques for Beginners strongly favor odorless mineral spirits (OMS) for cleaning brushes, as they are significantly less toxic. Never use these to thin your paint unless you are certain of the brand and application.
Brushes, Supports, and Surfaces
The tools you use directly influence the quality of your early attempts at Oil Painting Techniques for Beginners. Investing in a few quality brushes is better than buying a large set of poor-quality ones.
- Brushes: Start with four to six brushes. You should have both soft synthetic (or sable) brushes for smooth blending and stiff bristle brushes for applying thick paint and achieving textured effects (impasto). Get a mix of Flats (square tip) and Rounds (pointed tip) in medium to small sizes.
- Surfaces: Canvas panels are the most economical way to practice your initial Oil Painting Techniques for Beginners. They are pre-primed, portable, and cheaper than stretched canvases, which allows you to practice more without worrying about the cost of materials. Priming your surface with two thin coats of acrylic gesso is a preparatory Oil Painting Technique for Beginners that ensures the paint adheres properly and maintains its longevity.
- Palette: A simple glass palette is the easiest to clean, while disposable paper palettes are a no-mess option popular among many new students practicing Oil Painting Techniques for Beginners.
Understanding the “Fat Over Lean” Rule
The single most critical rule in all Oil Painting Techniques for Beginners—and advanced artists—is the “Fat Over Lean” principle. This rule dictates the proper layering of oil paint to ensure a painting’s durability and prevent cracking. Violating this principle is a common mistake that can ruin an otherwise perfect piece of art.
Why the Rule Exists
Oil paints dry via oxidation, a chemical process that begins on the surface and moves inward. If a fast-drying, solvent-heavy (lean) layer is applied over a slow-drying, oil-rich (fat) layer, the top layer will dry and harden before the paint beneath it has finished shrinking. This inevitable shrinkage and movement underneath the rigid top layer cause the surface to crack and wrinkle over time. Therefore, every set of Oil Painting Techniques for Beginners must emphasize layering.
- Lean Layer: The first layers of your painting should be the “leanest,” meaning they contain the least amount of oil and the most solvent (or are simply thinned with solvent). This ensures they dry quickly and adhere firmly to the canvas. A lean layer is ideal for initial sketches and underpainting.
- Fat Layer: Successive layers must progressively become “fatter,” meaning you gradually increase the amount of oil medium in the mixture. The final, richest, and most vibrant layers of the painting will contain the highest proportion of oil. This slow progression is a crucial Oil Painting Technique for Beginners to learn early.
- The Analogy: Think of the paint layers like a slow-moving glacier. The bottom layer must be solid and stable, while the top layers can remain mobile and flexible. If you put a heavy, flexible layer (fat) on a thin, brittle base (lean), the base will eventually give way. This simple analogy helps reinforce the importance of this foundational concept in Oil Painting Techniques for Beginners.
By adhering strictly to “Fat Over Lean,” you ensure your paintings will last for generations, a goal for every artist learning Oil Painting Techniques for Beginners.
Core Brushwork: Foundational Oil Painting Techniques for Beginners
Once you have your supplies and understand the “Fat Over Lean” rule, you are ready to explore the specific brushwork that defines oil painting. These four fundamental Oil Painting Techniques for Beginners—blending, impasto, glazing, and scumbling—form the backbone of both traditional and modern art. Integrating these methods is what separates a student from a confident painter.
Blending: Creating Smooth Transitions
Blending is arguably one of the most recognizable Oil Painting Techniques for Beginners and advanced artists use alike. It is the process of smoothly merging two colors, eliminating hard edges and creating subtle tonal transitions, which is essential for rendering realistic subjects like skin or skies.
The Magic of Wet-on-Wet
For beginners, the wet-on-wet (or Alla Prima) method is the fastest way to learn blending. Since oil paint dries slowly, you have an extended working time to manipulate the colors directly on the canvas. This is the ultimate playground for Oil Painting Techniques for Beginners focused on smooth effects.
- Step-by-Step Technique: Apply a patch of Color A next to a patch of Color B. Using a clean, dry, soft-bristled brush (often called a ‘blending brush’), lightly pull the bristles across the seam where the two colors meet. The key is to use minimal pressure and keep the blending brush clean. If the brush becomes saturated with paint, it will simply spread the color and create mud.
- Subtle Color Shifts: A good analogy for successful blending is smoothing two piles of sand together; you only want the finest particles to intermingle at the border. Practice this specific Oil Painting Technique for Beginners by creating a seven-step gradient scale from white to black or a primary color to its complementary color. The visual result should be a seamless, almost photographic transition.
- Historical Context: Artists like Johannes Vermeer were masters of subtle blending, creating the luminous, life-like quality of his figures through painstaking control of transitions. While achieving that level of precision takes years, understanding that the technique is about control, not speed, is paramount for Oil Painting Techniques for Beginners.
Impasto: The Power of Texture
Impasto is the application of thick paint, often straight from the tube or mixed with a thick medium, to create texture that stands proud of the canvas surface. This is one of the most exciting Oil Painting Techniques for Beginners to try because it is inherently expressive and dramatic.
Building Three-Dimensional Surfaces
The impasto technique adds a palpable, three-dimensional quality to the work. It captures light in a unique way, allowing the viewer to feel the artist’s hand and the weight of the material.
- Tools for Impasto: While you can apply thick paint with a bristle brush, the most effective tool for practicing this Oil Painting Technique for Beginners is a palette knife. The knife allows you to scoop and spread paint in thick, deliberate strokes without the paint getting lost in the brush bristles. Knives come in many shapes, but a simple diamond-shaped trowel knife is excellent for new students.
- Adding Mediums: To make the paint thicker and to avoid using an excessive amount of expensive pigment, artists often incorporate a thickening medium like a wax medium or a heavy gel medium. This extends the paint and helps it retain the peaks and valleys created by the knife or brush. When learning Oil Painting Techniques for Beginners, experimenting with these mediums is a great way to discover new effects.
- Psychological Impact: Consider the work of Vincent van Gogh, whose swirling impasto textures are synonymous with his emotional intensity. The application of impasto is not just a technical exercise; it is a way to convey energy and feeling. Practicing impasto is a vital part of learning Oil Painting Techniques for Beginners focused on creating expressionistic or abstract pieces. The contrast between smooth (blending) and thick (impasto) areas adds dynamic interest to any painting.
Glazing: Building Luminous Depth
Glazing is an ancient and powerful Oil Painting Technique for Beginners that involves layering very thin, transparent washes of color over a dried underpainting. This method is the key to achieving the deep, jewel-like luminosity characteristic of Renaissance and Baroque paintings.
The Secret to Luminous Color
A glaze is essentially a sheer veil of color. Because light travels through the transparent layer, hits the brighter layers underneath (often a light underpainting), and then reflects back, the colors gain a richness and glow that cannot be achieved by mixing colors on a palette. This is what makes glazing a truly transformative set of Oil Painting Techniques for Beginners to master.
- The Glazing Medium: A glaze requires a specific, very oily medium—usually a mix of Linseed Oil and a small amount of solvent, or a pre-made commercial glazing liquid. The paint must be thinned until it is almost like tinted water, but the oil content must be high to preserve the Fat Over Lean rule. A common ratio for a beginner practicing this Oil Painting Technique for Beginners is 1 part paint to 5 parts medium.
- Layering and Drying: Each glaze layer must be completely dry before the next is applied. This slow, methodical process is what builds the incredible depth. For example, to make a red appear incredibly rich, you might apply a thin glaze of Ultramarine Blue over the red, which, when dry, deepens the shadow, followed by a lighter red glaze for saturation. This layered approach is a hallmark of sophisticated Oil Painting Techniques for Beginners.
- Creating Illusion: Glazing is particularly useful in portraiture. By applying successive, transparent glazes of flesh tones, an artist can mimic the way light interacts with actual skin and blood vessels beneath the surface, creating an illusion of life. This demonstrates why learning effective Oil Painting Techniques for Beginners goes beyond simple application; it’s about understanding the interaction of light and material.
Scumbling: Adding Softness and Atmosphere
Scumbling is the opposite of glazing. Where glazing uses thin, transparent layers, scumbling uses a thin, opaque or semi-opaque layer of paint, applied with a stiff, dry brush over a dried area. The goal is not to completely cover the lower layer, but to partially hide it, creating a broken, atmospheric, or misty effect.
The Misty Veil Effect
Scumbling is a wonderful Oil Painting Technique for Beginners for creating the look of distance, fog, or a dusty texture. It often uses lighter, cooler colors to push an object back in a landscape.
- The Application Method: The key to successful scumbling is a very small amount of paint on a dry, stiff bristle brush. The brush should feel almost empty. Using a dabbing, scrubbing, or light circular motion, you lightly drag the paint across the surface of the dried layer beneath. The goal is for the paint to catch on the peaks of the canvas weave or the texture of the previous layer, allowing the color underneath to show through in the valleys. This visual blend of two colors (the scumble and the under-layer) creates a vibrant, hazy tone.
- Atmospheric Perspective: Scumbling is crucial for achieving atmospheric perspective, a core concept in landscape painting. As objects recede into the distance, they appear lighter, cooler, and less distinct due to the moisture and dust in the atmosphere. Applying a light, scumbled layer of pale blue or grey is one of the most effective Oil Painting Techniques for Beginners for creating this illusion of depth.
- Analogical Example: Imagine looking through a dusty window pane. The objects you see are mostly clear but have a subtle, hazy overlay. That overlay is the effect of scumbling. Mastering this specific Oil Painting Technique for Beginners can dramatically improve the professionalism and realism of your finished pieces.
Modern Approaches to Oil Painting Techniques for Beginners
While the techniques of the Old Masters are vital, the materials and methods available to the modern artist learning Oil Painting Techniques for Beginners have evolved. Contemporary approaches focus on speed, safety, and direct application.
The Direct Painting (Alla Prima) Method
Alla prima, Italian for “at first attempt,” or direct painting, is a method where the painting is completed in one session before the paint has had a chance to dry. This stands in stark contrast to the layered, weeks-long process of glazing.
Speed and Spontaneity
The direct method is one of the most satisfying Oil Painting Techniques for Beginners because it promotes spontaneity and immediacy. It forces the artist to make quick decisions about color and tone, which strengthens observational skills.
Core Principle: When working alla prima*, the artist is essentially blending on the canvas itself, keeping all the paint wet at the same time. This means the blending techniques we discussed earlier are in constant use. A modern approach to this Oil Painting Technique for Beginners is to start by blocking in large areas of fully saturated, opaque color in the lower layers, and then refine these blocks by painting into them with transitional colors.
The Benefit for Beginners: This method is excellent for short studies, sketches, and capturing transient light, such as during an en plein air* (outdoor) session. It removes the stress of the long drying time and the complexity of the “Fat Over Lean” rule, allowing the artist to focus purely on color and composition. Many contemporary instructors recommend the direct painting method as the starting point for all Oil Painting Techniques for Beginners.
The Challenge: The main challenge for new artists practicing this Oil Painting Technique for Beginners is avoiding “muddy” colors. Because you are continually mixing wet paint into other wet paint, the risk of colors merging into an indiscriminate brown or gray is high. This requires constant brush cleaning and careful placement of paint. This focus on clean color handling is a key lesson from practicing Oil Painting Techniques for Beginners with the alla prima* method.

Using Water-Mixable Oils: A Non-Toxic Trend
A significant modern development in Oil Painting Techniques for Beginners is the rise of water-mixable oils. These paints, which contain an emulsifier, can be thinned and cleaned up with water rather than traditional solvents, making them an excellent, safer alternative.
Safety and Convenience in the Studio
For artists who are sensitive to solvents or who paint in a shared living space, water-mixable oils provide an opportunity to explore all the same Oil Painting Techniques for Beginners without the associated fumes and toxicity of solvents. This development has lowered the barrier to entry for many new painters.
- How They Work: Water-mixable oils maintain the richness and slow-drying properties of traditional oils. The emulsifier allows the paint to form a stable emulsion with water, meaning you can use water as your thinning medium (for a lean layer). You can use all the classic Oil Painting Techniques for Beginners—blending, scumbling, and impasto—just as you would with traditional oils.
- Mixing with Traditional Oils: It is important to know that you can mix traditional oil paints with water-mixable oils, but doing so will reduce the paint’s ability to mix with water. A good rule of thumb for anyone trying this specific Oil Painting Technique for Beginners is to keep the ratio of traditional oil paint to water-mixable oil paint below 30%. This maintains the water-mixable properties for cleanup.
- Expanding the Possibilities: The convenience of water cleanup and the reduction in studio odors have made water-mixable oils a preferred choice for teaching basic Oil Painting Techniques for Beginners. It allows students to focus solely on the artistic process rather than the complexity of chemical mediums and ventilation. When searching for the ideal entry point to Oil Painting Techniques for Beginners, consider this contemporary option.
Mastering the Challenges: Common Mistakes and Solutions
As you delve deeper into Oil Painting Techniques for Beginners, you will inevitably encounter common problems. Knowing how to identify and solve these issues is just as important as knowing the techniques themselves. This section focuses on two major hurdles: dealing with muddy colors and managing drying time.
Troubleshooting the ‘Muddy’ Color Problem
The “muddy” effect—when vibrant colors mix to become dull, lifeless gray or brown—is one of the most frustrating experiences for any artist learning Oil Painting Techniques for Beginners. It happens when too many pigments are mixed together, or when complementary colors are unintentionally blended.
The Science of Clean Color
Mud is a sign of poor color management and improper application of Oil Painting Techniques for Beginners regarding mixing. It is generally understood that mixing more than three different pigments will result in a dirty-looking color. The key to avoiding this is a disciplined approach to the palette.
- The Clean Palette Technique: Always mix your colors in a segregated area on your palette. When you introduce a new color to an existing mix, use a palette knife, not your brush, to scoop and mix the paint. The brush should only be used for applying paint to the canvas. Using a clean knife ensures you do not inadvertently transfer the remnants of a previous, incompatible color into your new mix. This simple habit is one of the most crucial Oil Painting Techniques for Beginners to adopt.
- Scraping and Wiping: If you find the colors on your canvas are becoming muddy and overworked, stop immediately. Do not try to blend your way out of the mud. Instead, use a rag or a clean palette knife to physically scrape the wet paint off the area. This is a powerful, non-destructive fix when utilizing Oil Painting Techniques for Beginners. You can then wait a day for the residual layer to tack up, or simply re-prime the clean canvas spot with a thin, neutral color before reapplying your cleaner mix.
- Limit the Mixing: Remember the limited palette concept. By sticking to a core set of primary colors and earth tones, you inherently limit the number of pigments in any given mix, which naturally leads to cleaner, more vibrant colors. For anyone practicing Oil Painting Techniques for Beginners, mastering color mixing through limitation is far better than relying on a wide range of pre-mixed tubes.
Fixing Errors and Overcoming Drying Time Anxiety
One of the great advantages of oil paint is its slow drying time, offering ample opportunity for correction. However, for a beginner, this same slow drying time can cause anxiety or lead to overworking the painting. Learning to fix mistakes confidently is an essential set of Oil Painting Techniques for Beginners.
Embracing the Extended Working Window
Unlike fast-drying acrylics, oil paint grants you a generous working period, sometimes days, depending on the pigments and mediums used. This is a tremendous benefit for anyone trying out complex Oil Painting Techniques for Beginners.
- The Wet Fix: If you make a mistake in a wet area, simply take a clean, dry brush or a cotton swab dipped in your solvent (OMS) and carefully lift the offending paint right off the canvas. The area will be instantly cleaned back to the layer beneath. This is the simplest and fastest of the essential Oil Painting Techniques for Beginners for error correction. For small details, a fine-tipped cotton swab is an invaluable tool for precision cleaning.
- The Dry Fix (Scraping): If the paint has been on the canvas for a few days and is semi-dry (tacky), you can still scrape it off with a palette knife or gently sand the area once it is completely hard and dry. Sanding or scraping allows you to physically remove a problematic layer and then paint fresh, clean paint over the smooth surface. This is a less-known but highly effective Oil Painting Technique for Beginners for salvaging a difficult passage.
- The Patience Factor: The biggest mistake relating to drying time is not giving the painting enough time to dry before starting the next layer. This violates the “Fat Over Lean” rule and also guarantees muddy colors. When practicing Oil Painting Techniques for Beginners, think of your painting process in distinct sessions separated by mandatory drying time. This is not a race; it is a marathon that requires patience. Some traditional artists would wait six months before applying a final glaze to a work—a level of patience that underscores the importance of process in Oil Painting Techniques for Beginners.
Conclusion
Embarking on the journey of oil painting is an exciting and deeply rewarding endeavor. By understanding the foundational principles, such as the crucial “Fat Over Lean” rule, and practicing the core Oil Painting Techniques for Beginners—blending for realism, impasto for texture, glazing for depth, and scumbling for atmosphere—you are equipped with the knowledge of centuries of art history.
Remember that the process of learning Oil Painting Techniques for Beginners is an iterative one. Each attempt, whether a masterpiece or a learning exercise, builds your confidence and muscle memory. Do not be afraid of making mistakes; the forgiving nature of oil paint is a feature, not a bug, allowing you to scrape off the mud and start fresh. Whether you adopt the traditional layering methods or the swift, modern approach of alla prima and water-mixable oils, the key is to be consistent, experiment fearlessly, and enjoy the rich, tactile beauty of the oil medium. Continue to practice these essential Oil Painting Techniques for Beginners, and you will see steady, impressive growth in your creative output.
FAQ (Frequently Asked Questions)
What are the main Oil Painting Techniques for Beginners to focus on first?
The main Oil Painting Techniques for Beginners you should focus on initially are the wet-on-wet (blending) method, which allows you to seamlessly merge colors and tones while the paint is still wet, and the block-in method for establishing simple shapes and values. Simultaneously, you must learn the foundational Fat Over Lean rule to ensure the longevity of your painted layers. Mastering these simple applications and rules is the fastest way to build a solid base for all other Oil Painting Techniques for Beginners.
What is the difference between glazing and scumbling in Oil Painting Techniques for Beginners?
Glazing and scumbling are two key Oil Painting Techniques for Beginners that affect light and depth in opposite ways. Glazing uses a thin, transparent layer of color over a dried layer to create luminous depth, as light passes through the glaze and reflects off the lighter surface underneath. Scumbling uses a thin, opaque or semi-opaque layer of paint, applied with a dry brush to partially reveal the underlayer, creating a soft, misty, or atmospheric effect. Both methods are essential Oil Painting Techniques for Beginners for adding complexity to a finished work.
How can I make my oil paint dry faster when I’m still learning Oil Painting Techniques for Beginners?
To speed up drying time while practicing Oil Painting Techniques for Beginners, you can take several steps. First, paint thinly; thin layers always dry faster than thick ones. Second, use a specific medium: adding a small amount of a fast-drying medium like Liquin or a solvent-heavy mixture will accelerate the oxidation process. Lastly, some colors dry faster than others; earth tones like Burnt Umber or Raw Umber dry quickly and are great for underpaintings, which is a necessary Oil Painting Technique for Beginners for laying foundations.
Should I use solvents for thinning or just for cleaning when learning Oil Painting Techniques for Beginners?
When first learning Oil Painting Techniques for Beginners, it is highly recommended to use odorless mineral spirits (OMS) primarily for cleaning your brushes. For thinning your paint and creating lean layers, it is safer to use a dedicated, low-odor medium like a refined linseed oil mixed with a tiny amount of solvent (or simply use walnut oil), strictly adhering to the “Fat Over Lean” rule. This distinction prevents the excessive use of solvent, which can damage your paint film over time and is less toxic for a beginner’s studio.
What is the most common mistake when practicing Oil Painting Techniques for Beginners?
The most common mistake when practicing Oil Painting Techniques for Beginners is overworking the paint, which results in “muddy” colors. This happens when the artist tries to mix or blend too many colors together, often using a single dirty brush, leading to a dull, gray mixture. The solution is to learn to use a clean brush for blending and, if an area is overworked, to scrape the paint off and restart that specific section, rather than attempting to fix the mud by adding more paint.