The moodboard is an indispensable tool in the creative world, serving as the foundational blueprint for any visual project, whether you are tackling interior design, branding, fashion, or web layout. This visual compilation—a carefully curated collection of images, textures, colors, and typography—captures the desired aesthetic and emotional tone of a project. It acts as a shared reference point, ensuring everyone involved, from the designer to the client, remains aligned with the core vision. For those seeking essential Moodboard Ideas For Designers Guide For Beginners, mastering this technique is the first step toward achieving professional, consistent, and impactful results.

When I first started in the design world, I made a classic mistake: I thought a moodboard was just a pretty collage. I vividly remember a client project years ago for a high-end coffee brand; I dove straight into logo sketches, assuming a “dark, modern” brief was clear enough. The result was chaos—the client repeatedly rejected the concepts, saying they were too cold, not “warmly modern” enough. Frustrated, I took a step back and spent an entire weekend gathering images of concrete textures, warm amber lighting, hand-drawn script fonts, and dark wood finishes. This wasn’t just a collection; it was a conversation piece. When I presented that moodboard—a true Moodboard Ideas For Designers Guide For Beginners example in action—the client immediately pointed to one photo of a leather apron and said, “That’s the feeling! That artisan touch.” That single moment taught me that the moodboard isn’t just about what things look like; it’s about how they feel, and it saved the entire project from disaster. It is the most human and honest way to communicate an abstract feeling before spending hours on execution.
*
What Exactly is a Moodboard, and Why Does it Matter?
A moodboard, or inspiration board, is essentially a visual story that communicates the overall look, feel, and style of a design project before any heavy lifting begins. It is a highly effective pre-design strategy that solidifies abstract concepts into tangible visual references.
Featured Snippet Answer: The Core Function of a Moodboard
A moodboard is a visual collage that establishes the aesthetic direction, emotional tone, and key elements for any design project. Its primary purpose is to create consensus and consistency among team members and clients by compiling essential components. This makes it a crucial resource for any beginner designer.
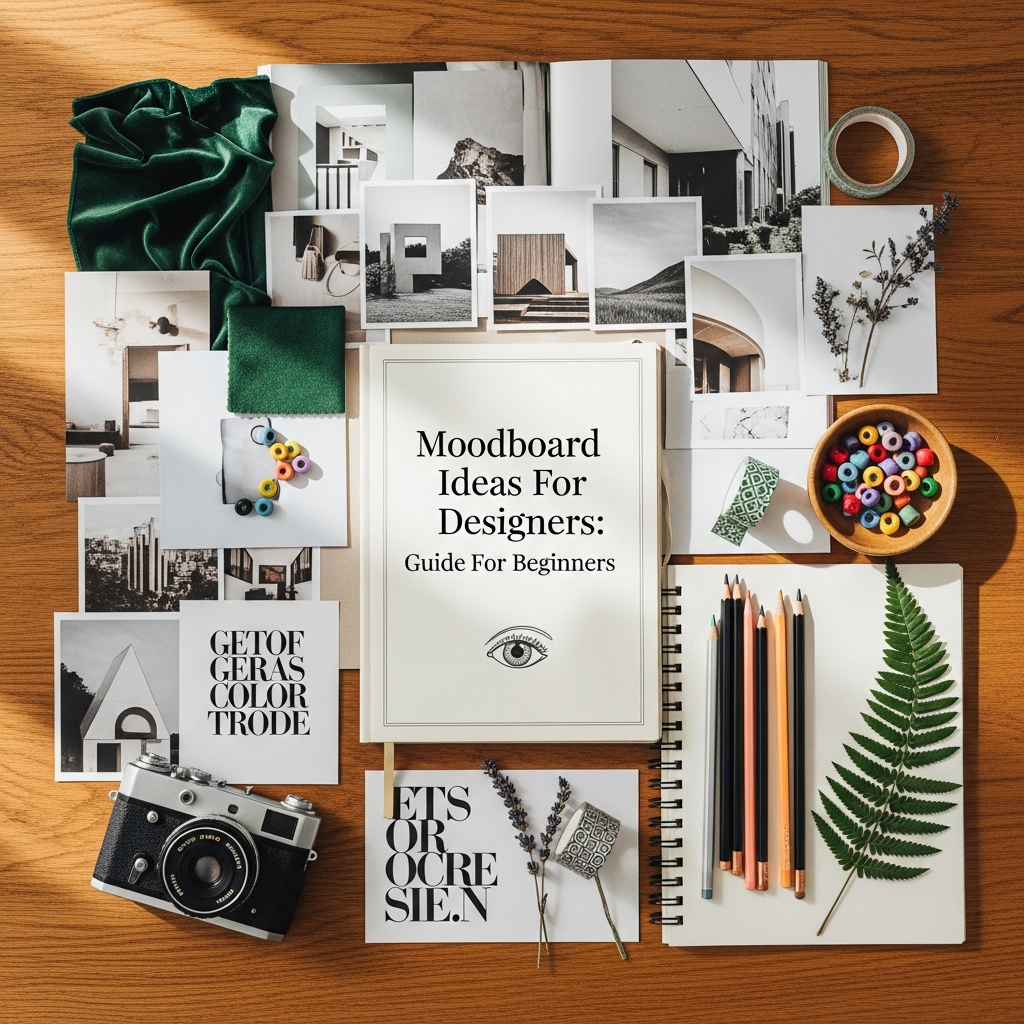
Key components typically include:
- Color Palette: Specific hex codes or physical swatches.
- Textures: Imagery of materials like wood, fabric, metal, or paper.
- Imagery & Photography: The desired style, subject matter, and lighting.
- Typography: Examples of fonts and text layouts.
- Overall Emotion: The “mood” or feeling the final design should evoke.
Beyond Aesthetics: The Strategic Role of the Moodboard
While the artistic value is clear, the moodboard’s true power lies in its strategic function, particularly for beginners who need structure. It operates as a communication bridge, translating subjective words—like “elegant,” “playful,” or “edgy”—into universal visual anchors. Without a moodboard, the design process can feel like a game of telephone, with each participant holding a different picture in their mind. The Moodboard Ideas For Designers Guide For Beginners is fundamentally a lesson in effective, early communication.
Using a foundational moodboard early in the process significantly reduces the risk of expensive and time-consuming revisions later on. Imagine the cost of redesigning a complete website interface versus the cost of rearranging a few images on a digital board. The moodboard locks down the vision before the execution phase begins. This foundational step is not merely an option; it is an obligation for professional designers. It’s an investment that pays dividends in project clarity and client satisfaction.
Project Success: How Moodboards Boost Efficiency
Though specific universal statistics are hard to pinpoint due to the subjective nature of design, professional firms and freelance designers consistently report that using moodboards dramatically improves project flow and client approval rates. When a client signs off on a visual direction presented in the form of a moodboard, they are far less likely to challenge the finished design, provided the final product accurately reflects the agreed-upon mood. This confidence-boosting effect is one of the most compelling arguments for including a detailed moodboard in every project scope.
Studies and anecdotal evidence within the design community suggest that having a clear visual compass from the start can decrease major project revisions by up to 50%. This efficiency gain is vital for beginners aiming to manage their time and workload effectively. When you create a comprehensive Moodboard Ideas For Designers Guide For Beginners, you are essentially future-proofing your design decisions. Furthermore, the moodboard serves as a benchmark against which all subsequent creative choices can be measured. If a proposed color or element doesn’t align with the board, it is swiftly eliminated, saving valuable production time.
*
The Essential Ingredients: Physical vs. Digital Moodboards
As designers, we have two primary approaches to creating our visual compass: the classic, tactile physical board and the modern, collaborative digital one. Both methods offer unique benefits, and the choice often depends on the project’s scale, the client’s preference, and the designer’s personal working style. Both approaches are valid options within any exploration of Moodboard Ideas For Designers Guide For Beginners.
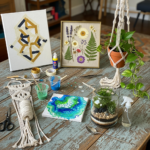
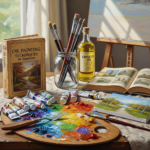
The Tangible Touch: Physical Moodboard Ideas For Designers Guide For Beginners
Physical moodboards are the traditional choice and remain highly effective, especially for projects involving tangible elements like interior design, fashion, or product packaging. They offer a sensory experience that digital screens simply cannot replicate. The act of touching, smelling, and feeling materials is crucial when designing for a physical space or product.
To create a powerful physical moodboard, you need more than just paper; you need sensory anchors:
- Fabric Swatches: Including linen, velvet, leather, or synthetic materials to define texture and material weight.
- Paint and Color Chips: Small, actual samples from paint companies or printed color blocks to ensure accurate color matching.
- Found Objects: Bits of raw wood, a tarnished piece of metal, a pressed flower, or a specific key—anything that adds a unique, three-dimensional flavor to the aesthetic.
- Typography Samples: Printed elements of text cut from magazines or custom-printed to show paper stock and finish.
The setup for a physical board usually involves a sturdy base, such as foam board, cork, or even a piece of primed wood. This hands-on process allows the designer to play with depth and shadow, creating a dynamic visual narrative. The key is to layer the elements and use an adhesive like spray mount or small pins to give the board a sense of permanence and hierarchy. A well-executed physical Moodboard Ideas For Designers Guide For Beginners is an artifact in itself, instantly communicating warmth and intentionality.
The Digital Canvas: Modern Moodboard Ideas For Designers Guide For Beginners
Digital moodboards have become the standard in fast-paced environments like web design, graphic design, and video production, mainly due to their ease of collaboration, sharing, and unlimited space. They are particularly vital for remote teams and clients who require instant access to the project vision.
Modern digital tools offer incredible flexibility and functionality:
- Miro and Mural: These collaborative whiteboarding tools allow multiple team members to contribute images, links, sticky notes, and comments in real-time, making the moodboarding process highly democratic and iterative.
- Milanote and InVision Freehand: Platforms tailored specifically for creatives, offering structured templates and dedicated spaces for design assets like brand guidelines, color palettes, and animation references.
- Figma and Sketch: While primarily design tools, their expansive artboards are often used by graphic designers to create organized, vector-based moodboards, which can be easily transitioned into final design assets.
The advantages of a digital Moodboard Ideas For Designers Guide For Beginners include the ability to easily integrate moving elements, such as video snippets, GIFs, and animated typography, which is crucial for modern, dynamic brand identities. Furthermore, digital boards often automatically include metadata, such as image sources and hex codes, providing a direct link from inspiration to execution. This eliminates guesswork and streamlines the entire workflow. The flexibility to duplicate and iterate rapidly means a designer can create multiple variations—a “primary board” and a “secondary direction” board—without wasting physical resources.
*
Step-by-Step Mastery: How to Build Your First Moodboard
Creating an impactful moodboard is a three-phase process that moves from expansive collection to focused storytelling. This methodology is applicable whether you choose a physical or a digital medium, and it is the backbone of any reliable Moodboard Ideas For Designers Guide For Beginners.
Phase 1: Research and Collection (The ‘Dumping’ Phase)
The first step is about volume and exploration; you are gathering the raw material. At this stage, do not judge or filter your choices excessively. Think of this as filling a giant, empty shopping cart with anything that remotely catches your eye or reminds you of the project’s brief. The goal is to cast a wide net and capture a diverse range of inspiration.
Your collection should include elements that speak to all the senses and concepts:
- Visual Texture: Photos of rough stone, smooth glass, frayed denim, or brushed metal.
- Conceptual Imagery: Pictures that convey the emotion, not necessarily the exact product. For a “luxury” brand, this might be a secluded mountain cabin or a crisp glass of champagne, rather than a picture of their actual product.
- Non-Traditional References: Soundwave visuals, screenshots from a film, or quotes from a book that capture the project’s spirit.
- Color Swatches: Gather anything from nature, clothing, or existing designs that feature a color you find compelling.
This phase is messy and intuitive. Spend dedicated time—at least 2 to 4 hours for a significant project—on pure collection. The richer your source material, the more focused your final curation will be. A beginner should learn to embrace this chaos; it is the fertile ground from which clarity emerges. The foundation of successful Moodboard Ideas For Designers Guide For Beginners is exhaustive research.
Phase 2: Curation and Refinement (The ‘Editing’ Phase)
Once you have a vast collection of elements, the critical editing phase begins. This is where you transform a random dump of inspiration into a cohesive, meaningful statement. For a beginner, this is often the hardest step because it requires you to kill your darlings—to discard images you love but which do not serve the project’s narrative.
The refinement process involves several key actions:
- Identify the Core 3: Pick the three most powerful images or elements that, by themselves, represent the project’s central vision. These will be your anchors.
- Establish Hierarchy: Place the anchor elements prominently (larger scale, central positioning). All other elements must support these main pieces, either through contrast or complement.
- Limit the Palette: If you gathered 20 colors, narrow it down to a primary palette of 3-5 colors (plus a few neutral tones). Too many colors dilute the focus and confuse the viewer.
- Find the Connective Thread: Arrange pieces so that your eye flows naturally across the board. The items should “talk” to one another; a color in one photo should be echoed in the texture of a neighboring piece.
This deliberate reduction of elements ensures the final moodboard is focused and speaks with a single, clear voice. A good moodboard is about less, showing restraint and direction. Mastering this editing step transforms simple Moodboard Ideas For Designers Guide For Beginners into professional presentations.
Phase 3: Presentation and Storytelling (The ‘Selling’ Phase)
The final phase is about framing the moodboard and articulating the narrative it tells. A moodboard is only effective if the viewer—usually the client or the development team—understands why certain items were chosen. The board needs a clear title, a brief concept statement, and annotations.
To enhance the storytelling aspect:
- Add Keywords: Around the board, include a few carefully selected adjectives that define the tone (e.g., “Authentic,” “Minimal,” “Vibrant,” “Heirloom”). These words guide the viewer’s interpretation.
- Annotate the ‘Why’: Especially in digital boards, add small, discreet notes explaining the specific purpose of an element. For example, next to a photo of a particular lighting fixture, you might write: “Reference for shadow play and warmth,” or next to a font: “Used for its approachable, non-intrusive feel.”
- Define the Contrast: Explicitly point out the tension in the board, such as the contrast between “rough texture” (raw wood) and “polished finish” (chrome). This demonstrates a nuanced, intentional design strategy.
When presenting, avoid simply describing what the images are; instead, describe what the images mean for the project. The power of a successful Moodboard Ideas For Designers Guide For Beginners is its ability to turn inspiration into actionable design principles. It moves the conversation from personal opinion to professional execution.
*
Advanced Moodboard Ideas For Designers Guide For Beginners: Moving Beyond the Static
The concept of the moodboard continues to evolve, pushing past simple two-dimensional collages to embrace motion, sound, and immersion. For designers moving beyond the absolute basics, incorporating these advanced techniques can differentiate their work and capture the complexity of modern brand identities.

Integrating Motion and Sound: Kinetic Moodboards
In a digital-first world, a static image sometimes falls short of capturing the dynamic spirit of a project, especially for branding, video, or interactive media. Kinetic moodboards solve this by incorporating time-based media. This requires using digital tools like Figma, After Effects, or video editing software.
Key elements of a Kinetic Moodboard include:
- Video Snippets: Short, 2-5 second clips that show desired pacing, transition styles, or lighting changes (e.g., the smooth, slow motion of liquid, or the rapid, sharp cuts of an urban scene).
- Sound Design Cues: Embedding audio clips, background music (BGM) samples, or sound effects (SFX) that convey the project’s auditory identity (e.g., the crisp sound of a typewriter for a journalistic brand, or soft ambient noise for a wellness app).
- Animated Text/Logo Transitions: Demonstrating how typography might slide, fade, or snap into place, guiding the developer or animation specialist on the desired motion principles.
These boards are often presented as short video files, typically 30 to 60 seconds long, giving a comprehensive preview of the project’s sensory experience. This dynamic approach is an essential advanced addition to the established Moodboard Ideas For Designers Guide For Beginners playbook.
The Power of Data Visualization in Moodboarding
While moodboards are fundamentally creative, for projects with a technical or analytical focus (like FinTech interfaces or scientific publications), integrating data visualization elements can add a layer of intellectual rigor. This trend focuses on making the project feel trustworthy, serious, or precise.
A data-focused moodboard might include:
- Chart and Graph Aesthetics: Samples of the desired line weight, grid structure, color coding, and overall cleanliness of data displays.
- Information Hierarchy: Layout examples that demonstrate how complex information should be logically and clearly presented, prioritizing readability over mere decorative appeal.
- Specific Color Meanings: Attaching concrete data to color choices, such as using cooler blues to signify trust and stability, backed by relevant psychological studies.
This method proves that a moodboard is not limited to purely artistic endeavors; it can be a tool for conveying informational structure and tone. By incorporating these highly structured elements, designers demonstrate a practical, problem-solving mindset alongside their creative flair. The most comprehensive Moodboard Ideas For Designers Guide For Beginners now fully embrace the power of information structure.
*
Common Pitfalls and How to Avoid Them
Even with the best intentions, designers—especially beginners—can fall into predictable traps that weaken the effectiveness of their moodboards. Recognizing and avoiding these pitfalls is key to maximizing the utility of this essential tool.
Pitfall 1: The ‘Overstuffing’ Trap (Too Much is Too Little)
A common mistake is mistaking the moodboard for a digital scrapbook, where every interesting image found online is thrown onto the canvas. The result is a confusing, visually noisy board that lacks focus and direction. When a client or team member looks at a cluttered board, they cannot discern the intended hierarchy or the single, guiding aesthetic.
The Fix: Apply the “Rule of Three” from Phase 2 vigorously. For every new element you add, consider removing an element that is less central to the theme. The moodboard should feel curated and deliberate, not exhaustive. If you feel the need to show multiple distinct directions, create separate moodboards—perhaps a “Primary Direction” board and an “Alternative Concept” board. This shows professional control and clarity, a crucial lesson in any comprehensive Moodboard Ideas For Designers Guide For Beginners.
Pitfall 2: Lack of Context and Narrative
A board that consists only of beautiful, unrelated images is merely eye-candy; it is not a moodboard. If you cannot look at the final arrangement and clearly articulate the story of the design, the board is missing context. For example, a picture of a sleek car next to a rough, hand-painted texture might be aesthetically pleasing, but without a narrative explaining the contrast, the elements remain disconnected.
The Fix: Always focus on the relationship between the elements. Use negative space (white space) effectively to group related items, suggesting a connection. Most importantly, apply the storytelling techniques from Phase 3: Use descriptive keywords and annotations to literally spell out the intended meaning of the pairings. Explain that the sleek car represents the “cutting-edge technology” and the rough texture represents the “handmade, human element” of the brand.
Pitfall 3: Ignoring the Client’s Voice and Audience
A moodboard must reflect the target audience and the client’s business goals, not just the designer’s personal taste. A moodboard for a children’s toy company should feel wildly different than one for a corporate financial institution, even if the designer personally prefers a dark, moody aesthetic. Beginners often struggle to detach their personal preferences from the project requirements.
The Fix: Before collecting any visuals, immerse yourself in the client’s existing brand materials and the defined target demographic. Use your research phase to explicitly search for images and elements that appeal to that audience. For instance, if the audience is Gen Z, incorporate current social media visual trends. If the audience is retirees, focus on classic, high-legibility elements. The success of the moodboard, and by extension the entire project, is measured by how well it serves the client’s objectives, not just its visual appeal. Therefore, any effective Moodboard Ideas For Designers Guide For Beginners must emphasize the importance of market research.
*