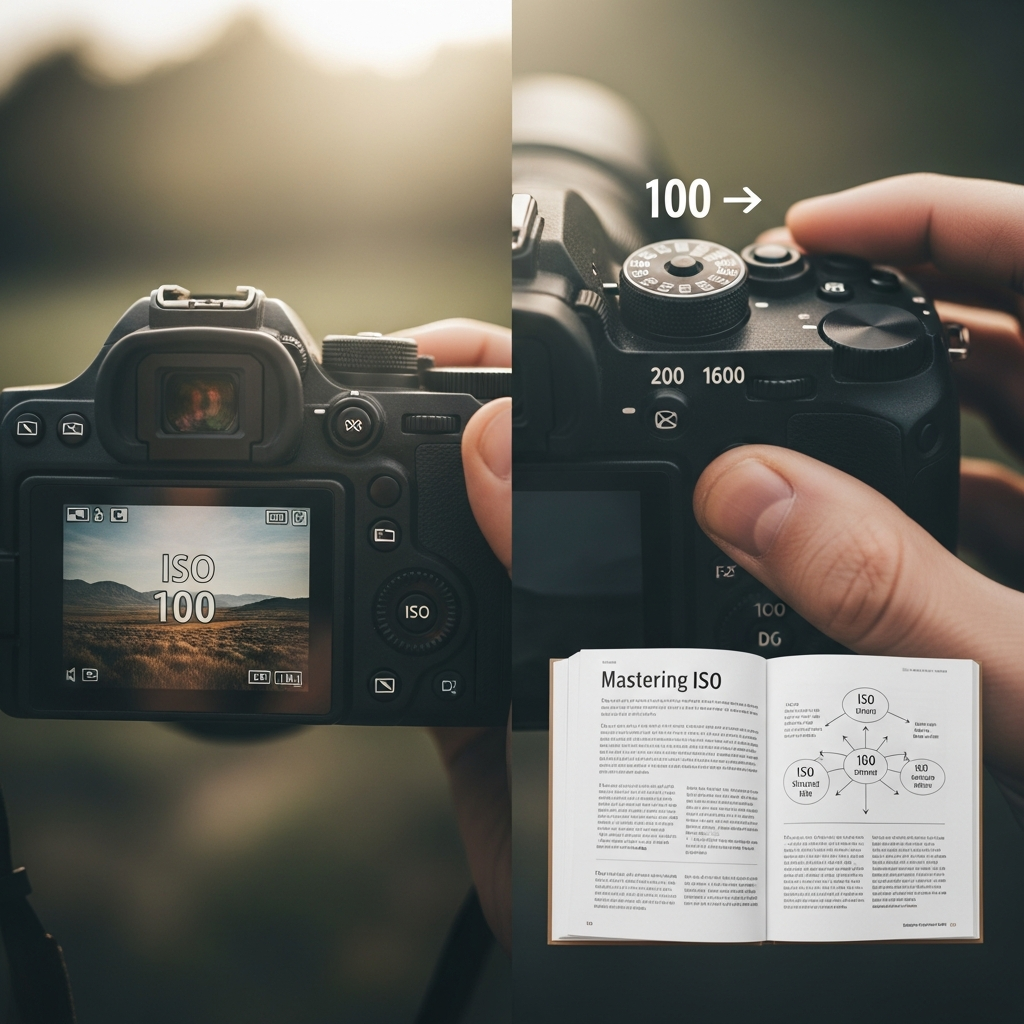
The quest for the perfect photograph often comes down to mastering the fundamental elements of exposure, and among them, the ISO setting is perhaps the most misunderstood. If you have ever wondered how to use ISO settings correctly to capture a sharp, well-lit image without that distracting “grain” or digital noise, you are not alone. It is a critical skill that differentiates a novice photographer from a seasoned professional. Learning how to use ISO settings correctly means you can confidently adapt to any lighting scenario, from a brilliantly sunny beach day to a dimly lit concert hall.

*
What is ISO, Really? Beyond the Acronym
The acronym ISO stands for the International Organization for Standardization, which is the body that created the standard used to measure film and sensor sensitivity. In simple terms, the ISO setting on your camera dictates how sensitive the camera’s image sensor is to light. It is one of the three foundational pillars of exposure, working in tandem with aperture and shutter speed to determine the final brightness and quality of your image. Understanding this core function is the first, most crucial step in learning how to use ISO settings correctly.
The Historical Context: Film Speed vs. Digital Sensitivity
To truly grasp the concept, it helps to look back at the days of film photography. Film was rated by “film speed,” and a higher speed film (like ISO 800) was physically more sensitive to light than a slower speed film (like ISO 100). The photographer had to load a specific film and stick with that sensitivity for the entire roll, making planning essential.
Today’s digital cameras offer a massive advantage: variable sensitivity. When you adjust the ISO on a modern digital camera, you are not changing the sensor’s inherent physical properties. Instead, the camera is applying an electronic boost or amplification to the signal captured by the sensor. The higher the number (e.g., ISO 6400), the more the signal is amplified, effectively brightening the image. However, this amplification comes at a cost, which is the main reason why knowing how to use ISO settings correctly is so important.
The Science of Digital Amplification (Noise Introduction)
When the camera amplifies the signal to make the image brighter, it is also amplifying everything else, including the inherent imperfections and electrical fluctuations—what we call digital noise or “grain.” This noise manifests as random colored speckles or a gritty texture, particularly visible in the darker areas of the photograph.
A low ISO setting, typically ISO 100 or 200, is often called the “base ISO” of a camera. At this setting, the sensor is operating with the least amount of electronic amplification, resulting in the cleanest, highest-quality image with the best dynamic range. The general principle for how to use ISO settings correctly is deceptively simple: Always aim for the lowest ISO possible that still allows you to achieve a proper exposure with your desired aperture and shutter speed. This is a crucial concept to master.
*
The Exposure Triangle: ISO’s Essential Role
The ISO setting is only one-third of the equation. To truly understand how to use ISO settings correctly, you must first understand its relationship with its two partners: aperture and shutter speed. Together, these three controls form what is universally known as the Exposure Triangle. Think of them as a team of three essential controls, all working together to capture the right amount of light.
Aperture (f-stop): Controlling Depth of Field
Aperture, measured in f-stops (e.g., f/2.8, f/8, f/16), is the adjustable opening inside your lens that controls how much light passes through to the sensor. A wider aperture (smaller f-number, like f/2.8) lets in a lot of light, but also creates a shallow depth of field (blurry background). A narrow aperture (larger f-number, like f/16) lets in very little light, but keeps more of the scene sharp. When you choose a narrow aperture for a sharp landscape, you are reducing the light, which forces you to compensate by either slowing the shutter speed or increasing the ISO.
Shutter Speed: Freezing or Blurring Motion
Shutter speed, measured in fractions of a second (e.g., 1/100s, 1/1000s), controls how long the light is allowed to hit the sensor. A fast shutter speed (e.g., 1/2000s) freezes action, but drastically reduces the amount of light. A slow shutter speed (e.g., 1/2s) blurs motion, but lets in a flood of light. When photographing a rapidly moving object, you must use a fast shutter speed, which often means you need to increase the ISO dramatically just to maintain a bright image.
Balancing the Three: The Key to How to Use Iso Settings Correctly
Mastery of the Exposure Triangle is the true answer to how to use ISO settings correctly. It is always a balancing act. If you change one setting, you must adjust at least one of the others to maintain the same level of exposure.
| The Scenario | Aperture Choice | Shutter Speed Choice | ISO Compensation |
| :— | :— | :— | :— |
| Portrait, Outdoors, Sunny | Wide (f/2.8) for bokeh | Fast (1/2000s) | Lowest (ISO 100) to avoid overexposure and noise. |
| Landscape, Overcast | Narrow (f/11) for sharpness | Medium (1/60s) | Mid-Range (ISO 400) to maintain hand-holdable shutter speed. |
| Indoor Sports, Low Light | Wide (f/4) | Very Fast (1/1000s) to freeze action | Very High (ISO 3200+)—necessary trade-off for the shot. |
The main point is that ISO is your flexible last resort. You should first determine the required aperture (for depth of field) and shutter speed (for motion control), and only then adjust the ISO to achieve a balanced exposure. This disciplined approach is the foundation for how to use ISO settings correctly in any situation.
*
Mastering the Low-Light Trade-Off: Noise vs. Detail
The decision of how to use ISO settings correctly almost always comes down to the difficult choice between an image that is underexposed and noisy, or an image that is correctly exposed but noisy. In most cases, a slightly noisy but correctly exposed image is preferable, as underexposed images often look even grainier when you try to brighten them later during editing. Learning this balance is essential.
The Concept of ‘Base ISO’ and Why It Matters
As mentioned, every camera has a Base ISO, usually ISO 64 or ISO 100. This is the setting where the sensor achieves its maximum performance, meaning it has the widest dynamic range (ability to capture detail in both highlights and shadows) and the lowest inherent noise. When you are shooting in a bright, controlled environment—such as a studio or a sunny outdoor location—you should always choose your Base ISO. It is the absolute optimal setting for image quality, and is the key element in answering how to use ISO settings correctly for professional-grade results.
By sticking to Base ISO whenever possible, you establish a standard of quality that ensures your shadows and highlights contain the maximum possible information, making editing much more forgiving. You have to force yourself to use a slower shutter speed or a wider aperture before touching the ISO dial.
Case Studies in High ISO Scenarios (Astrophotography, Indoor Sports)
While the rule is to keep ISO low, some scenarios demand a high ISO, and professionals embrace this trade-off. Learning how to use ISO settings correctly means knowing when to break the “low ISO” rule.
- Astrophotography: Capturing faint stars and the Milky Way requires gathering massive amounts of light in a short time to prevent star trails. You typically need a wide-open aperture (e.g., f/2.8) and a relatively fast shutter speed (e.g., 15-25 seconds). Even with those settings, the light from stars is so dim that you are almost always forced to shoot at extremely high ISOs, often ISO 3200 to ISO 12800. The noise is an accepted part of the process, which is often managed with specialized stacking software.
- Indoor Sports: Freezing the action of a basketball player or a skater requires a very fast shutter speed, perhaps 1/500th of a second or faster. Since indoor lighting is often poor, you are forced to crank up the ISO significantly, perhaps to ISO 1600 or ISO 3200, just to get enough light for that fast shutter speed. Here, the priority is clearly capturing the moment without blur, and image noise is the secondary concern. The clarity of the moment is more important than the cleanliness of the pixels.
In these situations, the question of how to use ISO settings correctly is solved by using the highest acceptable ISO that still meets your aperture and shutter speed needs.
Modern Noise Reduction Technology vs. Getting it Right In-Camera
Modern digital cameras, especially those released in 2023 and 2024, are incredibly adept at handling high ISO. Sensor technology has improved so much that an ISO 3200 shot on a flagship camera today is often cleaner than an ISO 800 shot from a camera a decade ago. Furthermore, modern editing software has powerful noise reduction capabilities.
However, relying too heavily on post-processing is a mistake. Noise reduction, whether in-camera or on the computer, works by blurring or smoothing out the image details, which can lead to a loss of sharpness and texture. The best practice for how to use ISO settings correctly remains: capture the cleanest possible image in-camera. Noise reduction should only be the final polish, not a primary fix for underexposure. The goal should be to minimize the need for heavy-handed noise correction by maximizing the light captured at the source.
*
A Practical Guide to How to Use Iso Settings Correctly
The principles are simple, but applying them in the field can be challenging. To guide your decision-making, you should adopt a clear, three-step mental checklist for how to use ISO settings correctly in any new environment. This practical guide focuses on standard scenarios that most photographers encounter daily. This systematic approach is the core of how to use ISO settings correctly.
Sunny Day Scenarios (ISO 100-200)
When the sun is out, you have an abundance of light—a true luxury for any photographer.
- The Rule: Always use your camera’s Base ISO (typically ISO 100 or 200).
- The Execution: Since you have so much light, you can easily use fast shutter speeds (1/500s or faster) and narrow apertures (f/8 for landscapes) while keeping your ISO low.
Case Example: You are photographing a bright cityscape at noon. You set your aperture to f/8 for maximum depth of field and your shutter speed to 1/250s to avoid camera shake. You check your exposure meter and realize the image is still too bright. The proper solution is not to use a faster shutter speed (you do not need to freeze motion) or a narrower aperture (you want to maintain f/8 for sharpness), but to revert to the lowest possible ISO—the Base ISO. This is a perfect example of how to use ISO settings correctly* to maximize image quality.
Overcast/Indoor Scenarios (ISO 400-800)
This is where the balancing act begins. Overcast days or well-lit interiors offer a moderate amount of light, but it is not enough to simply rely on the Base ISO.
- The Rule: Increase ISO to the minimum necessary to maintain your desired aperture and shutter speed.
The Execution: If you are indoors shooting a family dinner, you likely want a wide aperture (f/4) to blur the busy background and a shutter speed of at least 1/60s to prevent hand-shake (or faster if people are moving). If your exposure is too dark at ISO 100, you bump it up. Try ISO 400 first. Is it still too dark? Try ISO 800. For modern cameras, an ISO 800 is generally considered very clean. This process of using the lowest sufficient ISO is a hallmark of how to use ISO settings correctly*.
Analogy: Think of ISO as a temporary brightness booster. You only use as much booster as you absolutely need. If ISO 400 gets the job done and allows you to keep the shutter speed at a crisp 1/125s, then ISO 400 is the correct choice. If you are serious about how to use ISO settings correctly*, you’ll always choose the minimum amplification.
Night/Dim Light Scenarios (ISO 1600+)
In truly dark environments—a night street scene, a theater performance, or a dimly lit reception—you are forced to use the highest available ISO settings, often venturing into ISO 1600, 3200, 6400, or even higher.
- The Rule: Accept the noise trade-off to ensure a fast enough shutter speed to prevent motion blur.
The Execution: You are at a concert and need a shutter speed of 1/250s to freeze the vocalist. Your aperture is wide open at f/2.8. Even so, your photo is pitch black. You have run out of aperture and shutter speed options. This is the moment to use the ISO. You might find that ISO 6400 is the setting that finally gives you a balanced exposure. This high ISO setting, while introducing noticeable noise, is the correct setting because it successfully captures the moment without motion blur, which is the primary objective. Understanding how to use ISO settings correctly* in this context is about prioritizing the crucial elements of the image.
Pro Tip: In extremely low light, consider setting your maximum acceptable ISO limit in the camera menu (e.g., 6400). This helps you know your noise “ceiling” and ensures you do not accidentally push the setting too high, which is a common mistake when figuring out how to use ISO settings correctly*.
The Professional Priority System: Shutter/Aperture First, ISO Last
For most professional photographers, the decision-making process for how to use ISO settings correctly follows a strict hierarchy. This is often referred to as setting two of the three variables and letting the camera determine the third, or setting a priority.
- Determine your creative needs (Aperture/Shutter): What depth of field do you want? (Aperture priority). Do you need to freeze action? (Shutter priority).
- Set the most critical factor: If freezing action is key, set your fast Shutter Speed (e.g., 1/500s). If background blur is key, set your wide Aperture (e.g., f/2.8).
- Adjust the second factor to compensate (if possible): If you set a fast shutter speed, you will open the aperture as wide as possible to gather more light.
- ISO is the tie-breaker and final adjustment: Only after setting Aperture and Shutter Speed according to your creative vision do you adjust the ISO. You move it up from the Base ISO until the exposure meter is balanced. This guarantees you are using the cleanest image setting possible for the specific circumstances. This systematic method ensures you always know how to use ISO settings correctly.
*
Advanced Techniques: Auto ISO and ISO Invariance
The advancement of digital camera technology has introduced features that make the job of figuring out how to use ISO settings correctly much easier and more consistent. Modern photographers rarely dial in a manual ISO for every shot. Instead, they rely on intelligent automation with carefully set limits.

Setting the Right Limits: The Power of Auto ISO
The Auto ISO feature is one of the most powerful tools available for photographers today. Instead of constantly monitoring the light and manually adjusting the ISO, you can delegate this task to the camera while maintaining control over the two most important creative aspects: aperture and shutter speed. This is a modern answer to how to use ISO settings correctly.
The best practice for using Auto ISO involves setting specific limits:
- Minimum Shutter Speed: This is the most crucial limit. You tell the camera, “No matter what, do not let the shutter speed drop below 1/125th of a second (or 1/60th, etc.).” This prevents blurry, motion-affected photos.
- Maximum ISO: This is your noise ceiling. You tell the camera, “I am willing to accept noise up to ISO 6400, but no higher.” This prevents the camera from boosting the sensitivity to a level where the image quality becomes unacceptable.
When using Auto ISO with these limits, the camera first adjusts the shutter speed and aperture based on your chosen shooting mode (Aperture Priority or Shutter Priority). If it still needs more light, it then starts to increase the ISO, but it will never go faster than your set minimum shutter speed and will never go higher than your set maximum ISO. This allows you to focus on composition and framing, knowing that the camera is expertly handling how to use ISO settings correctly within your specified boundaries.
Understanding ISO Invariance (For Specific Modern Cameras)
ISO invariance is a more technical concept, but it is fundamentally changing how to use ISO settings correctly for photographers using high-end mirrorless and DSLR cameras (primarily those with Sony sensors).
In an ISO-invariant camera, the image quality (specifically, the noise profile and dynamic range) achieved by shooting at a low ISO (e.g., ISO 100) and brightening the resulting dark image later in editing is virtually indistinguishable from the image shot at a higher ISO (e.g., ISO 1600) and correctly exposed in-camera.
What this means for your workflow:
- Priority on Highlights: If your camera is ISO-invariant, you should prioritize setting your exposure to protect the brightest parts of your scene (the highlights), even if it means the rest of the image is underexposed. Since you can brighten the dark areas later without introducing extra noise, you are free to ensure the highlights are never “blown out” (pure white with no detail).
Low ISO for Detail: For ISO-invariant cameras, some professionals recommend sticking to the Base ISO for low-light scenes, unless* they need a brighter view to focus or compose. The low ISO guarantees maximum dynamic range, which is critical for recovering details from the shadows in post-processing.
This advanced knowledge of how to use ISO settings correctly is device-specific, so check your camera’s technical reviews to see if it is ISO-invariant before changing your entire workflow. For most standard cameras, the rule still stands: expose correctly in-camera using the lowest necessary ISO.
*
Common Mistakes and Misconceptions When Using ISO
Even experienced photographers sometimes make simple mistakes regarding their ISO settings. Identifying these pitfalls is key to perfecting how to use ISO settings correctly in the long run.
Mistake 1: Leaving the Camera on Auto ISO Without Limits
This is perhaps the most common error. Photographers switch to Auto ISO for convenience and forget to set the maximum limit. They take a beautiful portrait in a sunny park (ISO 100), then immediately walk into a dim building and take a picture of an architectural detail. The camera, prioritizing a fast shutter speed, might boost the ISO all the way up to its maximum, say ISO 25600, resulting in an unacceptably noisy image. This fails to address how to use ISO settings correctly because it yields an image that, while exposed, is technically poor.
- The Fix: Always set your Max ISO Limit. If you know your camera produces too much noise past ISO 3200, then set 3200 as the maximum. This way, you cap the noise and force the camera to use slower shutter speeds if more light is required.
Mistake 2: Using the “Sunny 16” Rule for ISO
The old “Sunny 16” rule is a great guideline for manual exposure in bright sunlight, suggesting that on a sunny day, an aperture of f/16 and a shutter speed reciprocal to the ISO (e.g., 1/100s at ISO 100) will give you a correct exposure. The misconception is that one should always aim for ISO 100.
The Correction: While ISO 100 is ideal, modern cameras are so efficient that using ISO 200 or 400 on a bright day might be necessary just to allow you to use a wider aperture (like f/4) for a shallower depth of field while still having a fast, hand-holdable shutter speed (like 1/800s). The objective is clean exposure, and sometimes a slightly higher, but still clean, ISO is the correct choice to achieve the desired creative effect. The overall goal is still how to use ISO settings correctly* to fit the creative vision.
Mistake 3: Fearing Noise More Than Motion Blur
Beginners often become obsessed with avoiding digital noise and stick rigidly to ISO 100 or 200, even in low light. The result is an image that is underexposed or requires a shutter speed so slow that the image is ruined by camera shake or subject motion blur.
The Reality: Motion blur is far more distracting and unrecoverable than digital noise. Digital noise can be reduced in editing software; a blurry photo due to subject movement cannot be fixed. When faced with a choice in low light, choose the higher ISO that allows you to use a shutter speed of 1/60s or faster. This is a fundamental lesson in how to use ISO settings correctly—the capture of the moment takes precedence. When you prioritize the right settings, you are answering the question of how to use ISO settings correctly*.
*
The Future of ISO: Computational Photography and Sensor Trends
As technology progresses rapidly, how to use ISO settings correctly continues to evolve. Recent trends in digital photography show two key directions: continuous sensor improvement and the rise of computational photography. These advancements will likely make the high-ISO anxiety of the past a non-issue.
Sensor Technology Continues to Improve
Every year, new sensor designs (like stacked BSI sensors) push the limits of noise performance. The “Base ISO” range is getting cleaner, and the “Max Usable ISO” is getting higher. Where ISO 3200 was once considered unusable, it is now a clean standard for professional work on many new cameras. This means that photographers will have more freedom to choose a faster shutter speed or a narrower aperture, knowing that the camera can handle the required high ISO without a major quality hit. The ability to use higher and higher ISO settings cleanly is simplifying how to use ISO settings correctly.
Computational Photography
The major shift is in how the camera processes light. Features that merge multiple frames taken at a high ISO and then use internal processing to “average out” the noise are becoming standard. This is most prominent in modern smartphone cameras, which can produce incredibly clean low-light photos. As this technology migrates to dedicated cameras, the concept of ISO noise will change from being an electronic artifact to a software problem that the camera automatically solves.
However, even with these advances, the core principles of how to use ISO settings correctly will endure. The photographer’s role will always be to decide the priorities in the Exposure Triangle: Is depth of field more important than freezing motion? The ISO will always be the lever used to balance that decision, regardless of how clean the resulting file is. The better you understand the why of ISO, the better you will be prepared for the future.
*
Conclusion: Your Next Steps to How to Use Iso Settings Correctly
Mastering the ISO setting is a journey that moves you from simply getting a bright picture to taking a perfectly exposed, high-quality photograph. The key to knowing how to use ISO settings correctly lies in understanding that ISO is your last-resort adjustment, a means to an end, not the starting point.
To summarize the most effective path for how to use ISO settings correctly:
- Establish a Priority: Decide your desired Aperture (for depth of field) and Shutter Speed (for motion). These are your creative controls.
- Start at Base: Always begin at your camera’s Base ISO (typically ISO 100).
- Adjust Last: Only increase the ISO when your creative Aperture and Shutter Speed choices do not provide enough light for proper exposure.
- Aim for the Minimum: Always choose the lowest possible ISO that successfully balances the exposure; for example, if ISO 400 works, do not use ISO 800.
- Embrace Auto ISO: Use the Auto ISO feature with carefully set limits for your maximum acceptable noise level (Max ISO) and to prevent motion blur (Min Shutter Speed).
By implementing these steps, you will stop struggling with the technicalities and instead use the ISO dial as an intuitive tool to realize your creative vision. Knowing how to use ISO settings correctly will open up new possibilities in low-light photography, ensuring your images are crisp, well-detailed, and free from unnecessary grain. Your photography will become more deliberate, and your results will be consistently better, answering the question of how to use ISO settings correctly once and for all. This final step is vital in ensuring you know how to use ISO settings correctly every single time you press the shutter button. Learning how to use ISO settings correctly truly elevates your photographic craft. Do not underestimate the value of knowing how to use ISO settings correctly. It is a vital part of the exposure process. Practice these rules, and you will quickly see a difference in your final image quality and confidently know how to use ISO settings correctly.
*
FAQ (Pertanyaan yang Sering Diajukan)
What is the ideal ISO setting for a beginner?
The ideal ISO setting for a beginner is Auto ISO with limits. Set your camera to Aperture Priority or Shutter Priority mode. Then, go into the menu and set your Auto ISO range:
- Minimum ISO: 100 (Your base ISO for maximum quality).
- Maximum ISO: 3200 (A good upper limit for acceptable noise on most modern cameras).
- Minimum Shutter Speed: 1/60s (To prevent hand-shake blur).
This setup allows you to learn how to use ISO settings correctly while the camera handles the exact adjustment, ensuring you get a clean, sharp image without worrying about excessive noise or blur.
Does a higher ISO always mean more noise (grain)?
Yes, a higher ISO setting on a digital camera always means the electronic signal is being amplified more, which inherently increases the visibility of digital noise (or grain) in the final image. While modern cameras manage high ISO much better than older models, the fundamental trade-off remains: Higher ISO = Brighter Image + More Potential Noise. The key to knowing how to use ISO settings correctly is finding the balance where the noise is acceptable for the needs of the photograph.
Why is ISO 100 or 200 called ‘Base ISO’?
ISO 100 or 200 is referred to as the Base ISO because it is the native sensitivity setting of the image sensor where the least amount of electronic amplification is applied. At this setting, the sensor delivers the cleanest image file with the maximum dynamic range (the ability to capture detail in both the brightest and darkest areas of the scene). Therefore, whenever you have enough light, using your camera’s Base ISO is the best way to achieve optimal image quality and is crucial for learning how to use ISO settings correctly.
When should I prioritize a fast shutter speed over a low ISO?
You should always prioritize a fast shutter speed over a low ISO whenever motion is a factor. This includes photographing moving subjects (sports, children, pets, cars) or shooting handheld with a long lens where camera shake is a risk. Motion blur cannot be fixed in editing, but noise can be managed. In low light, it is a key element of how to use ISO settings correctly to accept a high ISO (e.g., 3200 or 6400) if it means you can use a shutter speed fast enough (e.g., 1/500s) to freeze the action. The priority is a sharp subject over a noise-free background.