The ability to polish a portrait without making it look fake or plastic is the hallmark of great mobile photo editing. For anyone just starting out, learning How To Retouch Skin In Snapseed Guide For Beginners is the perfect entry point into professional-looking results. You can easily fix minor blemishes, smooth textures, and add a healthy glow to skin tones directly on your phone, making your images stand out on social media or in your personal gallery.

Essential Tools: The Snapseed Toolkit for Flawless Skin
Snapseed is a powerful, free application that offers many sophisticated tools, yet only a handful are truly essential for skin enhancement. Mastering just two main tools will give you 90% of the control you need to successfully learn How To Retouch Skin In Snapseed Guide For Beginners. This targeted approach simplifies the learning curve and allows you to focus on technique rather than being overwhelmed by options.
The two primary tools for achieving a natural skin retouch are:
- The Healing Tool: This is your digital eraser for removing imperfections, like blemishes, stray hairs, or dust.
- The Portrait Tool: This specialized feature provides controlled smoothing and brightening specifically for faces.
If you are wondering how to retouch skin in Snapseed Guide for Beginners, remember that these two tools should be the foundation of your editing workflow. They allow for both precision repair and general enhancement, resulting in a clean and polished portrait.
The Featured Snippet: Quick Steps for Skin Retouching
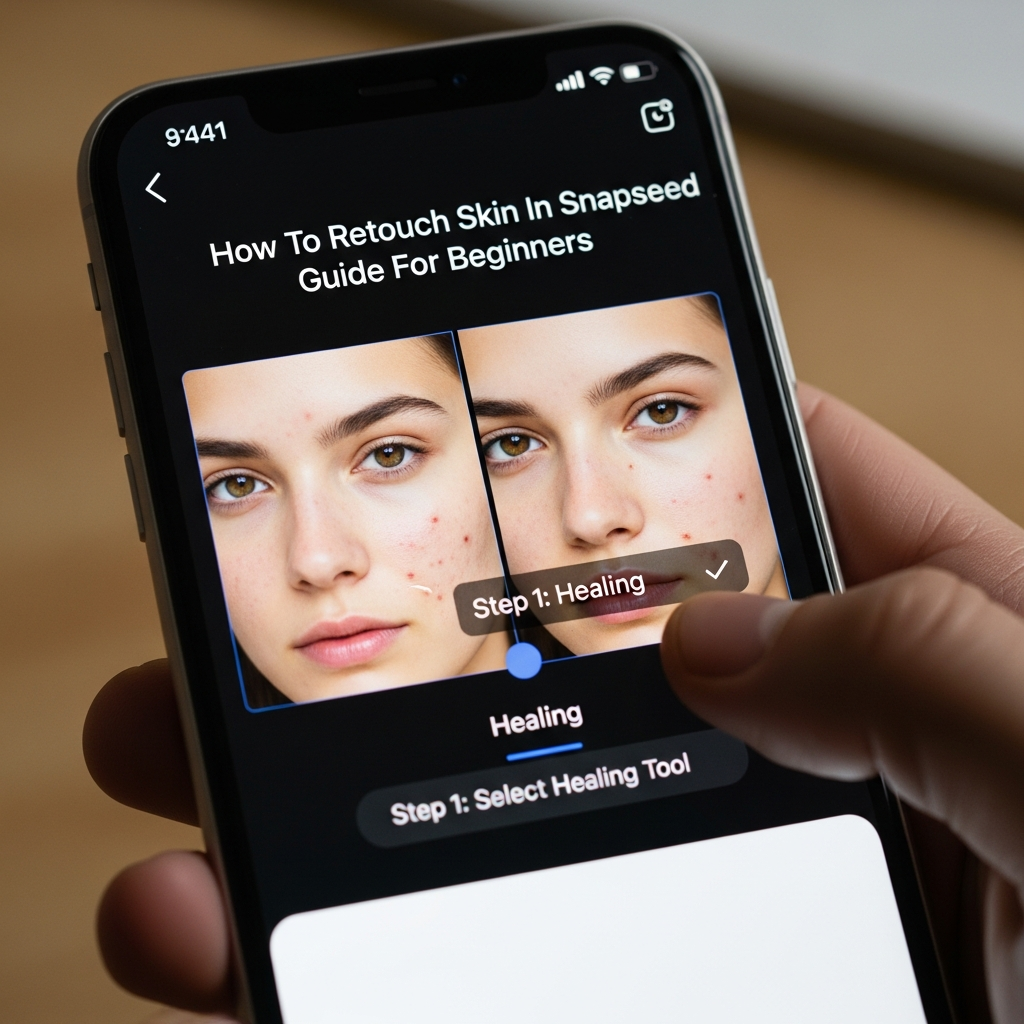
To retouch skin in Snapseed, focus on two main steps: precision repair and overall enhancement. Use the Healing Tool to tap away blemishes, spots, and minor imperfections. Afterward, switch to the Portrait Tool to apply Skin Smoothing and Face Spotlight to even out the texture and add a natural, vibrant glow to the face, completing your beginner’s skin retouch.
Step 1: The Foundation of Retouching with the Healing Tool
Before you even think about smoothing skin, you must first remove the distracting elements. This is where the Healing Tool comes into play. Think of this step as ‘digital cleaning’—you are preparing a clean canvas for the rest of your edits. A critical part of understanding How To Retouch Skin In Snapseed Guide For Beginners is knowing that simple removal of distractions can often be more impactful than heavy smoothing.
Mastering the Precision of the Healing Tool
The Healing Tool is arguably the most crucial feature in learning How To Retouch Skin In Snapseed Guide For Beginners. It operates by sampling an area around where you brush and using that texture to replace the area you just covered. This is the perfect solution for minor skin issues that detract from the subject.
The process is intuitive, but requires patience:
- Zoom In Aggressively: The key to successful healing is precision. Pinch and zoom into the skin area until you can clearly see individual pores or blemishes. If the blemish is only a few pixels wide, you need to be zoomed in.
- Tap vs. Brush: For very small spots, a quick tap with your finger is often enough. For slightly larger or elongated areas, like a fine line or a scratch, use a short, controlled brush stroke.
- Keep Brushes Small: Avoid covering large areas at once. If you cover too much, the tool won’t have enough surrounding healthy skin to sample, resulting in a blurry, repeated, or unnatural patch.
When practicing How To Retouch Skin In Snapseed Guide For Beginners, try to imagine the tool as a tiny cloning stamp. If the surrounding area has a uniform texture, like a smooth forehead or cheek, the Healing Tool works flawlessly. If you brush over an area with complex texture, such as where skin meets hair, the result will look messy. The secret to a beautiful final image, even for a simple guide like How To Retouch Skin In Snapseed Guide For Beginners, is always starting with meticulous spot removal.
Common Mistakes and Advanced Healing Tips for Beginners
Many people who start learning How To Retouch Skin In Snapseed Guide For Beginners make the common mistake of over-using the Healing Tool. They try to “smooth” the skin using it, which is the wrong approach. The Healing Tool is for removal, not texture refinement.
Mistake 1: Large Swipes. If you swipe a big area, the tool averages the texture, creating a noticeable, flat, and blurry patch—the opposite of a natural look. Instead, use a series of small, overlapping taps or short strokes.
Mistake 2: Missing the Edges. When removing a prominent spot, ensure you “heal” all the way around its edges. Often, the resulting patch is clean, but a faint, blurry halo remains right where the original blemish was. Zoom in to detect these subtle artifacts.
Advanced Tip: Fixing ‘Hot Spots’. Sometimes, harsh studio lighting or sunlight can create a bright, shiny ‘hot spot’ on the forehead or nose. While not a blemish, this can be distracting. You can lightly tap or brush these tiny, overly bright areas. The Healing Tool samples the slightly darker, surrounding skin, which subtly reduces the intense reflection, creating a more even skin tone. This is an excellent technique for learning How To Retouch Skin In Snapseed Guide For Beginners and moving beyond basic spot removal.
Ultimately, the best advice for mastering How To Retouch Skin In Snapseed Guide For Beginners using the Healing Tool is to know when to stop. Your goal is not to eliminate every single pore or freckle, but only the temporary imperfections.
Step 2: The Art of Subtlety with the Portrait Tool
Once the initial cleanup is complete, the next logical step in learning How To Retouch Skin In Snapseed Guide For Beginners is moving to the general enhancements. The Portrait Tool is Snapseed’s built-in feature designed specifically to improve facial features gracefully and quickly. This tool has multiple adjustments bundled into one, but we will focus on the two settings most vital for skin: Skin Smoothing and Face Spotlight.
If you look at professional retouched images, you will notice that the texture is often even, but still present. This balance is what the Portrait Tool helps you achieve. Understanding the nuances of this tool is fundamental to any comprehensive How To Retouch Skin In Snapseed Guide For Beginners.
Dialing in Skin Smoothing for a Natural Look
The Skin Smoothing feature within the Portrait Tool is what most beginners are looking for when they ask How To Retouch Skin In Snapseed Guide For Beginners. It uses sophisticated processing to selectively blur or reduce noise in skin tones while trying to preserve details like eyes, hair, and edges.
Process for Perfect Smoothing:
- Select ‘Portrait’: Open the ‘Tools’ menu and choose the ‘Portrait’ option.
- Select Style: Snapseed offers various styles (e.g., ‘Smooth 2’, ‘Pop’, ‘Brighter’). For a natural skin retouch, start with the ‘Smooth’ or ‘Smooth 2’ style as a baseline.
- Adjust ‘Skin Smoothing’: Swipe vertically to select the ‘Skin Smoothing’ parameter, then swipe horizontally to adjust the intensity.
- Low (1-30): Ideal for already good skin or if your portrait is very high-resolution and you want to keep maximum texture.
- Medium (30-60): The sweet spot for most casual portraits where you want a noticeable but still natural effect.
- High (60+): Should be used sparingly, as it quickly leads to the ‘plastic skin’ look, which is what we want to avoid in a guide like How To Retouch Skin In Snapseed Guide For Beginners.
A key concept when using the Skin Smoothing setting is to always check the ‘before and after’ (by tapping and holding the image). You should barely notice the smoothing at first glance. If the skin looks dramatically different, you have gone too far. Subtlety is the golden rule when learning How To Retouch Skin In Snapseed Guide For Beginners. Consider this smoothing as a way to minimize large variations in skin color and tone, not as a complete texture removal.
Face Spotlight for Adding Dimension and Glow
The second powerful feature in the Portrait Tool is Face Spotlight. This is an absolute game-changer for those learning How To Retouch Skin In Snapseed Guide For Beginners because it addresses the lighting and dimension of the face.
What Face Spotlight Does: It selectively brightens the face area—the central focal point of a portrait—while often darkening the surrounding background or less important details. This immediately draws the viewer’s eye to the subject and makes the face appear more vibrant and three-dimensional.
Why it’s crucial for skin retouching: A slight brightness boost can make the skin look healthier, younger, and more luminous. It counteracts the dulling effect that can sometimes happen when photos are taken in low light or with a flat camera flash.
- Adjustment Range: Just like with smoothing, less is more. Adjust the Face Spotlight slider by swiping horizontally. An increase between 10 and 20 is usually all you need to add a beautiful, natural pop.
The Power of Contrast: By making the face slightly brighter and the background subtly darker, you increase the subject’s separation from the environment. This technique is known as vignetting* and is essential for dynamic portraits.

If you combine controlled blemish removal, a subtle skin smoothing, and a touch of Face Spotlight, you have successfully mastered the primary goal of How To Retouch Skin In Snapseed Guide For Beginners: making your portrait look polished, not processed. Many professional editors follow this simple three-part formula for their initial pass on a portrait, proving that even a complex task like skin retouching can be simplified for beginners.
Step 3: Global Color and Light Adjustments for Skin Tone
A complete skin retouch isn’t just about texture; it’s also about color and light. After you’ve utilized the Portrait Tool, you must step back and look at the overall image. Skin color is highly dependent on the overall color balance of the photo. Therefore, the next stage in this extensive How To Retouch Skin In Snapseed Guide For Beginners involves refining the image’s global settings.
The key tools here are Tune Image and White Balance.
Fine-Tuning Skin Tone with White Balance
Skin tones often look “off” because the camera misinterprets the lighting condition. A portrait taken indoors under incandescent light might have an orange cast, making the skin look warm or sickly, while a picture taken in the shade might have a blue cast, making the skin look cool and pale. Correcting this is a vital part of learning How To Retouch Skin In Snapseed Guide For Beginners.
White Balance Correction Steps:
- Select ‘White Balance’: Open the ‘Tools’ menu and choose ‘White Balance’.
- Use the Eyedropper (Auto): Snapseed has a convenient eyedropper tool. Tap on a neutral gray or white area in the image (like a white shirt or a patch of white wall). The app automatically adjusts the temperature and tint to neutralize that spot, often correcting the skin tone instantly.
- Manual Adjustments (Temperature & Tint): If the auto-correction is not perfect, you can manually slide the Temperature (for blue/orange balance) and the Tint (for green/magenta balance).
- Too Blue/Cool: Increase the Temperature (slide right toward Orange).
Too Green: Increase the Tint (slide right toward Magenta). This is essential for correcting the green cast from fluorescent lights.*
A beautifully balanced skin tone makes the retouching effort look far more professional. If the initial image is poor, no amount of spot healing or smoothing will save it. That’s why every good tutorial on How To Retouch Skin In Snapseed Guide For Beginners includes this essential color-correction step. The goal is a healthy, realistic skin color that complements the subject’s natural features.
Utilizing Ambience and Saturation in Tune Image
After White Balance is set, the Tune Image tool is the final stop for global refinement. For skin retouching, two settings here are particularly useful: Ambience and a slight adjustment to Saturation.
The Magic of Ambience:
Ambience is a unique Snapseed slider that intelligently adjusts contrast and saturation across the image, primarily affecting midtones (which include most skin tones).
- Small Increase (5-15): A slight positive adjustment to Ambience can beautifully lift the shadows in the face, revealing hidden detail and adding depth without blowing out the highlights. It makes the skin appear less flat. This is a subtle yet powerful technique in any serious How To Retouch Skin In Snapseed Guide For Beginners.
Saturation (The Cautionary Tale):
Too much saturation can make skin look garish, artificial, and overly red or yellow. However, a slight adjustment can add a healthy warmth, especially after a cool White Balance correction.
Small Decrease (-5 to -10): If your subject naturally has a lot of redness in their skin, a slight decrease* in saturation can help subdue the excessive red and yellow tones, leading to a calmer, more even complexion.
- Small Increase (+5 to +10): If the skin looks dull, a tiny boost can bring back some healthy color.
Remember, the success of your final portrait—the ultimate proof that you’ve mastered How To Retouch Skin In Snapseed Guide For Beginners—rests on these subtle, global adjustments. They ensure that your beautifully retouched skin doesn’t look like it was pasted onto a dull or poorly colored background.
Step 4: The Finishing Touches and Detail Preservation
We’ve removed spots, smoothed textures, brightened the face, and corrected the color. The final stage of learning How To Retouch Skin In Snapseed Guide For Beginners involves critical finishing touches that ensure the overall image quality is high and that the natural essence of the person remains.
Bringing Back Detail with the Details Tool (Structure & Sharpening)
Heavy skin smoothing, while effective, can sometimes unintentionally soften important areas like the eyes, lips, and hair. A high-quality image relies on crisp, focused detail in these areas. This is why the Details tool is the final, targeted step.
Sharpening vs. Structure:
- Sharpening: This tool increases contrast along edges, which can be useful for making eyes pop. However, too much sharpening can introduce grain or ‘digital noise’ into the skin, undoing all your smoothing work. Use this sparingly, or not at all on skin areas.
- Structure: This is a much better choice for portraits. Structure enhances micro-contrast, making textures appear more defined.
The Magic of Selective Sharpening:
The best way to use the Details tool is selectively. After applying a small global increase (e.g., +10 to +15) in Structure, go to the View Edits menu (the stack icon) and select the Details tool. You can now use a Brush to apply the effect only to the eyes, eyebrows, and lips, while leaving the delicate, smoothed skin untouched. This selective application ensures the face maintains its soft, retouched quality while the important features remain sharp and engaging. This technique separates a basic beginner from someone who truly understands How To Retouch Skin In Snapseed Guide For Beginners.
The Final Review: How to Avoid the ‘Plastic’ Look
The biggest fear and pitfall for anyone who is learning How To Retouch Skin In Snapseed Guide For Beginners is creating a portrait that looks fake, artificial, or “plastic.” This is generally caused by applying tools too heavily, especially Skin Smoothing and Healing.
Here are the final checkpoints before saving your masterpiece:
- Check the Edges: Zoom in and examine the area where the retouched skin meets the hair or clothing. If the line is unnaturally sharp or there is a noticeable halo, you have over-smoothed the skin.
- Examine the Nose and Forehead: These areas naturally have subtle variations in tone and light. If they are perfectly flat and smooth, reduce the Skin Smoothing intensity. Natural skin has texture; your goal is refinement, not erasure.
- Compare Before and After: Tap and hold the image to see the original. The change should be positive, subtle, and an improvement in clarity and warmth, not a dramatic transformation into a different person. A great How To Retouch Skin In Snapseed Guide For Beginners emphasizes that the subject should still look like themselves, just on a very good day!
Case Study and Analogy: Thinking Like a Makeup Artist
To truly grasp How To Retouch Skin In Snapseed Guide For Beginners, imagine you are not a photo editor but a professional makeup artist.
- The Healing Tool is like a Precision Concealer. You are only targeting tiny spots (a zit, a mole, a small scratch) that you want to completely hide. You wouldn’t use concealer over the entire face; you use it only where needed.
- The Portrait Tool (Skin Smoothing) is like Light Foundation or Setting Powder. This is applied evenly and lightly over the entire face to create a uniform canvas, smooth out minor texture differences, and reduce shine, all while letting the natural features peek through.
- The Portrait Tool (Face Spotlight) is like Highlighting/Contouring. It subtly brightens specific areas (cheekbones, nose bridge, forehead) to add dimension and attract light, making the skin look radiant and healthy.
- The Details Tool is like applying Mascara and Lip Gloss. It sharply defines the eyes and lips, which are the main focal points, ensuring they stand out against the smooth canvas of the skin.
By adopting this mindset, you realize that successful skin retouching is a multi-layered process of subtle refinement applied with precision, which is the core principle behind this complete How To Retouch Skin In Snapseed Guide For Beginners. When you master these layers, the resulting portrait will feel incredibly natural and vibrant. This comprehensive How To Retouch Skin In Snapseed Guide For Beginners ensures you are well-equipped to produce high-quality, professional-looking images. Mastering How To Retouch Skin In Snapseed Guide For Beginners means mastering the art of non-destructive, beautiful enhancement.
In conclusion, knowing How To Retouch Skin In Snapseed Guide For Beginners is an invaluable skill in the world of mobile photography. It’s not about transforming reality but about presenting the best version of your subject through careful, precise, and subtle digital refinement. Every time you open the app to edit a portrait, remember the formula: heal, smooth, brighten, color-correct, and sharpen selectively. With practice, the steps outlined in this detailed How To Retouch Skin In Snapseed Guide For Beginners will become second nature, allowing you to create stunning, natural-looking images every time.
—
Frequently Asked Questions (FAQ)
What is the best Snapseed tool for removing blemishes?
The Healing Tool is the definitive choice in Snapseed for removing blemishes, acne, spots, or any unwanted, temporary imperfection on the skin. You simply zoom in close to the spot and tap it with your finger; the tool will sample the surrounding good skin texture and seamlessly blend it over the blemish. This precise control is the most effective first step for anyone learning How To Retouch Skin In Snapseed Guide For Beginners.
Does Snapseed make the skin look plastic?
Snapseed will only make the skin look “plastic” or artificial if the Skin Smoothing slider in the Portrait Tool is pushed too high, or if the Healing Tool is used incorrectly over large areas instead of just small spots. The key to avoiding the plastic look, as emphasized in this guide on How To Retouch Skin In Snapseed Guide For Beginners, is to keep the Skin Smoothing intensity below 60 and always preserve a subtle amount of natural skin texture.
How do I brighten the face in a portrait using Snapseed?
You can brighten the face in Snapseed using two main methods:
- Portrait Tool: Use the Face Spotlight slider to selectively brighten the face area. This is the most intelligent way because it leaves the background largely untouched.
- Selective Tool: Use the Selective tool to place a control point (the ‘B’ for Brightness) directly on the face and increase its brightness locally. This manual method gives you granular control over where the light is added.
Is the Snapseed app free to use for skin retouching?
Yes, the Snapseed app is completely free to download and use on both iOS and Android devices. All the powerful tools mentioned in this guide, including the Healing Tool, Portrait Tool, and Tune Image, are available for free, making it the best free application for anyone wanting to learn How To Retouch Skin In Snapseed Guide For Beginners.