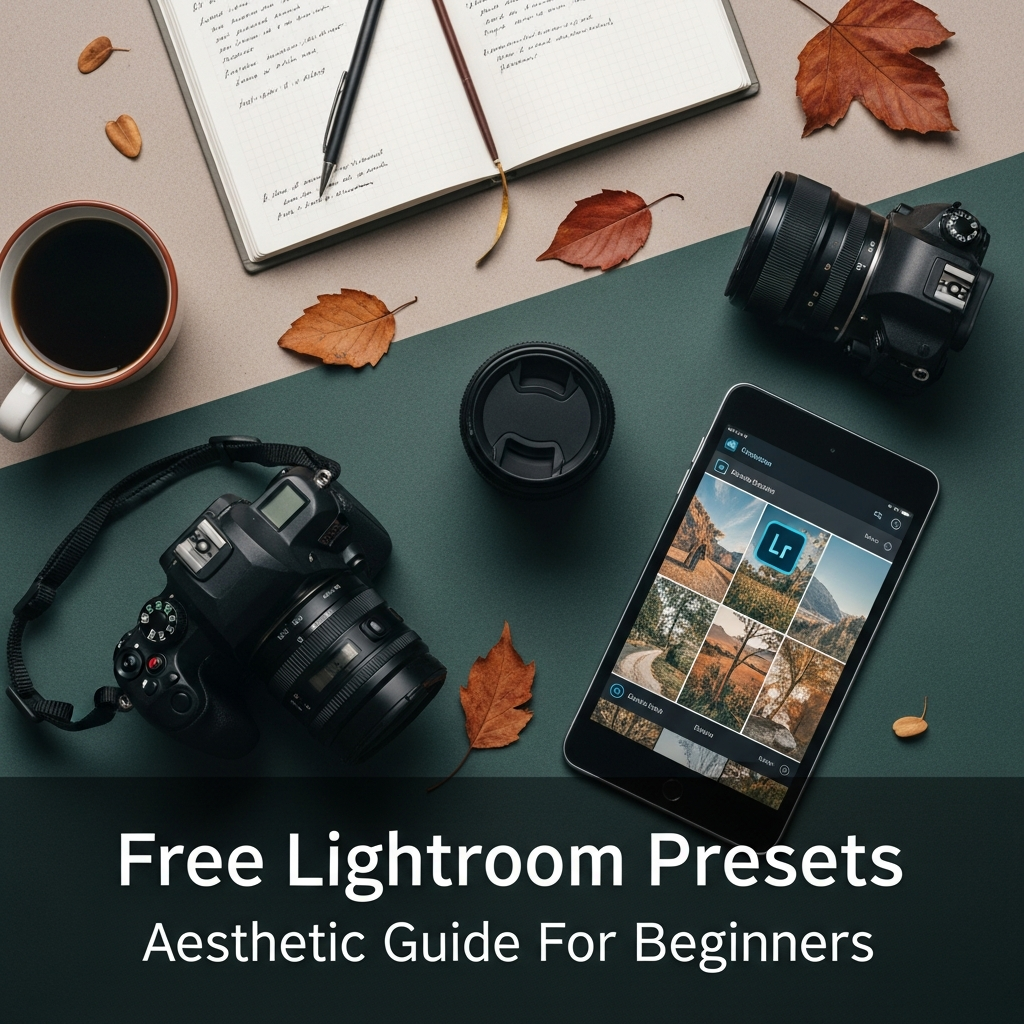
Free Lightroom Presets Aesthetic Guide For Beginners: Transform Your Photos Instantly
In the modern digital landscape, visual storytelling has become the universal language of the internet. Whether you are an aspiring influencer, a small business owner, or simply someone who wants to make their vacation photos look spectacular, the art of photo editing is an essential skill. However, professional editing can often feel intimidating for those just starting out. This is where free Lightroom presets aesthetic tools come into play, serving as the ultimate bridge between amateur snapshots and professional-grade photography.
Adobe Lightroom has long been the industry standard for color grading and image enhancement. While the software offers powerful manual controls, presets allow you to apply complex adjustments with a single click. In this comprehensive guide, we will explore everything you need to know about using free Lightroom presets to achieve a cohesive, professional aesthetic for your personal or professional brand.
What Exactly Are Lightroom Presets?
Before diving into the technicalities, it is crucial to understand what a preset actually is. Think of a Lightroom preset as a sophisticated “filter,” but with a major difference. While standard social media filters often degrade image quality or apply a “one-size-fits-all” mask, a preset is a collection of specific settings saved within Lightroom.
When you apply a free Lightroom preset aesthetic, the software automatically adjusts various parameters, including:
- Exposure and Contrast: Managing the brightness and dynamic range.
- White Balance: Adjusting the temperature (warmth) and tint.
- HSL (Hue, Saturation, and Luminance): Fine-tuning individual colors.
- Tone Curves: Controlling the highlights, shadows, and midtones.
- Detail and Grain: Adding sharpness or a vintage film texture.
Because these are non-destructive adjustments, you can see exactly what changes were made and tweak them to fit your specific photo perfectly.
Why Beginners Should Use Free Aesthetic Presets
The learning curve for Adobe Lightroom can be steep. For a beginner, staring at dozens of sliders like “Dehaze,” “Clarity,” or “Point Curve” can be overwhelming. Here is why starting with presets is a strategic move:
1. Speed and Efficiency
Manual editing can take anywhere from ten minutes to an hour per photo. Presets allow you to batch-edit hundreds of photos in seconds, ensuring you spend less time behind a screen and more time behind the lens.
2. Educational Value
Presets are a fantastic learning tool. By applying a preset and then looking at the “Develop” module, you can see exactly how a professional photographer manipulated the sliders to achieve a certain look. It is like having a roadmap for color grading.
3. Visual Consistency
If you are building an Instagram feed or a portfolio, consistency is key. Using a consistent free Lightroom presets aesthetic ensures that all your images share a similar color palette and mood, which is essential for branding.
Understanding the Different File Formats: DNG vs. XMP
As you begin your journey, you will encounter two main types of preset files. Knowing the difference is vital for a smooth installation process.
- DNG Files (Mobile Presets): These are “Digital Negative” files. They are essentially photos that carry the preset data within them. These are primarily used for the Lightroom Mobile app (iOS and Android).
- XMP Files (Desktop Presets): This is the modern standard for Lightroom Classic and Lightroom CC on desktop. They are small data files that tell the software how to adjust the sliders.
- lrtemplate Files: These are older versions of desktop presets. While they still work, most modern creators have transitioned to XMP.
How to Find High-Quality Free Lightroom Presets Aesthetic
The internet is flooded with “free” offers, but not all presets are created equal. Some can make your photos look “muddy” or distorted. To find the best aesthetic presets, look for creators who offer:
- Before and After Previews: So you can see the effect on different skin tones and lighting conditions.
- Specific Styles: Such as “Dark & Moody,” “Bright & Airy,” “Vintage Film,” or “Cinematic.”
- Safe Downloads: Always download from reputable photography blogs or established marketplaces to avoid malware.
Step-by-Step Guide: How to Install Free Lightroom Presets
The installation process varies depending on whether you are using a smartphone or a computer. Follow these steps carefully.
Installing Presets on Lightroom Mobile (DNG Method)
- Download the DNG File: Save the free preset file to your phone’s camera roll or files app.
- Import to Lightroom: Open the Lightroom Mobile app and click “Add Photos.” Select the DNG file you just downloaded.
- Open the Image: The DNG file will look like a normal photo, often with “Preset” written on it.
- Copy Settings or Create Preset: Tap the three dots (…) in the top right corner. Select “Create Preset.”
- Name Your Preset: Give it a name (e.g., “Warm Summer Glow”) and save it to a preset group.
- Apply to Your Photos: Open any of your own photos, scroll the bottom toolbar to “Presets,” and find your newly saved aesthetic.
Installing Presets on Lightroom Desktop (XMP Method)
- Download and Unzip: Most desktop presets come in a .zip folder. Extract them first.
- Open Lightroom: Launch Lightroom Classic or Lightroom CC.
- Go to the Develop Module: (In Classic) or the Edit panel (in CC).
- Open the Presets Panel: On the left side (Classic) or right side (CC), find the “Presets” section.
- Import: Click the “+” icon and select “Import Presets.”
- Select Files: Navigate to your unzipped XMP files and click “Import.” They will now appear in your library.
Top 5 Popular Aesthetic Styles for Beginners
If you are unsure which “vibe” to go for, here are the most trending free Lightroom presets aesthetic styles currently dominating the digital space:
1. The “Bright and Airy” Look
Characterized by high exposure, low contrast, and desaturated warm tones. This is perfect for wedding photography, lifestyle content, and interior design. It makes spaces look larger and cleaner.
2. The “Dark and Moody” Aesthetic
This style focuses on deep shadows, rich textures, and desaturated greens and blues. It is ideal for forest photography, coffee shop shots, and emotional portraits. It adds a sense of mystery and depth.
3. The “Vintage Film” (Analog) Style
Inspired by Kodak and Fujifilm stocks, this aesthetic adds a slight grain, faded blacks (crushed blacks), and a shift toward teal and orange or warm yellow tones. It creates a nostalgic, timeless feeling.
4. The “Minimalist/Clean” Preset
This style focuses on true-to-life colors but with enhanced clarity and neutralized white balance. It is the “no-makeup makeup” look of photo editing—making the photo look better without looking “edited.”
5. The “Cinematic Teal and Orange”
A staple in Hollywood, this aesthetic plays with complementary colors. It pushes shadows toward teal and skin tones toward orange, creating a high-contrast, professional movie look.
Pro Tips for Customizing Your Presets
A common mistake beginners make is thinking a preset is a “one-click” solution. In reality, every photo is taken under different lighting conditions. To make a free Lightroom preset aesthetic work for you, you must learn to “tweak” it.
Adjusting Exposure First
The most common reason a preset looks “bad” is that the original photo was either too bright or too dark. After applying a preset, always go to the Light panel and adjust the Exposure slider first.
Fixing Skin Tones with HSL
If a preset makes skin look too orange or red, go to the Color or HSL panel. Select Orange, and adjust the Saturation (down) or Luminance (up) to make the skin look more natural.
Correcting White Balance
If your photo looks too blue (cold) or too yellow (warm), use the Temp slider. A preset might have been designed for a sunset, but if you apply it to a cloudy day photo, you will need to manually warm it up.
The Importance of Shooting in RAW
While presets work on JPEG files (standard phone photos), they perform significantly better on RAW files. RAW files contain much more data in the shadows and highlights. Most modern smartphones (like iPhone Pro models or high-end Androids) now allow you to shoot in RAW. Using a free Lightroom preset aesthetic on a RAW file allows for much smoother color transitions and prevents “banding” in the sky or shadows.
Common Mistakes to Avoid as a Beginner
- Over-Processing: It is tempting to crank the “Clarity” or “Saturation” to 100. Avoid this. Subtle edits usually look more professional.
- Ignoring the Histogram: Keep an eye on the graph at the top. If the graph is touching the far right, you are losing detail in the highlights (clipping).
- Applying the Same Preset to Everything: Not every preset works for every photo. A “Beach” preset will likely look terrible on a “Night City” photo.
- Forgetting the “Crop” Tool: Sometimes the best “edit” is simply a better crop. Use the “Rule of Thirds” to guide the viewer’s eye.
How to Organize Your Preset Library
As you collect more free Lightroom presets aesthetic, your library can become cluttered.
- Create Folders: Group them by style (e.g., “Portrait,” “Landscape,” “Vintage”).
- Favorite the Best: Use the “star” or “favorite” feature for the 5-10 presets you use most often.
- Delete the Fluff: If a preset never looks good on your photos, delete it. Quality over quantity is vital.
Creating Your Own “Signature” Aesthetic
Once you have experimented with free presets, you might find yourself making the same adjustments over and over. This is the moment to create your own signature look.
- Apply a free preset as a base.
- Adjust the sliders until it fits your unique style.
- Click “Create Preset” and name it after yourself or your brand.
Now, you have a unique aesthetic that no one else has!
Conclusion: Start Your Creative Journey Today
Using free Lightroom presets aesthetic is not “cheating”—it is utilizing a powerful tool to enhance your creative vision. It allows you to bypass the technical frustrations of software and focus on what matters most: the story within the frame.
As you grow as a photographer, you will find that presets are just the beginning. They provide the foundation upon which you will build your own unique style. Download a few packs, experiment with the sliders, and most importantly, have fun with the process. Your perfect aesthetic is just a few clicks away.
Frequently Asked Questions (FAQ)
Q1: Are free Lightroom presets safe to download?
Yes, as long as you download them from reputable photography websites or well-known creators. Avoid sites that look suspicious or ask for unnecessary personal information.
Q2: Do I need a paid Lightroom subscription to use presets?
No! You can use the Lightroom Mobile app for free on iOS and Android. You only need a subscription for premium features like the healing brush, masking, or syncing across desktop and mobile.
Q3: Can I use mobile presets on my desktop?
Generally, yes. If you have a Creative Cloud subscription, presets synced on your mobile app will appear on your desktop. Additionally, DNG files can be imported into the desktop version and saved as presets.
Q4: Why does the preset look different on my photo than in the preview?
Presets are highly dependent on the original lighting, camera settings, and colors of the photo. You will almost always need to make minor adjustments to Exposure and White Balance after applying a preset.
Q5: What is the best aesthetic for Instagram?
Currently, “Minimalist,” “Vintage Film,” and “Moody Muted” tones are very popular. However, the best aesthetic is one that consistently represents your personality or brand.
Q6: Can I use these presets on videos?
In the latest versions of Lightroom (Mobile and Desktop), you can actually apply presets to video clips! This is a game-changer for creating aesthetic Reels or TikToks with the same look as your photos.