Aesthetic Pencil Sketch Inspiration: A Complete Guide for Beginners to Master the Art of Graphite
The world of art often seems daunting to those standing on the outside looking in. However, the humble pencil remains one of the most accessible and versatile tools for self-expression. Whether you are looking to decorate your journal, create personalized gifts, or embark on a professional journey, finding the right aesthetic pencil sketch inspiration is the first step toward creative fulfillment.
In this comprehensive guide, we will explore the nuances of graphite art, from selecting the right tools to mastering advanced shading techniques. By the end of this pillar post, you will possess a clear roadmap to transform a blank page into a masterpiece that resonates with your personal aesthetic.
Understanding the “Aesthetic” in Pencil Sketching
The term “aesthetic” has evolved significantly in the digital age. In the context of pencil sketching, it refers to a visual style that is pleasing, harmonious, and often evokes a specific mood—be it minimalist, vintage, or hyper-realistic.
For a beginner, achieving an aesthetic look isn’t just about technical perfection; it is about the intentional use of lines, shadows, and negative space. An aesthetic sketch often tells a story or captures a fleeting emotion through the subtle interplay of graphite and paper.
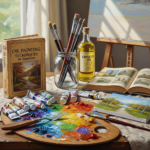
Essential Tools: Building Your Beginner Sketching Kit
Before diving into inspiration, you must understand your instruments. You do not need an expensive studio, but the quality of your materials will significantly impact your progress.
1. The Graphite Pencil Hierarchy
Pencils are categorized by their hardness and blackness. Understanding this is crucial for aesthetic pencil sketch inspiration:
- H Series (Hard): These produce light, thin lines. Ideal for initial outlines and technical layouts.
- B Series (Black/Soft): These are darker and softer. A 2B or 4B is perfect for general sketching, while 6B to 9B are used for deep, dramatic shadows.
- HB Pencil: The middle ground, similar to a standard school pencil, used for basic sketching.
2. Choosing the Right Paper
The “tooth” or texture of the paper determines how the graphite adheres. For a smooth, aesthetic finish, look for Bristol board or high-quality sketching paper with a weight of at least 100gsm. Textured paper (cold press) is better for expressive, charcoal-like effects.
3. Erasers and Blending Tools
- Kneaded Eraser: This is a must-have. It can be molded into any shape to “pick up” graphite without damaging the paper, perfect for creating highlights.
- Blending Stumps (Tortillions): These allow you to smudge graphite smoothly, creating those soft, ethereal gradients common in aesthetic art.
Fundamental Techniques Every Beginner Should Practice
To turn your pencil sketch inspiration into reality, you must master the mechanics of the hand.
The Power of Pressure Control
The most common mistake beginners make is pressing too hard. Practice drawing a long gradient bar, starting from the lightest touch possible and gradually increasing pressure until you reach the pencil’s maximum darkness. This control is what creates depth in your artwork.
Shading Methods for Depth
- Hatching: Drawing parallel lines closely together.
- Cross-Hatching: Layering parallel lines at different angles to create density.
- Stippling: Using small dots to create value; very effective for minimalist aesthetic sketches.
- Circulism: Drawing tiny, overlapping circles to create a skin-like texture or soft shadows.
15+ Aesthetic Pencil Sketch Inspiration Ideas for Beginners
If you are staring at a blank page, here are several themes categorized by their difficulty and visual impact.
1. Botanical and Floral Minimalist Art
Flowers are a staple of aesthetic art. Instead of drawing a full bouquet, focus on a single minimalist sprig of lavender or a delicate eucalyptus leaf. Focus on the organic curves and the way the light hits the petals.
2. The “Window to the Soul”: Eyes
Sketching a single eye is a classic beginner exercise. It allows you to practice different textures: the wetness of the cornea, the fine lines of the eyelashes, and the soft skin of the eyelids.
3. Celestial and Cosmic Elements
Combine crescent moons, stars, and clouds. This style often uses a “dreamy” aesthetic, where you can practice blending techniques to create soft, glowing edges around the moon.
4. Architectural Details
Instead of a whole building, sketch a vintage doorway or a cozy window with a small plant on the sill. This helps you understand perspective and the geometry of man-made objects.
5. Still Life: Everyday Objects
Find beauty in the mundane. A crumpled coffee cup, a pair of worn-out sneakers, or a stack of old books. These objects provide excellent practice for capturing folds, shadows, and varied textures.
6. Minimalist Line Portraits
Try drawing a face using as few lines as possible. This “one-line” or minimalist style is incredibly popular in modern aesthetic decor. It teaches you to identify the most important features of a subject.
7. Hands in Motion
Hands are notoriously difficult, but they are incredibly expressive. Try sketching hands holding a flower, a cup, or touching fingertips. Use reference photos to understand the bone structure.
8. Wildlife Silhouettes
Draw the silhouette of a deer or a bird, but fill the inside with a different scene, like a forest or a starry night. This “double exposure” look is a hallmark of creative pencil art.
Step-by-Step Guide: Creating Your First Aesthetic Sketch
Follow this process to ensure your drawing remains clean and professional.
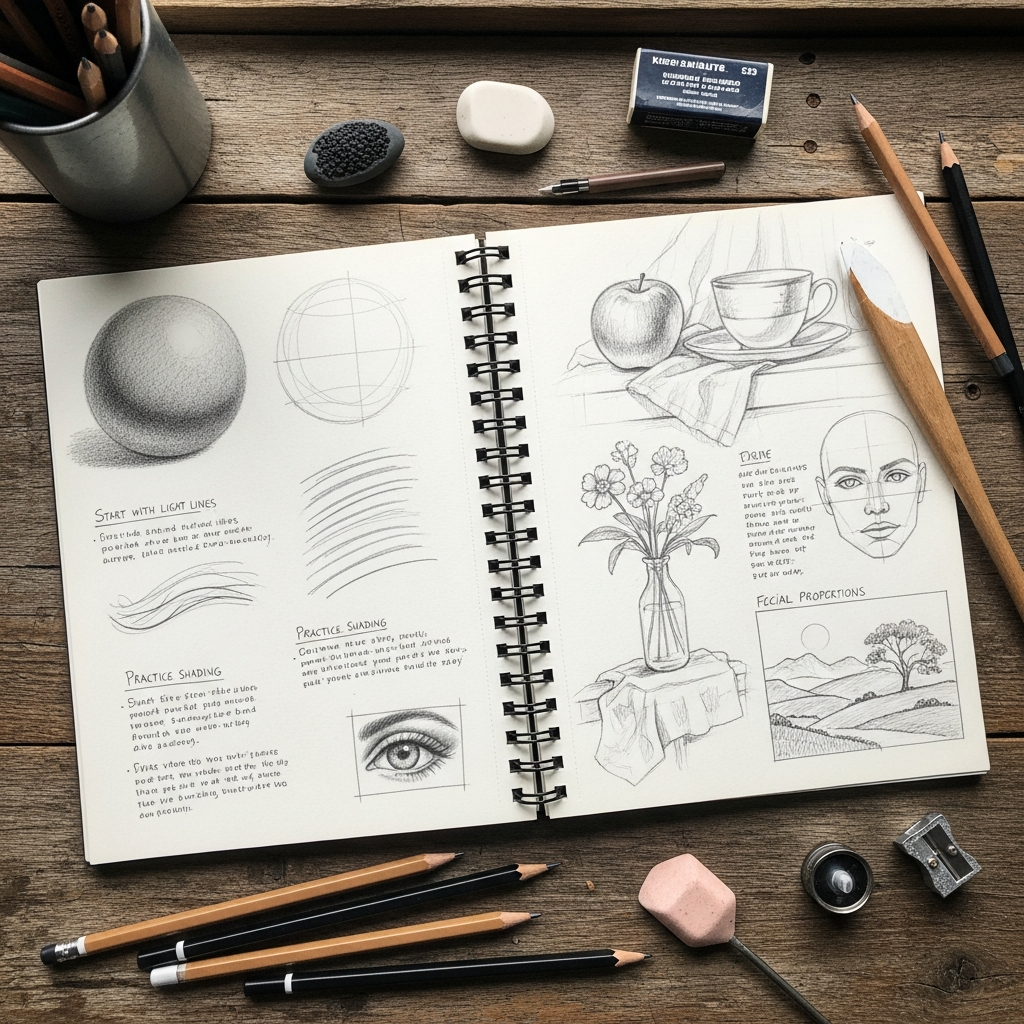
Step 1: Light Sketching (The Ghost Image)
Using a 2H or HB pencil, lightly map out the basic shapes. Do not worry about details yet. Focus on composition and proportions. If you are drawing a flower, draw circles for the head and lines for the stem.
Step 2: Defining the Outlines
Once the proportions are correct, use a slightly darker pencil (like a B) to define the actual edges. Keep your lines confident but fluid.
Step 3: Identifying the Light Source
Before you shade, decide where the light is coming from. Mark a small “X” outside your drawing area to remind yourself. This ensures that your shadows are consistent across the entire sketch.
Step 4: Layering Values
Start with the lightest shadows first. Use your blending stump to soften the graphite. Gradually add darker layers (4B or 6B) in the deepest crevices. Remember: You can always add more graphite, but it is harder to remove it.
Step 5: Adding Highlights
Use your kneaded eraser to “draw” the light back into the sketch. Dab it on the areas where the light hits most directly—the tip of a nose, the edge of a leaf, or the spark in an eye.
Expert Tips for Developing Your Own Artistic Style
Finding your unique voice takes time. Here is how to accelerate that process:
- Keep a Daily Sketchbook: Consistency is more important than talent. Even 15 minutes a day will yield massive improvements in 30 days.
- Limit Your Palette: Sometimes, using only one type of pencil (e.g., just a 2B) forces you to be more creative with pressure and texture.
- Study the Masters: Look at the works of Leonardo da Vinci or modern graphite artists on social media. Analyze how they handle “lost and found” edges—where a line seems to disappear into the background.
- Don’t Fear Mistakes: An “aesthetic” sketch often embraces imperfections. A smudge or an asymmetrical line can add character and a “human” feel to your work.
How to Preserve and Showcase Your Pencil Sketches
Graphite is prone to smudging. Once you have finished your masterpiece:
- Use a Fixative Spray: A professional fixative (or even a light mist of unscented hairspray) will “lock” the graphite onto the paper.
- Use Glassine Paper: If you are keeping sketches in a book, place a sheet of glassine or wax paper between pages to prevent transfer.
- Digital Archiving: Take a high-resolution photo in natural, indirect light. Use basic editing apps to increase the contrast, making the whites whiter and the blacks deeper for a social-media-ready aesthetic.
Frequently Asked Questions (FAQ)
Q: Which pencil is best for a complete beginner?
A: An HB, 2B, and 4B set is the perfect starting point. These three will allow you to cover almost the entire range of values needed for a standard sketch.
Q: Why does my shading look “muddy” or dirty?
A: Muddy shading usually happens when you over-blend or use your fingers to smudge. Fingers contain oils that trap graphite and make it look dull. Always use a blending stump or a clean tissue.
Q: How do I stop my hand from smudging my work?
A: Place a clean piece of scrap paper under your hand while you work. This acts as a barrier between your skin and the drawing.
Q: Can I learn to sketch if I have no natural talent?
A: Absolutely. Drawing is a mechanical skill that involves hand-eye coordination. Like typing or driving, it can be learned through repetition and understanding the “rules” of light and shadow.
Conclusion
Embarking on a journey into aesthetic pencil sketch inspiration is a rewarding endeavor that sharpens your observation skills and provides a much-needed mental escape. By starting with the right tools, mastering basic shading, and consistently practicing with various themes, you will soon find your unique artistic rhythm.
Remember, every expert was once a beginner who refused to give up. Pick up your pencil, find a quiet corner, and let your creativity flow onto the paper. Your first aesthetic masterpiece is only a few strokes away.