Aesthetic Pencil Sketch Inspiration Guide For Beginners: Master the Art of Graphite
The world of art often feels intimidating to those standing on the outside, yet the humble pencil remains one of the most accessible and profound tools for self-expression. If you have ever felt a surge of inspiration while looking at a minimalist drawing or a moody, shaded portrait, you are experiencing the power of the “aesthetic” movement in pencil art. This aesthetic pencil sketch inspiration guide is designed to transform your curiosity into competence, providing you with the roadmap needed to start your artistic journey today.
In this comprehensive guide, we will explore the nuances of pencil sketching, from the basic tools you need to the advanced concepts of light and shadow. Whether you wish to fill a sketchbook for personal relaxation or share your creations on social media, understanding the fundamentals is the first step toward mastery.
Understanding the “Aesthetic” in Pencil Sketching
Before you sharpen your pencil, it is vital to understand what makes a sketch “aesthetic.” In the modern context, aesthetic art refers to a style that prioritizes visual harmony, mood, and a specific emotional resonance. It often leans toward minimalism, soft textures, and thoughtful compositions.
For a beginner, an aesthetic pencil sketch is not necessarily about hyper-realism. Instead, it is about capturing the essence of a subject—be it a delicate flower, a pair of eyes, or a quiet corner of a room—in a way that feels intentional and evocative.
The Essential Toolkit: Setting the Stage for Success
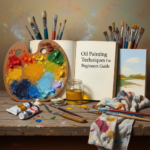
To follow this aesthetic pencil sketch inspiration guide, you do not need an expensive studio. However, using the right tools will significantly impact the quality of your work and your enjoyment of the process.
1. Graphite Pencil Grades
Not all pencils are created equal. Pencils are graded on a scale from H (Hard) to B (Black/Soft).
- H Pencils (9H to H): These produce light, thin lines. They are perfect for initial outlines and technical details.
- HB Pencil: The middle ground, similar to a standard school pencil.
- B Pencils (B to 9B): These are softer and darker. A 2B or 4B is essential for creating the deep shadows and rich textures characteristic of aesthetic sketches.
2. Quality Sketching Paper
The “tooth” or texture of the paper determines how the graphite adheres to the surface. For beginners, a medium-tooth sketchbook is ideal. It allows for both fine lines and smooth shading without the lead sliding off the page.
3. Erasers and Blending Tools
- Kneaded Eraser: This is a pliable tool that you can mold into any shape. It is used to “lift” graphite for highlights rather than just scrubbing it away.
- Blending Stumps (Tortillons): These are tightly rolled paper sticks used to smudge and blend graphite, creating the soft, dreamy transitions common in aesthetic art.
Fundamental Techniques for Aesthetic Sketches
To bring your aesthetic pencil sketch inspiration to life, you must master a few core techniques. These are the building blocks of every great drawing.
Line Quality and Variation
In aesthetic sketching, the line itself is a form of expression. Avoid “hairy” lines (many small, disconnected strokes). Instead, practice confident, continuous lines. Varying the pressure you apply to the pencil—making some lines thick and dark while others remain faint—adds depth and visual interest to a simple drawing.
The Value Scale
“Value” refers to the lightness or darkness of a color. In pencil sketching, your value scale ranges from the white of the paper to the deepest black your 8B pencil can achieve. Beginners should practice creating a 10-step value scale to understand how to transition smoothly between different tones.
Shading Methods
There are several ways to add volume to your sketches:
- Hatching: Drawing parallel lines close together.
- Cross-hatching: Layering parallel lines at different angles.
- Stippling: Using small dots to create texture and depth.
- Circulism: Moving the pencil in tiny, overlapping circles to create a smooth, skin-like texture.
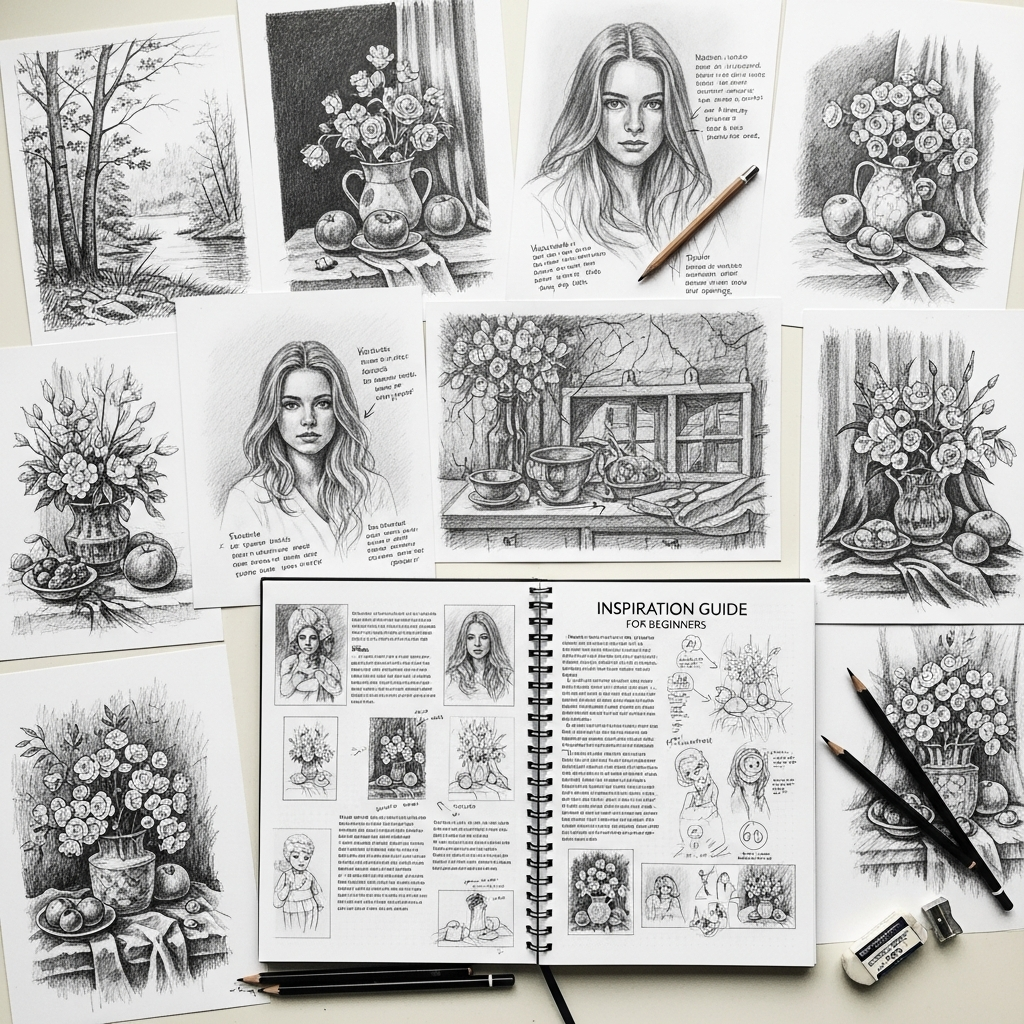
Finding Your Aesthetic Pencil Sketch Inspiration
The most common hurdle for beginners is the “blank page syndrome.” Where do you find ideas? This section provides specific themes to ignite your creativity.
1. Minimalist Botanical Sketches
Flowers and leaves are perfect for beginners because their organic shapes are forgiving. Focus on a single stem of lavender or a delicate eucalyptus leaf. Use thin, crisp lines for the edges and a soft 2B pencil for subtle shading where the leaves overlap.
2. Ethereal Portraits and Features
You do not need to draw a full face to create something beautiful. Focus on individual features. A single eye reflecting a landscape, or a pair of hands held in a graceful gesture, can be incredibly “aesthetic.” Pay close attention to the “catchlight” in the eyes—the small white dot that gives the drawing life.
3. Architectural and Urban Minimalism
Aesthetic sketches often find beauty in the mundane. A simple window with a lace curtain, a lonely streetlamp, or a stack of vintage books can make for a compelling subject. Use a ruler for the main structures but keep the shading soft to maintain a hand-drawn feel.
4. Celestial and Dreamy Imagery
The moon, stars, and clouds are staples of the aesthetic art world. Practice blending your graphite to create the soft, billowing edges of a cloud against a dark, night-sky background created with heavy cross-hatching.
Step-by-Step Guide: Creating Your First Aesthetic Sketch
Follow these steps to translate your aesthetic pencil sketch inspiration into a finished piece of art.
Step 1: Light Sketching (The Ghost Image)
Using an H or HB pencil, lightly map out the basic shapes of your subject. Do not worry about details yet. Focus on proportions and placement on the page. Keep your grip loose and your pressure light so you can easily erase mistakes.
Step 2: Refining the Outline
Once you are happy with the basic structure, use a slightly darker pencil (like a B) to define the final outlines. This is where you decide which lines are important and which should be left out to maintain a clean, aesthetic look.
Step 3: Establishing the Light Source
Identify where the light is coming from. Mark the brightest areas (highlights) and the darkest areas (shadows). This step is crucial for giving your drawing a three-dimensional appearance.
Step 4: Layering the Values
Start with your mid-tones. Use a blending stump to smooth out the graphite. Gradually add darker layers in the shadow areas using a 4B or 6B pencil. Remember, it is easier to add graphite than to remove it, so work in thin layers.
Step 5: Adding Highlights and Fine Details
Use your kneaded eraser to “pop” the highlights. This could be the shimmer on a lip or the edge of a leaf. Finally, use a sharpened H pencil to add any tiny details, like individual eyelashes or the veins in a petal.
Expert Tips to Elevate Your Pencil Art
To move from a beginner to an intermediate level, consider these professional insights:
- Embrace Negative Space: Sometimes, what you don’t draw is as important as what you do. Leaving large areas of the paper white can create a sense of calm and focus.
- Avoid Using Your Fingers to Blend: The oils on your skin can smudge the graphite in a way that makes it look “muddy” and difficult to erase. Always use a blending stump or a clean tissue.
- Check Your Proportions Frequently: Hold your sketch up to a mirror or take a photo of it with your phone. Seeing the image reversed or through a lens often reveals proportional errors you didn’t notice before.
- Practice “Blind Contour” Drawing: This involves looking only at your subject and not at your paper while you draw. It trains your eye-hand coordination and helps you see shapes more accurately.
Overcoming Creative Blocks
Even with an aesthetic pencil sketch inspiration guide, you might find days where the pencil feels heavy. When this happens:
- Change Your Environment: Move to a cafe, a park, or a different room.
- Set a Timer: Commit to drawing for just 10 minutes. Often, the hardest part is starting.
- Doodle Without Purpose: Forget about making something “good.” Just let the pencil move across the paper.
- Revisit Old Work: Look at your first sketches to see how far you have progressed. This can provide a much-needed boost in confidence.
Conclusion: Your Journey into Pencil Art
Pencil sketching is a journey of patience and observation. By following this guide, you have the foundational knowledge to begin exploring your own unique aesthetic. Remember that every master artist was once a beginner who refused to give up. Treat your sketchbook as a safe space for experimentation, mistakes, and growth.
As you continue to practice the techniques of shading, line variation, and composition, you will find that your ability to translate the world onto paper becomes more natural. Keep seeking inspiration in the small details of daily life, and let your pencil tell the story.
Frequently Asked Questions (FAQ)
What is the best pencil for a beginner’s aesthetic sketch?
For beginners, an HB pencil for outlines and a 2B or 4B pencil for shading are the most versatile choices. As you progress, you can expand your set to include a full range from 2H to 6B.
How can I make my pencil sketches look “cleaner”?
To keep your sketches clean, place a piece of scrap paper under your hand while drawing to prevent smudging. Use a kneaded eraser for precise corrections and avoid pressing too hard during the initial sketching phase.
Do I need to learn anatomy to draw aesthetic portraits?
While a basic understanding of proportions helps, aesthetic art often focuses on mood and style over perfect anatomical accuracy. Start by practicing individual features (eyes, lips, nose) before attempting a full portrait.
How long does it take to get good at pencil sketching?
Consistency is more important than the total amount of time. If you practice for 20-30 minutes every day, you will see significant improvement in your line control and shading within just a few weeks.
Can I use a regular school pencil for aesthetic sketching?
Yes, you can start with a standard #2 (HB) pencil. However, you will find it difficult to achieve deep shadows or soft blending. Investing in a small set of drawing pencils will greatly improve your results.