Night Photography Tips And Tricks Guide For Beginners
Venturing into the world of night photography unveils a breathtaking realm of stars, city lights, and illuminated landscapes that remain hidden during the day. For beginners, this specialized field might seem daunting, yet with the right knowledge and tools, capturing stunning images after dusk is entirely achievable. This comprehensive guide provides essential night photography tips and tricks to help you confidently navigate low-light conditions and produce captivating shots. Learning to adjust camera settings, master manual focus, and understand light will transform your nighttime vision into incredible photographs.

Embracing the Darkness: Why Night Photography?
Night photography is a unique genre that challenges photographers to see and interpret light in new ways. The absence of bright sunlight brings out details often overlooked, creating dramatic contrasts and a sense of mystery. From the serene glow of the moon to the vibrant streaks of city traffic, the night offers a canvas rich with potential. Many find the process deeply rewarding and soul-filling, capturing a sense of wonder that everyone feels when gazing at the night sky. It allows for creative experimentation with long exposures, revealing elements invisible to the naked eye. This unique experience makes understanding “Night Photography Tips And Tricks Guide For Beginners” invaluable.
Photography at night is not merely about capturing what’s there, but about interpreting the available light and shadow to craft a compelling visual story. Unlike daytime photography, where abundant light allows for quick captures, night photography demands patience and a deliberate approach to every shot. This slower pace can be incredibly meditative, allowing you to connect more deeply with your surroundings. You’ll discover how the smallest light source can become a powerful focal point, adding depth and intrigue to your compositions.
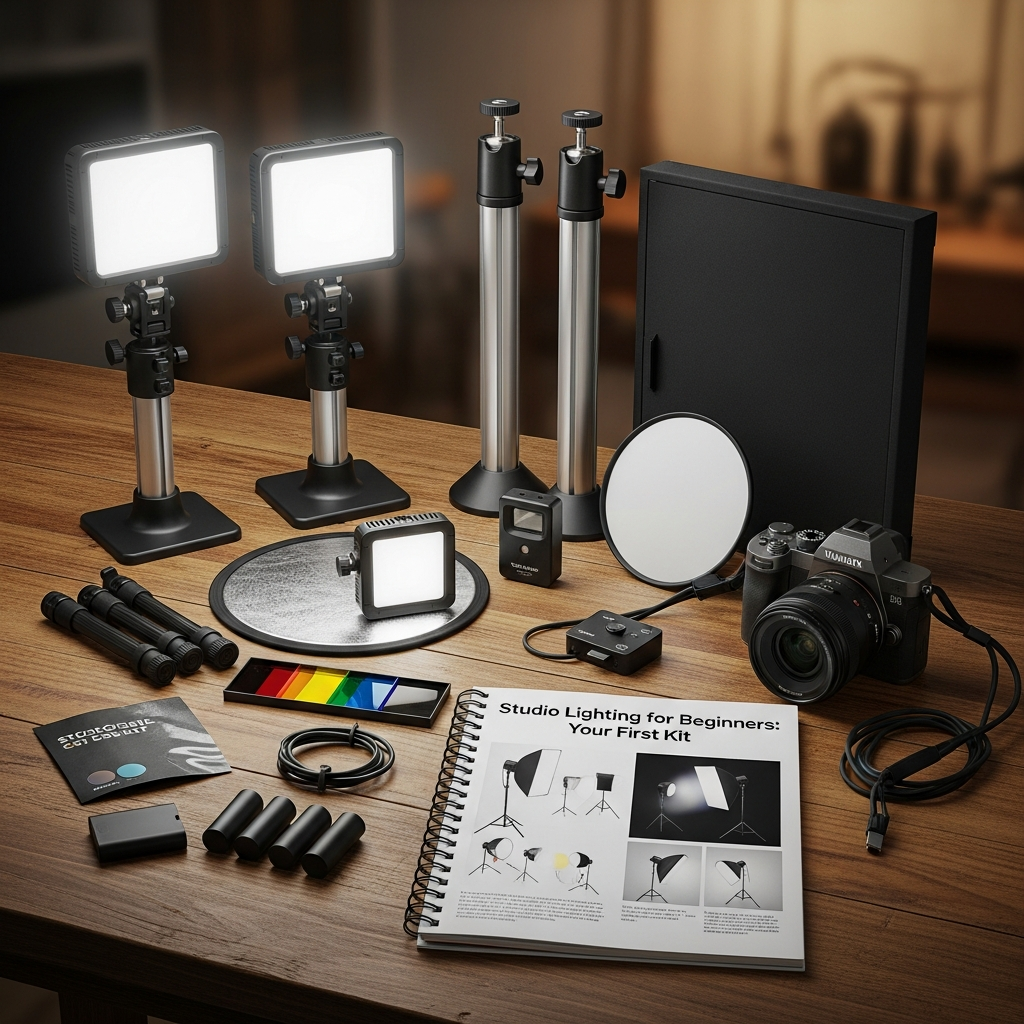
Essential Gear for Night Photography
Before you even think about camera settings, having the right equipment is paramount for successful night photography. While you don’t need the most expensive gear to start, certain tools are non-negotiable for capturing sharp, clear images in low light. This section will walk you through the essential components to consider for your night photography adventures, ensuring you are well-prepared to apply the best “Night Photography Tips And Tricks Guide For Beginners”.
The Indispensable Tripod
A sturdy tripod is arguably the most critical piece of equipment for night photography, and it is non-negotiable. Night shots necessitate long shutter speeds to gather sufficient light, which means any camera movement will result in blurry images. A solid tripod eliminates this issue by keeping your camera completely still throughout the exposure, allowing you to capture sharp details in the darkest scenes. Even cameras with excellent in-body image stabilization cannot compensate for the long exposure times required at night.
When selecting a tripod, prioritize stability over excessive weight. While a heavy tripod can offer more stability, a well-built, stable model rated for your camera’s weight is key. Flimsy tripods are prone to vibrations, which can ruin your night shots, even with a remote shutter release. Look for features like multiple leg extension points and a versatile ball head, which provides maximum control and flexibility for various shooting angles. For serious night photography, this stability is the foundation of every successful image. Investing in a good tripod is a game-changer for night photography, providing the necessary support for sharp, noise-free images.
Camera and Lens Choices
While any camera with manual control of ISO, aperture, and shutter speed can work, certain features enhance the night photography experience. Cameras with good high ISO performance are preferable, as they produce less noise at higher sensitivities. Full-frame cameras often excel in low-light conditions due to their larger sensors, which capture more light and result in less noise and better detail retention. However, modern crop-sensor cameras can also yield excellent results, especially when paired with fast, wide-aperture lenses.
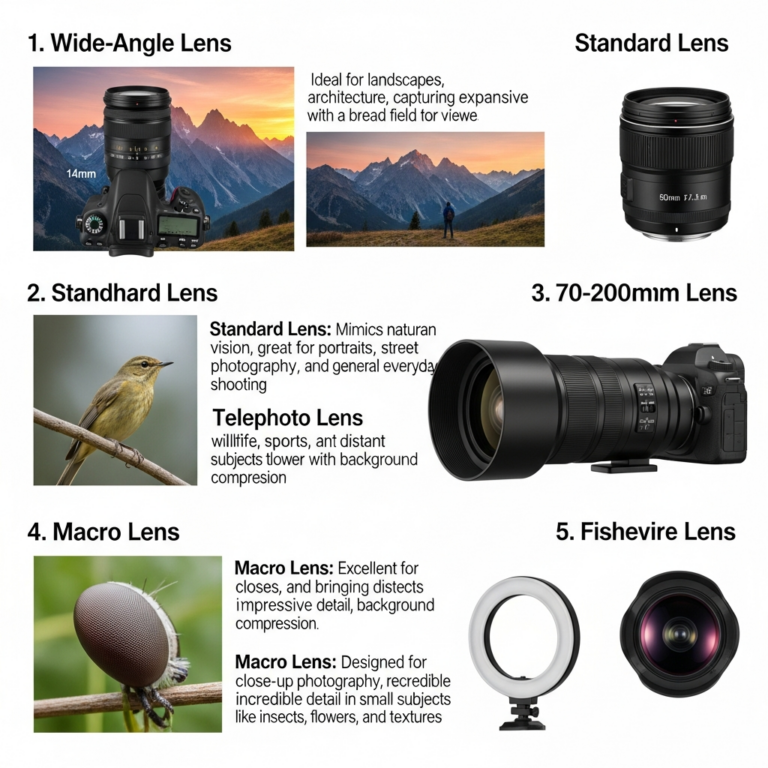
The choice of lens is equally, if not more, important. For many types of night photography, especially astrophotography, a wide-angle lens (e.g., 12-20mm) with a fast aperture (f/2.8 or wider) is highly recommended. A fast aperture allows maximum light to enter the lens, reducing the need for excessively high ISO settings or extremely long exposures, which helps in capturing sharper stars without noticeable movement due to Earth’s rotation. For cityscape night photography, wide-angle lenses are also often preferred to capture the grandeur of urban scenes, but a fast 35mm or 50mm prime lens can be excellent for street night photography, offering great autofocus capabilities in low light. Remember, “good glass is worth the investment and will make all the difference in the focus and clarity of your photography”.
Beyond the Basics: Remote Shutter Release and Lighting Tools
Once you have your camera, lens, and tripod, a few accessories can significantly improve your night photography experience. A remote shutter release or intervalometer is highly recommended. This small device allows you to trigger the shutter without physically touching the camera, preventing any vibration that could cause blur during a long exposure. Many cameras also offer a built-in 2-second or 10-second self-timer, which can serve a similar purpose for static scenes, allowing any camera shake from pressing the button to dissipate.
For navigating dark environments and light painting, a headlamp or flashlight is indispensable. A headlamp with a red light mode is particularly useful as it preserves your night vision, which is crucial when your eyes have adapted to the darkness. Beyond practical illumination, a flashlight can be used creatively for “light painting” foreground elements, adding subtle illumination and depth to your night scenes. Furthermore, extra batteries are a must, as long exposures can quickly drain your camera’s power. For beginners diving into “Night Photography Tips And Tricks Guide For Beginners”, these small additions make a big difference.
Mastering Your Camera Settings for Night Photography
Understanding and controlling your camera’s settings is the core of successful night photography. Unlike daytime shooting where automatic modes often suffice, night conditions demand manual control to achieve the desired results. This section will delve into the exposure triangle—aperture, shutter speed, and ISO—along with other critical settings for captivating night photography. This knowledge is fundamental for anyone looking for effective “Night Photography Tips And Tricks Guide For Beginners”.
Understanding Manual Mode: Your Control Center
For night photography, manual mode (M) on your camera is essential. This mode grants you complete control over aperture, shutter speed, and ISO, allowing you to fine-tune each setting for the specific low-light conditions you encounter. Automatic modes often struggle in the dark, frequently resulting in underexposed or grainy images. By taking the reins in manual mode, you can strategically balance these three elements to capture enough light without compromising image quality.
In manual mode, you become the director of light. You decide how wide your lens opens, how long the sensor is exposed, and how sensitive your camera is to the faint light available. This level of control is empowering and crucial for overcoming the unique challenges of night photography, where there’s no “perfect setting” but rather a combination that works for your specific scene. Mastering manual mode is the first and most important step in this “Night Photography Tips And Tricks Guide For Beginners”.
Aperture: Letting in the Light
Aperture, denoted by f-numbers (f/stops), controls the size of the lens opening and thus how much light reaches the camera sensor. For most night photography, especially astrophotography, you want to use the widest possible aperture your lens offers (the lowest f-number), such as f/2.8 or f/4. A wider aperture lets in more light, which is critical in dark environments, helping to reduce the need for extremely high ISOs or excessively long shutter speeds. This is a key “Night Photography Tips And Tricks Guide For Beginners” insight.
However, a wider aperture also results in a shallower depth of field. While this is often desirable for isolating subjects, for landscapes that include a foreground, middle ground, and background, you might want to stop down slightly to achieve greater sharpness throughout the frame. For cityscapes or light trails, where you might want starburst effects from lights, a smaller aperture like f/8 to f/16 is often used. Experimentation is key to finding the balance between light gathering and depth of field for your specific night photography scenario.
Shutter Speed: Painting with Time
Shutter speed dictates how long the camera’s sensor is exposed to light. In night photography, longer shutter speeds are fundamental to collecting enough light to properly expose your image. The duration can range from several seconds to several minutes, depending on the available light and your creative intent. For capturing static stars, a common starting point is between 15-30 seconds. If your shutter speed is too long, the stars will begin to show trails due to the Earth’s rotation. The “Rule of 500” can provide a guideline for the maximum shutter speed before star trailing becomes noticeable (500 divided by your lens’s focal length). However, some sources suggest this rule may not be precise enough for modern high-megapixel sensors.
For light trails from moving vehicles in cityscapes, shutter speeds of 10-30 seconds or even longer can create captivating streaks of light. For night street photography, you might aim for moderately faster shutter speeds (1/80 to 1/200 sec) to capture action without excessive blur, especially if shooting handheld with a fast lens. Always remember that a tripod is essential when using long shutter speeds to prevent camera shake and ensure sharp images. This is a core “Night Photography Tips And Tricks Guide For Beginners” technique.
ISO: Balancing Sensitivity and Clarity
ISO determines your camera sensor’s sensitivity to light. In the dark, you’ll need to increase your ISO to make the sensor more sensitive and gather more light. Common ISO settings for night photography range from 800 to 3200, or even higher, depending on your camera’s low-light performance and the specific scene. However, raising the ISO too much introduces digital noise (graininess) into your photos, which can degrade image quality. The goal is to find the “sweet spot” that provides enough brightness without excessive grain.
For cityscapes with ample ambient light, a lower ISO (e.g., ISO 100-800) might be sufficient to reduce noise. In darker conditions like astrophotography, a higher ISO is often necessary. It is generally best to prioritize bringing in light through aperture and shutter speed before pushing the ISO too high. Some modern cameras have better noise reduction capabilities at high ISOs than older models. Understanding your camera’s capabilities and experimenting with different ISOs is crucial for mastering these “Night Photography Tips And Tricks Guide For Beginners”.
White Balance: Capturing the Mood
White balance dictates the color temperature of your image, ensuring whites appear white and colors are rendered accurately. Night scenes often feature a mix of artificial lights (warm tones) and natural darkness (cool tones), making white balance tricky. While you can set a custom white balance or use presets like “Daylight” or “Tungsten,” shooting in RAW format gives you the most flexibility to adjust white balance in post-processing without losing image quality.
Many photographers prefer to adjust white balance in post-processing to achieve the desired mood, whether that’s a cooler, more natural night sky, or warmer tones for city lights. Auto White Balance (AWB) can provide a neutral starting point, which can then be fine-tuned later. Experiment with different settings while shooting, and always remember that the final look is subjective and can be tailored to your artistic vision. This control over color is a powerful aspect of “Night Photography Tips And Tricks Guide For Beginners”.

Achieving Pin-Sharp Focus in the Dark
One of the most challenging aspects of night photography for beginners is achieving sharp focus. The lack of light makes traditional autofocus systems struggle, often resulting in blurry or soft images. This section explores techniques to ensure your subjects, whether distant stars or nearby city elements, are perfectly in focus. These focusing strategies are critical “Night Photography Tips And Tricks Guide For Beginners”.
Manual Focus is Your Friend
In low-light conditions, your camera’s autofocus system often becomes unreliable and may “hunt” for focus, or miss the mark entirely. Therefore, switching to manual focus (MF) is almost always necessary for night photography. Manual focusing gives you precise control, allowing you to lock onto your subject and ensure sharpness. This manual approach is a cornerstone of effective “Night Photography Tips And Tricks Guide For Beginners”.
Before heading out, it’s a good practice to familiarize yourself with your lens’s manual focus ring. Understand where the infinity mark is, but be aware that true infinity focus might not be exactly at the hard stop on your lens. Different lenses behave differently, and sometimes the infinity mark shifts over time due to temperature changes or lens variations. Practice focusing manually during the day on distant objects to get a feel for it.
Techniques for Focusing in Low Light
Several techniques can help you achieve precise manual focus in the dark:
- Focus on a Bright Light Source: If possible, find a distant bright light source (like a streetlamp, building light, or even a very bright star or the moon) within your frame or nearby. Use your camera’s live view and zoom in as much as possible on this light source. Then, slowly adjust your focus ring until the light appears as small and sharp as possible. Once focused, switch your lens to manual focus to lock it in place and avoid accidental adjustments.
- The Infinity Focus Trick: For astrophotography, where stars are your primary subject, set your lens to manual focus and carefully turn the focus ring towards infinity. Then, use live view and magnify a bright star to fine-tune until it appears as a pinpoint. Some photographers pre-focus on a distant object during the day and mark their lens or tape the focus ring to that position for consistent night focus.
- Using a Torch for Foreground: If you have a foreground element you want to light up, you can use a strong flashlight to momentarily illuminate it. Autofocus on the illuminated foreground, then switch to manual focus and compose your shot. This is particularly useful for adding depth to night landscapes and is a useful “Night Photography Tips And Tricks Guide For Beginners” strategy.
Compositional Creativity Under Starlight
Composition remains as crucial in night photography as it is during the day, yet the challenges of darkness often require a different approach. A good daytime composition doesn’t always translate to a good nighttime composition because the light is fundamentally different, often appearing flatter. This section will explore various night photography tips for composition, helping you create visually striking images that draw the viewer in. Effective composition is vital for any “Night Photography Tips And Tricks Guide For Beginners”.
Finding Your Foreground
Many beginner night photographers make the mistake of simply pointing their camera at the sky. While a sky full of stars is beautiful, including a strong foreground element adds depth, context, and visual interest to your image. A lone tree, a mountain, a tent, rock formations, or even interesting architectural elements can act as a “hero piece,” anchoring the viewer’s eye and creating a sense of scale. The foreground provides a narrative, transforming a simple star photo into a compelling nightscape.
Consider how your foreground interacts with the night sky. Will it be a silhouette against the brighter sky, or will you light paint it to reveal its details? Sometimes, the contrast between a dark foreground and a bright sky creates a natural contrast that can be very effective. For “Night Photography Tips And Tricks Guide For Beginners,” always think beyond just the sky.
Leading Lines and Silhouettes
Leading lines are powerful compositional tools that guide the viewer’s eye through the image to the main subject. In urban night photography, roads, pavements, rows of streetlights, or even architectural elements can serve as leading lines, creating a dynamic flow within your composition. Experiment with low angles to emphasize these lines and add a sense of drama.
Silhouettes are another excellent technique for night photography. Objects in the foreground can be silhouetted against a brighter night sky, creating dramatic shapes and adding mystery to your image. This natural contrast between a dark foreground object protruding into the sky can be incredibly compelling. For astrophotography, a silhouetted mountain range or a prominent tree can frame the Milky Way beautifully.
Scouting Locations and Using Planning Apps
Planning is crucial for successful night photography. Scouting your locations during daylight hours allows you to assess potential compositions, identify foreground elements, and understand the general layout. You can visualize how certain elements might look under the stars and plan your angles accordingly.
For astrophotography, specialized apps like PhotoPills or Sky Safari are invaluable. These apps can predict the position of the Milky Way, the moon phases, and sunrise/sunset times for any given location and date. Knowing when and where the Milky Way will rise allows you to plan your composition meticulously, ensuring your “hero piece” aligns perfectly with the galactic core. Aim to shoot during a new moon for the darkest skies and clearest views of stars. Avoiding areas with significant light pollution is also critical, so check light pollution maps before you go. These tools are essential for any comprehensive “Night Photography Tips And Tricks Guide For Beginners”.
Minimizing and Managing Noise in Night Photos
Digital noise, often appearing as graininess, is a common challenge in night photography due to the necessity of higher ISO settings and long exposures. While modern cameras have improved significantly, understanding how to minimize and manage noise is key to producing clean, high-quality images. This section will offer night photography tips to combat this issue effectively. Dealing with noise is a practical skill crucial for a complete “Night Photography Tips And Tricks Guide For Beginners”.
Understanding Noise
Noise in night photos is typically caused by a combination of factors:
- High ISO: Increasing the ISO amplifies the signal from the sensor, but it also amplifies electronic noise.
- Long Exposures: Longer exposure times can heat up the camera sensor, leading to “thermal noise”.
- Underexposure: Underexposing an image and then brightening it in post-processing tends to reveal and exacerbate noise, especially in shadow areas. It’s generally better to expose properly in-camera, even if it means a higher ISO, than to brighten a very dark image later.
The goal is to gather as much light as possible efficiently, minimizing the need for extreme settings that introduce noise. This understanding is foundational for any “Night Photography Tips And Tricks Guide For Beginners”.
In-Camera Strategies to Reduce Noise
Several strategies can be employed in-camera to reduce noise:
- Proper Exposure: The most fundamental way to minimize noise is to achieve a proper exposure in the first place. Avoid underexposing your photos, as noise often appears more prominently in dark, underexposed areas. Check your histogram to ensure the waveforms are not crushed against the left side, indicating clipping.
- Use a Wide Aperture: As discussed, a wide aperture lets in more light, allowing for lower ISOs or shorter shutter speeds, both of which help reduce noise.
- Optimal ISO Selection: While a high ISO is needed, push it only as high as necessary for proper exposure, and understand your camera’s “ISO invariant” point, if applicable. Some sources even suggest using a higher ISO (1600-3200) to shorten shutter speeds and reduce noise caused by sensor heating during very long exposures. This contradicts the conventional advice of “lowest ISO possible” from some other sources, highlighting the nuance in “Night Photography Tips And Tricks Guide For Beginners”.
- Image Stacking: For stationary subjects like the Milky Way or star point photography, taking multiple shorter exposures and then stacking (averaging) them in post-processing software can dramatically reduce noise. This technique allows you to capture more light information with less noise than a single very long exposure.
- Dark Frame Subtraction: Some cameras have a built-in long exposure noise reduction feature which essentially takes a second “dark frame” exposure with the shutter closed, then subtracts the noise pattern from your actual image. While effective, it doubles your exposure time, limiting continuous shooting. Some photographers have found it to make little difference.
Post-Processing for Cleaner Images
Even with careful in-camera techniques, some noise will likely be present in night photos. Post-processing software offers powerful tools to refine your images:
- Noise Reduction Software: Programs like Adobe Lightroom, Photoshop, or specialized plugins such as Topaz Denoise offer effective noise reduction algorithms. Be cautious not to overdo it, as excessive noise reduction can lead to a “plastic” look, loss of detail, or mistakenly remove small stars. Applying selective noise reduction, for example, only to the sky or darker shadow areas, can be beneficial.
- Adjusting Blacks and Shadows: Sometimes, simply adjusting the “Blacks” slider in Lightroom can reduce noise more effectively than dedicated noise reduction, without sacrificing sharpness. This also helps in achieving better contrast and a darker, more realistic night sky.
- Blending Techniques: As mentioned, blending multiple exposures can be done in post-processing to reduce noise and enhance detail, especially for the Milky Way. Blending a dusk shot for foreground details with a high ISO star shot can also add richness and mask noise. These are advanced yet effective “Night Photography Tips And Tricks Guide For Beginners” strategies.
Post-Processing Your Night Photography Masterpieces
The journey of night photography doesn’t end when you press the shutter button; it continues in the digital darkroom. Post-processing is a crucial step that transforms raw images into captivating works of art, bringing out the depth, color, and clarity that your camera sensor recorded. This section offers essential post-processing night photography tips for refining your images. Mastering these techniques is an integral part of this “Night Photography Tips And Tricks Guide For Beginners”.
Developing RAW Files
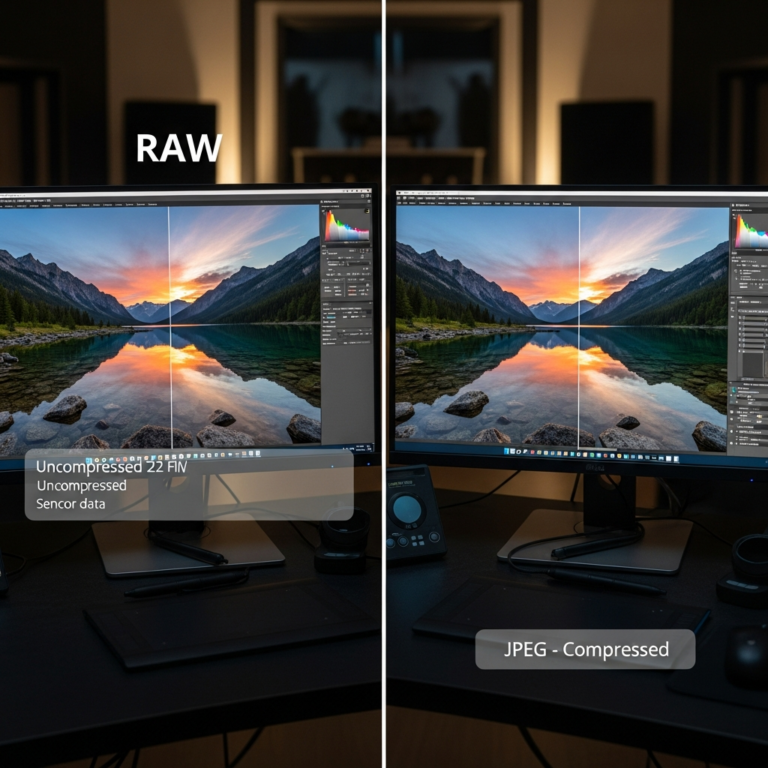
Always shoot in RAW format for night photography. RAW files retain significantly more image data than JPEGs, offering greater flexibility for adjustments during post-processing without degradation. This is particularly important for night shots where exposure, white balance, and dynamic range can be challenging to perfect in-camera. A RAW file allows you to recover more detail from shadows, control blown-out highlights, and make precise color corrections.
When you open a RAW file in software like Adobe Lightroom or Photoshop, you’re essentially developing a digital negative. This initial stage allows for broad adjustments that set the foundation for your final image. This step is a non-negotiable “Night Photography Tips And Tricks Guide For Beginners” requirement.
Essential Adjustments: Exposure, Contrast, and Color
Once your RAW file is open, focus on these fundamental adjustments:
- Exposure Tweaks: Fine-tune the overall exposure to reveal details in both shadows and highlights. Night images can sometimes appear too dark or overly bright straight out of the camera, so balancing this is key.
- Contrast and Clarity: Subtle adjustments to contrast can add depth and definition, making stars appear sharper and the Milky Way more prominent. Be careful with the clarity slider, as too much can introduce halos or exacerbate noise. Applying clarity and sharpening globally first, then selectively, often yields better results.
- White Balance Adjustment: Correcting white balance is vital to achieving natural colors in the night sky. Experiment with cooler tones for a more natural night look. Adjusting vibrance and saturation carefully can enhance colors without making the image look artificial. The HSL (Hue, Saturation, Lightness) sliders provide precise control over specific color ranges, allowing you to refine blues, purples, oranges, and reds.
- Highlight and Shadow Recovery: Night scenes often have extreme dynamic range, with bright light sources and deep shadows. Use the highlight and shadow sliders to recover detail in both these areas. You can recover more from highlights than shadows, so “exposing to the right” (ETTR) can be a strategy to capture more information in shadows with less noise. These are crucial “Night Photography Tips And Tricks Guide For Beginners” post-processing steps.
Advanced Techniques: Stacking and Blending
For those looking to push their night photography further, advanced post-processing techniques like stacking and blending offer remarkable improvements:
- Image Stacking: As discussed in the noise reduction section, stacking multiple exposures for star points or the Milky Way reduces noise through “image averaging”. Specialized software like Sequator (PC) or Starry Landscape Stacker (Mac) can align stars and combine images, also removing airplane trails.
- Blending Exposures: This technique involves combining different exposures of the same scene, often one for the foreground and another for the sky. For instance, you might use a shorter, lower ISO exposure for a brightly lit foreground and a longer, higher ISO exposure for the stars. These images are then blended seamlessly in Photoshop to create a final image with optimal exposure throughout. This complex but rewarding technique helps manage extreme dynamic range and noise. A good “Night Photography Tips And Tricks Guide For Beginners” should introduce these possibilities.
Types of Night Photography to Explore
The night offers a diverse range of photographic opportunities, each with its unique charm and technical considerations. As you become more comfortable with the basic “Night Photography Tips And Tricks Guide For Beginners,” you can begin to explore these specialized genres.
Astrophotography: Stars and Milky Way
Astrophotography, the photography of celestial objects and the night sky, is perhaps the most popular and challenging form of night photography. It involves capturing distant stars, constellations, the Milky Way, and even meteor showers. Success in this genre heavily relies on finding dark skies, far away from light pollution.
Key considerations for astrophotography include:
- New Moon Phases: Plan your shoots around a new moon for the darkest skies, as a full moon can wash out the stars.
- Wide-Angle, Fast Lenses: Essential for gathering maximum light and fitting more of the sky into your frame.
- Precise Manual Focus: Crucial for pin-sharp stars, often achieved by zooming in on a bright star in live view.
- Composition with Foreground: Always aim to include an interesting foreground element to add depth and scale to your starscapes.
Cityscapes and Light Trails
Cityscape night photography focuses on capturing the vibrant energy and illuminated architecture of urban environments. This genre often involves long exposures to create mesmerizing light trails from moving vehicles and to smooth out water in reflections.
Important aspects for cityscapes:
- Ambient Light: Cities provide numerous light sources like streetlights, neon signs, and building lights, which can be used creatively.
- Aperture for Starbursts: Closing your aperture down to f/11 or f/16 can create beautiful starburst effects from bright city lights.
- Reflections: Look for wet streets or bodies of water to capture stunning reflections of city lights, adding depth and visual interest.
- Dynamic Range Challenges: City scenes often have a high dynamic range, meaning very bright lights and deep shadows. Bracketing exposures (taking multiple shots at different exposures) can help capture detail across the entire scene. This is a valuable “Night Photography Tips And Tricks Guide For Beginners” application.
Light Painting
Light painting involves using a handheld light source (like a flashlight, LED panel, or even a smartphone) during a long exposure to selectively illuminate parts of your scene. This technique adds a creative and often ethereal touch to night photos, especially when applied to foreground subjects in dark landscapes.
Tips for light painting:
- Keep the Light Moving: Continuously move your