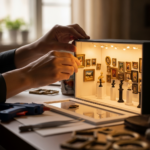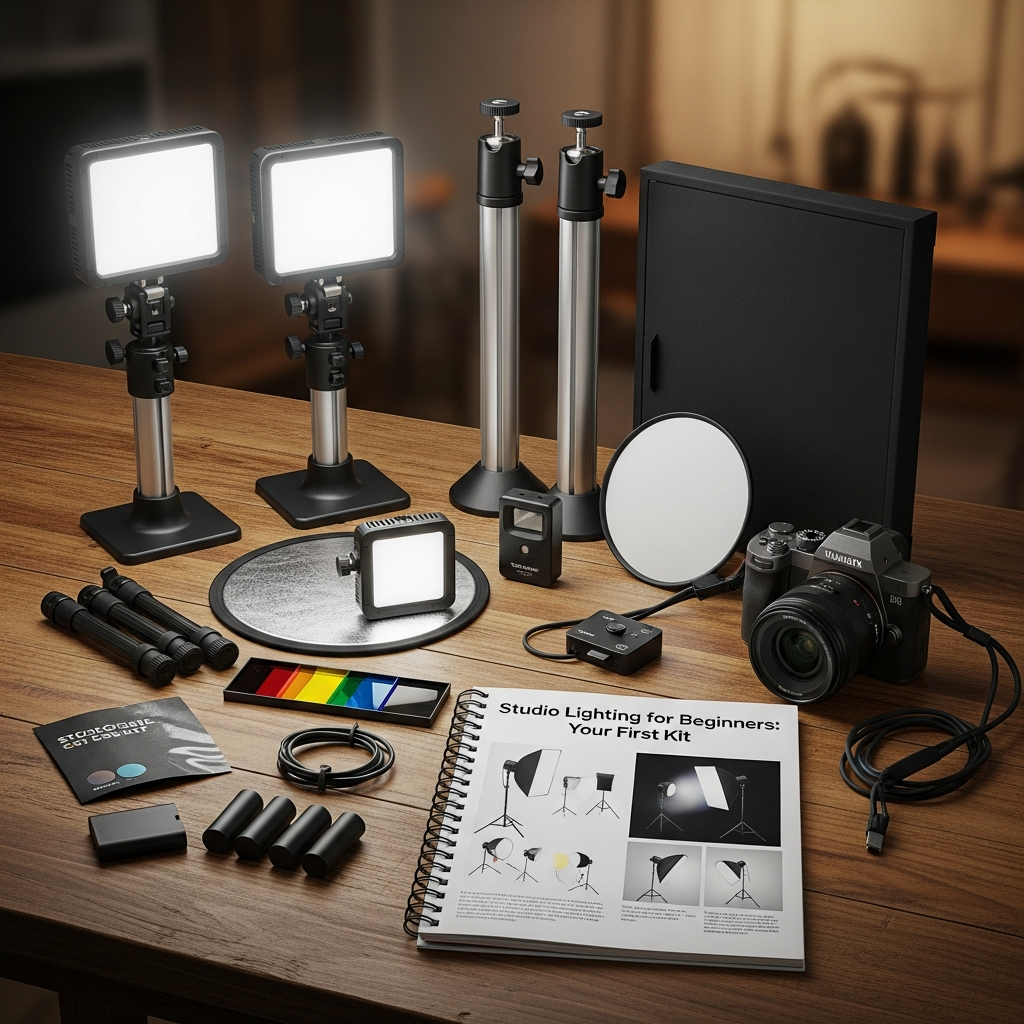
Embarking on the journey of photography or videography often brings with it the exciting challenge of mastering light. For beginners, the prospect of purchasing and setting up studio lighting can seem daunting, but it doesn’t have to be expensive or overly complicated. An effective and affordable studio lighting kit for beginners typically includes light sources (like continuous LED panels or basic strobes), light stands for positioning, and light modifiers such as softboxes or umbrellas to shape the light. These foundational components allow new creators to take control of their illumination, transforming ordinary photos and videos into professional-looking content without breaking the bank. The goal is to provide a versatile yet affordable studio lighting kits guide for beginners, empowering you to create stunning visuals right from the start.

Why Lighting Matters: Elevating Your Visuals
Lighting is arguably the most crucial element in photography and videography, deeply influencing the mood, depth, and overall impact of an image or video. Relying solely on natural light, while beautiful, can be unpredictable and hard to control. A dedicated affordable studio lighting kit for beginners offers the consistent control needed to craft specific aesthetics, highlight subjects effectively, and manage shadows, leading to a dramatic improvement in image quality. Proper lighting ensures your subjects are well-defined, textures are revealed, and colors are accurately rendered, which is vital for everything from product photography to captivating portraits.
Poor lighting, on the other hand, can quickly diminish the quality of even the best compositions. Images can appear flat, lacking dimension, with harsh shadows or blown-out highlights that distract from the subject. By investing in an affordable studio lighting kit for beginners, you gain the power to overcome these common pitfalls, ensuring your creative vision translates accurately into your final work. This control allows you to shoot anytime, anywhere, freeing you from the limitations of ambient conditions and helping you build a distinctive visual style.
Understanding Basic Lighting Types for Your First Kit
When selecting an affordable studio lighting kit for beginners, you’ll primarily encounter two main categories of artificial light: continuous lighting and strobe (flash) lighting. Both have distinct characteristics, advantages, and disadvantages that cater to different photographic needs and learning styles. Understanding these differences is key to making an informed decision for your initial setup.
Continuous Lighting: What You See Is What You Get
Continuous lights, as their name suggests, remain on constantly, allowing you to see the exact effect of the light on your subject in real-time before you even press the shutter. This “what you see is what you get” principle makes them incredibly beginner-friendly, as you can easily adjust positions and modifiers to sculpt the light visually. Continuous lighting is often praised for its ease of use and is particularly well-suited for video production, product photography, and portraiture where subtle adjustments are important.
Modern continuous lighting primarily comes in two forms:
- LED Panels/Lights: These are highly popular due to their energy efficiency, low heat output, and long lifespan. Many LED lights offer adjustable brightness and color temperature (bi-color or RGB options), providing immense versatility for various shooting scenarios. A two-light LED panel setup with stands is often recommended as an excellent starting point for an affordable studio lighting kit for beginners. Some LED lights can be app-controlled, adding another layer of convenience for creative control.
- Fluorescent Lights: Often found in older or more budget-oriented kits, fluorescent bulbs provide a soft, even light. They are a good option for those on a tight budget, particularly for product photography, and often come in kits with fixed softboxes. However, they can sometimes have issues with color rendering if not specifically designed for photography.
While continuous lights are fantastic for learning and for video work, they do have limitations. Generally, they are less powerful than strobes, which can restrict their effectiveness in bright outdoor conditions or when trying to achieve a shallow depth of field with wider apertures. You might need higher ISO settings or slower shutter speeds to compensate, which can introduce noise or motion blur in your images. Nevertheless, for an affordable studio lighting kit for beginners, continuous LEDs offer a robust and user-friendly experience.
Strobe Lighting (Flash): Power and Precision
Strobe lights, also known as flashes or monolights, emit a powerful, short burst of light. This intense burst is significantly brighter than continuous lights, allowing photographers to freeze fast motion, use lower ISO settings for cleaner images, and achieve smaller apertures for greater depth of field. Strobes are incredibly effective for overpowering bright ambient light, making them ideal for outdoor shoots or for creating dramatic, high-contrast images.
Strobe lighting comes in several types:
- Speedlights: These are compact, portable flash units that can be mounted on your camera’s hot shoe or used off-camera. They are versatile and a good entry point into flash photography.
- Monolights (Studio Strobes): These are more powerful, self-contained flash units designed for studio use. They offer higher power output and faster recycling times than speedlights, making them a staple in many professional setups. Brands like Godox offer affordable studio lighting kits for beginners that include monolights, providing semi-professional quality without an exorbitant price tag.
While strobes offer immense power and precision, they typically have a steeper learning curve for beginners. They require understanding concepts like flash synchronization, light meters (though many modern strobes have TTL automatic modes that simplify this), and wireless triggers. You don’t see the light’s effect until the flash fires, which can be a different experience than continuous lighting. However, the creative control and consistent, high-quality light they deliver are unmatched, making a basic strobe an excellent consideration for an affordable studio lighting kit for beginners looking to grow.
Essential Components of an Affordable Studio Lighting Kit
Building an affordable studio lighting kit for beginners involves more than just selecting a light source. A complete kit works synergistically to help you control and shape light effectively. Understanding each component ensures you build a versatile setup that meets your creative needs.
Light Sources (Bulbs/Heads)
As discussed, these are the heart of your lighting setup. For an affordable studio lighting kit for beginners, LED panels are a popular choice due to their versatility and user-friendliness. Many kits come with two LED panels, offering flexibility for various two-light setups. When looking at these light sources, consider:
- Wattage/Output: While wattage directly relates to power for incandescent bulbs, for LEDs, look at Lux ratings or equivalent incandescent wattage for brightness. A higher output provides more flexibility, especially when using modifiers that absorb some light.
- Color Temperature: Many modern lights offer adjustable color temperature (bi-color, typically 2700K-6500K), allowing you to match ambient light or create specific moods. Consistent color temperature across your lights is important to avoid color casts.
- CRI (Color Rendering Index): A high CRI (95+) ensures accurate color reproduction, which is crucial for professional-looking results.
Light Modifiers: Sculpting Your Light
Light modifiers are indispensable tools that transform the harsh, direct light from your source into soft, flattering illumination or focused beams. They are a critical part of any affordable studio lighting kit for beginners.
Softboxes Explained
Softboxes are fabric enclosures that attach to your light source, featuring a reflective interior and a translucent front diffusion panel. They produce a soft, even, and diffused light that is highly flattering, making them a favorite for portraits, product photography, and interviews. The larger the softbox relative to your subject, the softer the light will be.
Pros of Softboxes:
- Controlled Light: Softboxes offer excellent control over light direction and spill, preventing light from scattering uncontrollably. You can even add grids to further direct the light.
- Even Illumination: They create a very uniform spread of light across the diffusion panel, leading to smooth transitions from light to shadow.
- Flattering for Subjects: The soft, diffused light minimizes harsh shadows and imperfections, creating a more appealing look.
- Catchlights: Softboxes produce square or rectangular catchlights in the eyes, which many photographers find aesthetically pleasing as they mimic window light.
Cons of Softboxes:
- Setup Time: They can be a bit more time-consuming to set up and dismantle compared to umbrellas, especially traditional models. However, “easy-up” softboxes exist that open like umbrellas.
- Cost: Generally more expensive than umbrellas.
- Portability: Can be bulkier to transport when assembled, although many are collapsible.
For an affordable studio lighting kit for beginners, a rectangular or octagonal softbox is an excellent starting point, especially if you prioritize controlled, soft light.
Umbrellas Explained
Umbrellas are one of the most budget-friendly and user-friendly light modifiers, making them a staple in an affordable studio lighting kit for beginners. They resemble regular rain umbrellas but are designed to either reflect light or allow light to pass through.
Types of Umbrellas:
- Reflective Umbrellas: These have an opaque exterior (often black) and a reflective interior (silver or gold). The light source is pointed into the umbrella, and the light bounces off the reflective surface towards the subject. Silver umbrellas produce brighter, cooler light with more contrast, while gold adds warmer tones.
- Shoot-Through Umbrellas: Made of translucent white fabric, the light source is aimed through the umbrella directly at the subject, diffusing the light. These are very easy to use and produce a broad, soft light.
Pros of Umbrellas:
- Affordability: Typically less expensive than softboxes.
- Portability & Setup: Lightweight, quick to set up, and collapse easily, making them highly portable.
- Broad Light Coverage: Ideal for spreading soft, even light over a large area, great for groups or general room illumination.
- Beginner-Friendly: Simple to use, offering immediate soft lighting effects.
Cons of Umbrellas:
- Less Control: Umbrellas tend to have less control over light spill and direction compared to softboxes. This can be challenging in small spaces or when precise light placement is needed.
- Light Efficiency: Reflective umbrellas can be less efficient as light must bounce before reaching the subject, though shoot-through versions are more direct.
- Catchlights: They often produce rounder, sometimes “spiky” catchlights, which some photographers prefer less than the square catchlights of softboxes.
For an affordable studio lighting kit for beginners, having one or two umbrellas can be incredibly useful for their ease of use and broad, soft light. Many kits include both softboxes and umbrellas to offer maximum versatility.
Reflectors Explained
Reflectors are simple yet incredibly versatile tools that every beginner photographer should own. They are passive light modifiers that bounce existing light (natural or artificial) back onto your subject, effectively filling in shadows and adding highlights. They are particularly useful for making a single light source work harder.
Types of Reflectors:
- 5-in-1 Reflectors: These are very popular and highly recommended for an affordable studio lighting kit for beginners. They typically include five surfaces: white (for soft, neutral fill), silver (for brighter, more specular fill), gold (for warm tones), black (to subtract light and deepen shadows), and a translucent diffusion panel (to soften harsh light).
- DIY Reflectors: You can easily create your own reflectors using everyday materials like white foam boards, poster board, or even cardboard covered in aluminum foil. A white bedsheet or shower curtain can also act as an excellent diffuser or reflector.
Pros of Reflectors:
- Extremely Affordable: Often one of the cheapest lighting tools available.
- Portable: Lightweight and collapsible, making them easy to transport.
- Versatile: Can be used indoors or outdoors to manipulate both natural and artificial light.
- Fills Shadows: Effectively softens shadows created by your main light, adding dimension and detail to your subject.
- Enhances Existing Light: Maximizes the efficiency of your primary light source, sometimes eliminating the need for a second light.
For an affordable studio lighting kit for beginners, a good 5-in-1 reflector is a must-have, providing a range of lighting solutions at a minimal cost.
Light Stands: The Unsung Heroes
Light stands are essential for securely holding your light sources and modifiers at the desired height and angle. They provide stability and flexibility, preventing costly accidents and allowing for precise light placement.
When choosing light stands for your affordable studio lighting kit for beginners, consider:
- Stability: Look for stands with a wide, stable base. While budget stands might feel less robust, ensure they can safely support your lights and modifiers.
- Height: Stands should be tall enough to position your lights above your subject, often 6-8 feet (180-240 cm) is a good starting range.
- Portability: Many affordable stands are made of aluminum, balancing weight and durability.
- Build Quality: Even for an affordable option, good quality clamps and locking mechanisms are important for longevity and safety.
Triggers/Remotes (for Strobe Lighting)
If your affordable studio lighting kit for beginners includes strobe lights, you will need a way to trigger them wirelessly from your camera. This is typically done with a wireless transmitter (also called a trigger) that mounts on your camera’s hot shoe and receivers built into or attached to your flash units. Many modern strobe kits come with a compatible trigger, simplifying the process for new users.
Choosing Your First Affordable Studio Lighting Kit
Selecting the perfect affordable studio lighting kit for beginners depends on several factors, including the type of photography or videography you plan to do, your available space, and your budget. The key is to start simple and expand as your skills and needs evolve.
Considerations for Your Purchase
- Type of Photography/Videography:
- Portraits/Headshots: Soft, flattering light is crucial. A two-light continuous LED kit with softboxes or umbrellas would be ideal.
- Product Photography: Consistent, even lighting to highlight details. Continuous LED panels are excellent here, especially when paired with a light tent or diffusion box.
- Video (Vlogging, Interviews): Continuous lighting is almost a necessity as it allows you to see the light’s effect in real-time and avoids flickering in video recordings.
- Action/Freezing Motion: Strobes offer the power to freeze fast-moving subjects.
- Budget: The market for affordable studio lighting kits for beginners is robust, with options ranging from under $100 to several hundred dollars for more comprehensive setups. Remember that you don’t need to splurge on professional-grade equipment right away. Many photographers recommend starting with options like the LimoStudio or Neewer kits, which provide basic yet effective setups. Brands like Godox and Elinchrom also offer reputable entry-level kits that can serve you well into your intermediate stages.
- Portability: If you plan to shoot on location or have limited storage space, consider compact and lightweight kits. LED panels and collapsible umbrellas are generally more portable than large softboxes or heavy strobe units. Battery-powered LED or strobe lights offer ultimate portability, though they might come at a slightly higher price point.
- Space Availability: In a small home studio, large modifiers can be cumbersome. Smaller softboxes, shoot-through umbrellas, or LED panels are more practical. Reflectors are also great for small spaces, as they multiply the effect of a single light.
Recommendations for Different Scenarios
- Absolute Beginner / Small Budget (Under $150-200): Look for a basic two-light continuous LED panel kit with adjustable brightness and color temperature, including light stands. A 5-in-1 reflector is also a fantastic addition. Brands like Neewer and Anautin offer popular choices in this range. These types of affordable studio lighting kits for beginners are perfect for experimenting and learning fundamentals.
- Beginner with Moderate Budget ($200-500): Consider a two-light continuous LED softbox kit (e.g., LimoStudio, Showmaven) or an entry-level strobe kit (e.g., Godox SK400II, which often includes softboxes/umbrellas and a trigger). These kits offer more power and control, providing a more robust affordable studio lighting kits guide for beginners who want to grow. You might also find kits that combine two continuous lights and an umbrella or softbox for added versatility.
- Hybrid (Photo & Video Focus): Continuous LED lights are the most versatile for both photo and video work. A bi-color LED panel kit would be an excellent choice here. Some high-end LED lights even offer flash modes with high-speed sync, bridging the gap between continuous and strobe.
Remember, the goal for an affordable studio lighting kit for beginners is not to buy the most expensive gear, but to acquire tools that allow you to understand and manipulate light effectively.

Setting Up Your Affordable Studio Lighting Kit
Once you have your affordable studio lighting kit for beginners, the next step is to learn how to set it up and position your lights to achieve desired effects. Starting with simple setups will build your confidence and understanding.
Basic One-Light Setup
A single light source is a powerful tool, especially when combined with a reflector. This is a perfect starting point for any affordable studio lighting kit for beginners.
- Key Light: Position your main light (the “key light”) slightly to one side of your subject (typically 45 degrees from the camera-subject axis) and slightly above them, pointing downwards. This creates soft shadows that define form and add dimension.
- Reflector for Fill: Place a reflector (e.g., the white or silver side of your 5-in-1 reflector) on the opposite side of the key light, reflecting some of the key light back onto the shadow side of your subject. This “fills” in the shadows, making them softer and revealing more detail without adding a second light source. Adjust the distance of the reflector to control the intensity of the fill light.
This simple setup with an affordable studio lighting kit for beginners is incredibly effective for portraits and product shots, providing a beautifully lit image with minimal equipment.
Basic Two-Light Setup (Key and Fill)
When your affordable studio lighting kit for beginners includes two lights, you can create a more sophisticated lighting scheme.
- Key Light: Set up your primary light as described above – 45 degrees to the side and slightly above the subject. This will be your brightest light, defining the overall illumination and mood.
- Fill Light: Place your second light on the opposite side of the key light. The fill light should be less powerful than the key light (or positioned further away) to soften the shadows created by the key light, rather than eliminating them entirely. The ratio between your key and fill lights determines the contrast of your image. A subtle fill creates more dramatic shadows, while a stronger fill light results in softer, more evenly lit images.
This two-light setup is a common configuration for an affordable studio lighting kit for beginners and offers excellent control for various subjects.
Three-Point Lighting Concept (Briefly)
For even more depth and separation from the background, you can explore three-point lighting, a classic technique that can be achieved with an expanded affordable studio lighting kit for beginners.
- Key Light: The main light, as before.
- Fill Light: Softens shadows from the key light.
- Backlight/Hair Light (or Rim Light): A third light placed behind and slightly above your subject, aimed at their head or shoulders. This light creates a subtle rim of light around the subject, separating them from the background and adding depth. For an affordable studio lighting kit for beginners, this third light could even be a smaller LED panel or a strategically placed window (as shown in some natural light tutorials).
Mastering these basic setups with your affordable studio lighting kit for beginners will lay a strong foundation for more complex lighting techniques in the future.
Tips for Maximizing Your Affordable Studio Lighting Kit
Having an affordable studio lighting kit for beginners is just the beginning. To truly unlock its potential, embrace experimentation and smart practices.
Using Natural Light in Conjunction
Don’t underestimate the power of natural light, even when you have artificial lights. Windows can serve as excellent, soft light sources, especially when diffused with a sheer curtain or bedsheet. You can use your artificial lights to supplement natural light, perhaps as a fill light on a cloudy day or a kicker light to add a highlight. For example, positioning your subject near a large window and then using a single LED panel from your affordable studio lighting kit for beginners as a fill light on the shadow side can create a beautiful, natural-looking image.
Experimentation is Key
The best way to learn how to use your affordable studio lighting kit for beginners is to experiment. Move your lights around, change their height, adjust the power, and try different modifiers. Pay close attention to how the shadows fall and how the highlights appear. Take numerous test shots and analyze the results. There are no rigid rules, only guidelines; your creative vision is what matters most.
Understanding Light Quality and Direction
- Hard vs. Soft Light: The size of your light source relative to your subject dictates the softness of the light. Larger light sources (like big softboxes or umbrellas placed close to the subject) create softer light with gradual shadow transitions. Smaller, more direct light sources create harder light with sharp, defined shadows. Your affordable studio lighting kit for beginners should aim for soft, flattering light, which is why modifiers are so important.
- Direction: The direction of light dramatically affects the mood and dimension of your subject. Frontal light can be flat, side light creates drama and texture, and backlighting adds separation. Understanding these principles will guide you in positioning your affordable studio lighting kit for beginners effectively.
DIY Solutions to Enhance Your Kit
Even with an affordable studio lighting kit for beginners, there are many household items that can be repurposed to enhance your lighting setup:
- Diffusers: White bedsheets, shower curtains, or even tracing paper can diffuse harsh light sources, making them softer.
- Reflectors: Foam core boards, white poster board, aluminum foil-covered cardboard, or even a white towel or mirror can serve as effective reflectors.
- Flags: Black foam core or cardboard can be used to block unwanted light or create deeper shadows.
These budget-friendly additions can significantly expand the capabilities of your affordable studio lighting kit for beginners without additional cost.
Maintaining Your Affordable Studio Lighting Kit
Proper care and maintenance will extend the lifespan of your affordable studio lighting kit for beginners and ensure it performs reliably for years to come.
Storage and Transport
- Original Packaging: Keep the original boxes or invest in dedicated carrying bags/cases, especially if your kit comes with them. This protects components from dust and damage during storage and transport.
- Disassemble Carefully: Always follow manufacturer instructions for disassembling light stands and modifiers. Avoid forcing parts.
- Cool Down: Allow continuous lights (especially older fluorescent or halogen types) to cool down before packing them away, as heat can damage components or melt plastic. Modern LEDs generate less heat, but it’s still good practice.
Care for Bulbs/LEDs
- Handle with Care: Always handle bulbs and LED panels by their bases or edges to avoid touching the light-emitting surface directly, as oils from your skin can create hotspots or reduce lifespan.
- Clean Gently: If necessary, gently wipe LED panels with a microfiber cloth to remove dust or smudges.
- Lifespan: LEDs have a remarkably long lifespan (often 50,000 hours or more). While individual bulbs in fluorescent or tungsten kits will need replacement, LEDs in an affordable studio lighting kit for beginners are generally very durable.
Safety Tips
- Secure Stands: Always ensure light stands are fully extended and stable, especially when supporting heavy modifiers. Use sandbags if available, particularly with boom arms or in outdoor settings.
- Cable Management: Keep power cables neatly organized and out of the way to prevent tripping hazards.
- Ventilation: Ensure continuous lights have adequate ventilation to prevent overheating, especially older, hotter types.
- Follow Instructions: Always adhere to the manufacturer’s guidelines for assembly, use, and power requirements for your specific affordable studio lighting kit for beginners.
By following these simple maintenance and safety tips, your affordable studio lighting kit for beginners will remain a valuable tool in your creative arsenal.
Conclusion
Venturing into studio lighting with an affordable studio lighting kit for beginners opens up a world of creative possibilities. From understanding the fundamental differences between continuous and strobe lighting to mastering the use of essential modifiers like softboxes, umbrellas, and reflectors, you now have a comprehensive guide to start your journey. Remember that the quality of your images is not solely determined by the price tag of your equipment, but by your understanding and skillful manipulation of light. An affordable studio lighting kit for beginners provides the perfect foundation to learn, experiment, and ultimately, elevate your photography and videography to new heights. So, choose your kit, set it up, and start illuminating your creative vision!
—
FAQ
Q: What is the most crucial piece of equipment in an affordable studio lighting kit for beginners?
A: The most crucial piece is the light source itself, often an LED panel or a simple strobe, accompanied by light stands and basic modifiers like softboxes or umbrellas. These elements are fundamental for shaping and directing light to improve your photos and videos.
Q: Should beginners choose continuous lighting or strobes for their first kit?
A: Continuous lighting (especially LEDs) is generally recommended for beginners because it’s “what you see is what you get,” making it easier to adjust and visualize the lighting effect in real-time. This is ideal for learning, as well as for both photography and videography.
Q: How many lights do I need for an effective affordable studio lighting kit for beginners?
A: You can start effectively with just one light and a reflector for basic setups. However, a two-light kit provides significantly more flexibility for creating key and fill light setups, offering better control over shadows and highlights.
Q: What is the average cost of an affordable studio lighting kit for beginners?
A: The cost can vary, but many effective and affordable studio lighting kits for beginners range from under $100 for very basic LED panels to $300-$500 for more complete two-light kits with modifiers and stands.
Q: Can I use household items to supplement my affordable studio lighting kit for beginners?
A: Absolutely! Many common household items can serve as effective DIY lighting tools. White bedsheets or shower curtains can diffuse light, while white foam boards, aluminum foil, or even mirrors can act as reflectors. Cardboard can be used to block light as flags.