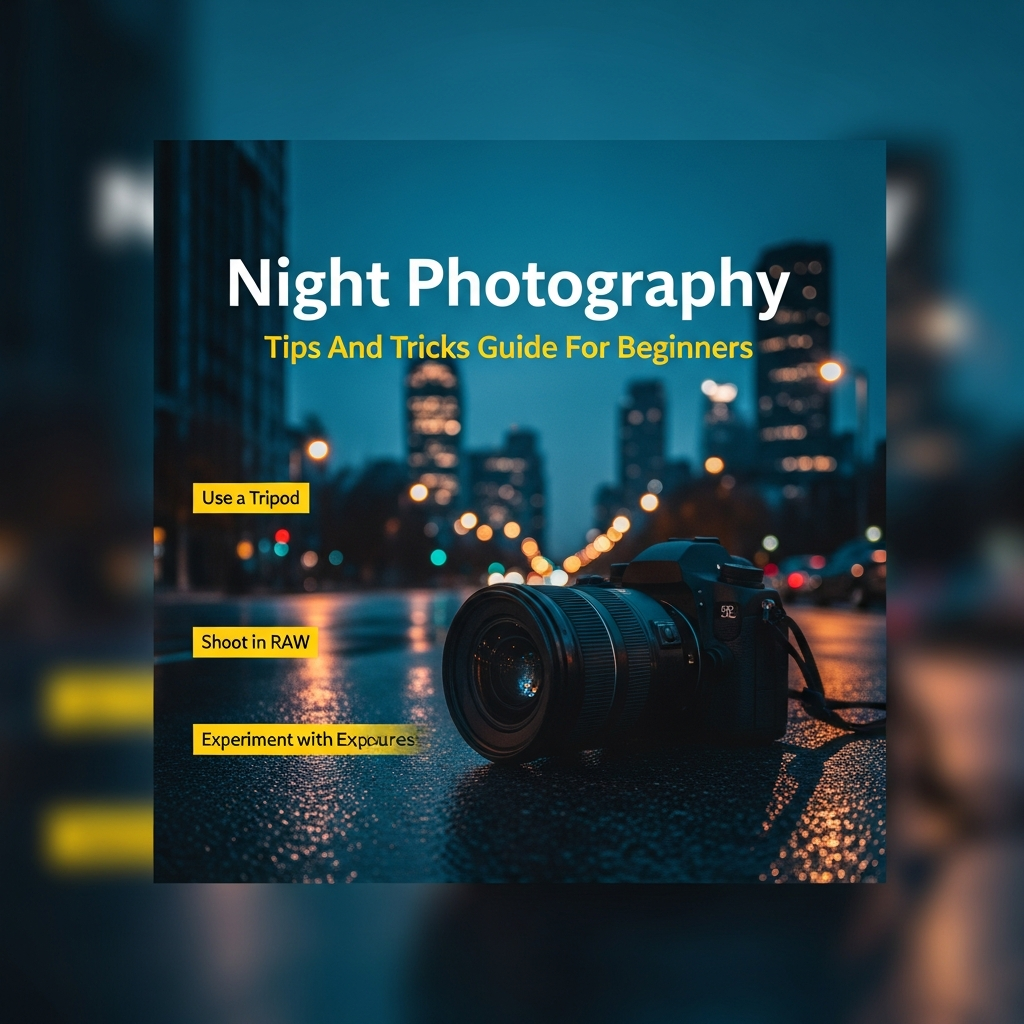
Night photography is an enthralling adventure, transforming familiar scenes into captivating landscapes bathed in moonlight, vibrant city lights, or the cosmic tapestry of the stars. It’s a journey into a realm where shadows dance with light, and the unseen becomes beautifully visible through the lens of your camera. For beginners, the thought of capturing such stunning images might seem daunting, but with the right knowledge and a dash of patience, anyone can master the art of shooting after sunset. This comprehensive night photography tips and tricks guide for beginners will equip you with the essential tools and techniques to embark on your nocturnal photographic odyssey, turning challenging low-light conditions into creative opportunities.

Understanding the Magic of Night Photography
The world takes on a different persona once the sun dips below the horizon. Colors soften, artificial lights gleam with newfound intensity, and the stars emerge, beckoning photographers to capture their ethereal beauty. Mastering night photography allows you to unveil these hidden spectacles, creating images that evoke wonder and tell compelling stories. This night photography tips and tricks guide for beginners focuses on making this accessible and enjoyable for everyone.
Why Photograph at Night?
Photographing at night offers a unique perspective that daylight simply cannot provide. It allows for creative exploration of light sources, from the soft glow of the moon to the dramatic streaks of car headlights or the intricate patterns of urban illumination. The absence of harsh sunlight often results in softer contrasts and richer colors, enabling photographers to craft images with incredible mood and atmosphere. Imagine capturing the serene glow of a city skyline reflected on a wet street after rain, or the breathtaking sweep of the Milky Way arching across a remote, dark sky. These are experiences that truly come alive through the magic of night photography.
Furthermore, night photography pushes you to slow down, observe, and anticipate. It demands a different kind of focus, encouraging deliberate composition and precise camera adjustments. This intentional approach can refine your photographic skills, improving your understanding of light, exposure, and composition in ways that daytime shooting might not. Many photographers find the tranquility of shooting at night to be a meditative experience, a chance to connect with their surroundings in a profound and personal way.
The Unique Challenges
While immensely rewarding, night photography presents a distinct set of challenges for beginners. The primary hurdle is, naturally, the lack of ambient light. This necessitates longer exposure times, wider apertures, and often higher sensitivities (ISO) on your camera, all of which come with their own considerations. Focusing in near-darkness, managing noise in your images, and maintaining sharp details can initially feel like an uphill battle. This night photography tips and tricks guide for beginners addresses these directly.
Another challenge is simply working in the dark. Navigating unfamiliar terrain, setting up equipment, and making precise adjustments without adequate light can be tricky. It requires preparation, a good headlamp with a red-light mode to preserve night vision, and a keen sense of your surroundings. Additionally, dealing with varied light sources, such as warm streetlights contrasting with cooler LED signs, can complicate white balance settings, requiring careful attention to color rendition. However, these very challenges are what make the successful capture of a night scene so incredibly satisfying.
Essential Gear for Night Photography
Having the right equipment is fundamental to successful night photography. While you don’t need the most expensive gear to start, certain tools will significantly enhance your ability to capture stunning nocturnal images. This section of our night photography tips and tricks guide for beginners outlines the must-haves for your kit bag.
Your Camera Body: Full-Frame vs. Crop Sensor
The camera body is your primary tool, and both full-frame and crop-sensor cameras can deliver excellent results in night photography. Full-frame cameras generally excel in low-light conditions due to their larger sensors, which can gather more light and typically produce less noise at higher ISO settings. This means cleaner, more detailed images, especially when capturing faint starlight or expansive Milky Way scenes. For beginners looking to upgrade, options like the Canon EOS R6 Mark II or Sony Alpha 7 IV are highly rated for their low-light performance.
However, if your budget is tighter or you’re just starting, crop-sensor cameras are perfectly capable, especially modern models. Cameras like the Nikon Z50, Canon EOS R10, or Sony Alpha 6000 are often recommended as excellent budget-friendly choices for night photography. They offer manual control over essential settings and can produce impressive results when paired with the right lens and techniques. Don’t let the “full-frame ideal” deter you; many professional-quality night shots have been taken with crop-sensor cameras. The most crucial factor is that your camera allows full manual control over aperture, shutter speed, and ISO, enabling you to dictate how much light enters the sensor and for how long.
The Right Lens: Aperture, Focal Length, and Stability
Your lens is arguably as important, if not more important, than your camera body for night photography. A “fast” lens with a wide aperture (low f-number) is paramount, as it allows maximum light to reach your camera’s sensor, which is critical in dark environments. Lenses with an aperture of f/2.8 or wider (e.g., f/1.8, f/1.4) are ideal, especially for astrophotography, as they help gather enough light to render stars brightly and clearly.
For focal length, wide-angle lenses (typically between 14mm and 35mm) are highly favored for night landscapes and astrophotography. They allow you to capture a broad expanse of the night sky, along with interesting foreground elements, creating awe-inducing compositions. While zoom lenses offer versatility, prime lenses (fixed focal length) often provide sharper image quality and wider apertures. When choosing, prioritize lenses known for their optical sharpness, especially at wide apertures, to ensure your stars appear as crisp, pinpoint lights rather than blurry blobs. This night photography tips and tricks guide for beginners strongly advocates for a good lens.
Tripods and Remote Shutters: Non-Negotiables
These two items are absolutely crucial for night photography and cannot be overlooked. A sturdy tripod is non-negotiable because night photography almost always involves long exposure times, ranging from several seconds to several minutes. Any movement of the camera during these extended exposures will result in blurry images. A robust tripod eliminates camera shake, keeping your camera perfectly still to capture sharp, clear photographs. When selecting a tripod, prioritize stability over lightweight design if possible, especially if you plan to shoot in windy conditions. Flimsy tripods can vibrate and ruin your shots.
Complementing your tripod, a remote shutter release (or cable release) is highly recommended. Even pressing the camera’s shutter button can introduce minute vibrations that can blur your image during a long exposure. A remote shutter allows you to trigger the camera without touching it, ensuring absolute stillness. If you don’t have a dedicated remote, you can often use your camera’s self-timer function (e.g., a 2-second delay) as a viable alternative, giving any vibrations a chance to subside before the shutter opens. This duo is essential for any aspiring night photographer.
Batteries, Headlamps, and Other Small Essentials
Beyond the core camera setup, a few smaller items can make a huge difference in your night photography experience. Plenty of spare batteries are a must. Long exposures and cold temperatures can drain camera batteries much faster than usual, so carrying several fully charged spares is a wise precaution. It’s a common mistake for beginners to forget extra power, cutting short what could have been a productive shooting session.
A headlamp with a red-light mode is invaluable for navigating in the dark, finding your gear, and making camera adjustments without losing your night vision. White light can cause your eyes to lose their dark adaptation, making it harder to see subtle details in the night sky. Other useful items include:
- Warm clothing and layers: Night shooting, especially in open areas, can get very cold, even on seemingly mild evenings.
- A comfortable bag: To transport your gear safely to and from your chosen location.
- Lens cleaning supplies: Dust, smudges, or condensation can easily ruin a night shot, so having a microfiber cloth and lens solution is vital.
- Planning apps: Applications like PhotoPills or Stellarium can help you track the position of the Milky Way, moon phases, and sunrise/sunset times, aiding in crucial planning.
Mastering Camera Settings for Night Photography
Understanding and correctly adjusting your camera settings is where the true magic of night photography happens. Unlike daytime shooting, automatic modes are largely ineffective in low light, necessitating a deep dive into manual control. This section of our night photography tips and tricks guide for beginners will demystify the core settings.
Aperture: Let There Be Light (Literally)
Aperture, represented by the f-number (e.g., f/2.8, f/4, f/11), controls the size of the lens opening and thus how much light enters the camera. In night photography, a wide aperture (low f-number) is generally preferred because it allows more light to hit the sensor, which is critical for capturing faint light sources like stars. For astrophotography, aiming for an aperture of f/2.8 or wider is ideal to ensure bright, clear stars.
However, the choice of aperture also affects your depth of field – the area in your image that appears acceptably sharp. A wider aperture (smaller f-number) results in a shallower depth of field, meaning less of the scene will be in sharp focus. For expansive night landscapes where you want both foreground and distant stars sharp, you might consider a slightly narrower aperture like f/4 or f/5.6 if there’s enough ambient light (e.g., from a bright moon or city lights). For cityscapes, where capturing sharpness from foreground to background is crucial, apertures like f/8, f/11, or even f/16 are often used to create a large depth of field, rendering all elements crisp and detailed. This specific night photography tips and tricks guide for beginners will help you navigate these nuances.
Shutter Speed: Capturing Light Trails and Still Stars
Shutter speed dictates how long your camera’s sensor is exposed to light. In night photography, these speeds are significantly longer than during the day. The optimal shutter speed depends heavily on what you’re trying to achieve:
- For capturing sharp, pinpoint stars without trails: You need to balance light gathering with the Earth’s rotation. A general guideline is the “500 Rule”: divide 500 by your lens’s focal length (e.g., 500 / 24mm = ~20 seconds) to get the maximum shutter speed before stars begin to trail. So, for wide-angle lenses, shutter speeds typically range from 10 to 30 seconds.
- For light trails (e.g., car headlights, star trails): You’ll need much longer exposures, ranging from 30 seconds to several minutes, or even hours for prominent star trails. Some cameras offer a “Bulb” mode, allowing you to keep the shutter open for as long as you hold down the remote release button. For urban light trails, 15-20 seconds can often create compelling streaks.
Experimentation is key, as the exact duration will depend on the scene’s brightness and your desired effect. This night photography tips and tricks guide for beginners emphasizes testing and adjusting.
ISO: Balancing Brightness and Noise
ISO controls your camera sensor’s sensitivity to light. A higher ISO makes the sensor more sensitive, allowing you to capture an image in darker conditions or with a shorter exposure time. However, higher ISO settings also introduce digital noise (graininess), which can degrade image quality. Finding the right balance is crucial for a successful night photography tips and tricks guide for beginners.
For night photography, you’ll generally need to use a higher ISO than in daylight.
- For moonlit scenes, an ISO between 800 and 1600 might suffice.
- For starlit scenes or Milky Way photography, ISO settings typically range from 1600 to 6400, depending on your camera’s low-light performance. Modern full-frame cameras often handle ISO 3200-6400 with acceptable noise levels.
- For cityscapes with ample ambient light and when using a sturdy tripod, you might even be able to keep your ISO as low as 100 or 200 to achieve the cleanest possible image.
Always take test shots and review them closely (zoomed in) to assess noise levels. It’s often better to have a slightly darker image with less noise that can be brightened in post-processing than a very noisy but bright image.
Focusing in the Dark: Manual Focus is Your Friend
Autofocus systems, even advanced ones, often struggle in low-light conditions, leading to blurry or “hunting” focus. Therefore, manual focus is essential for night photography. Here’s a reliable method:
- Switch your lens to manual focus (MF).
- Turn on your camera’s Live View mode.
- Locate a bright light source in the distance, such as a distant star, a planet, or a streetlamp.
- Digitally zoom in as much as possible on that light source using your camera’s zoom buttons.
- Rotate the focus ring on your lens slowly and carefully until the light source appears as small and sharp as possible.
- Once focused, you might want to secure the focus ring with a small piece of gaffer’s tape to prevent accidental movement.
Some lenses have an infinity (∞) focus mark, but it’s often not perfectly accurate, so always double-check with Live View and test shots. This manual focusing technique is a cornerstone of this night photography tips and tricks guide for beginners.
White Balance: Setting the Mood
White balance controls the color temperature of your image, affecting whether it appears warmer (more orange/yellow) or cooler (more blue). Night scenes often contain a mix of light sources with varying color temperatures, from the warm glow of incandescent streetlights to the cooler tones of moonlight or distant LED signs.
While Auto White Balance (AWB) can be a good starting point, allowing for adjustments in post-processing if you shoot in RAW, manually setting your white balance often yields more consistent and desired results.
- To achieve a cool, bluish night tone typical of moonlight or clear night skies, a Kelvin setting between 3200K and 4000K is often effective.
- For warmer, more neutral tones, especially in urban settings dominated by artificial lights, a setting between 5000K and 6000K might be more appropriate.
Shooting in RAW file format is highly recommended for night photography. RAW files retain much more image data than JPEGs, giving you far greater flexibility to adjust white balance, exposure, and other parameters in post-processing without significant loss of quality. This flexibility is invaluable when fine-tuning the mood and color of your nocturnal images.
Composition and Techniques for Stunning Night Shots
Beyond mastering camera settings, thoughtful composition and specific techniques are what truly elevate a night photograph from a simple snapshot to a work of art. This section of our night photography tips and tricks guide for beginners delves into the creative aspects.
The Rule of Thirds Under Moonlight
The Rule of Thirds is a fundamental compositional guideline that remains highly relevant in night photography. Imagine dividing your image into nine equal segments by two equally spaced horizontal lines and two equally spaced vertical lines. The idea is to place your main subject or points of interest along these lines or at their intersections, creating a more balanced and visually engaging composition than simply centering everything.

At night, this can be particularly effective when framing cityscapes, lone trees under a starry sky, or architectural elements. For instance, placing a well-lit building or a striking silhouette of a mountain range along one of the vertical lines, with the expansive night sky filling the remaining space, can create a powerful image. In Milky Way photography, you might place a compelling foreground subject in a lower corner and the Milky Way core in the opposite upper corner to achieve visual balance. Experiment with placing your horizon line on either the upper or lower horizontal third, depending on whether the sky or the foreground is your primary focus. This is a crucial night photography tips and tricks guide for beginners for visual impact.
Leading Lines and Framing in the Dark
Leading lines are compositional elements that draw the viewer’s eye through the image, usually towards the main subject. In night photography, artificial lights, roads, rivers, or even natural contours of the landscape can serve as powerful leading lines. For urban scenes, the illuminated streaks of car headlights on a winding road, the glowing edges of a bridge, or the repetitive patterns of streetlights can effectively guide the viewer’s gaze.
Framing, another compositional technique, involves using elements within the scene to create a “frame” around your main subject. This could be an archway, tree branches, or even the subtle outlines of dark structures against the illuminated sky. Framing adds depth and context to your image, drawing attention to your focal point while adding layers of interest. In the darkness, carefully chosen frames can create a sense of mystery and intimacy, enhancing the overall storytelling of your night photograph. This is a foundational night photography tips and tricks guide for beginners for compelling imagery.
Light Painting: Adding Creative Flair
Light painting is an exciting and creative technique that involves using a portable light source (like a flashlight, LED panel, or even a smartphone screen) to “paint” light onto specific areas of your scene during a long exposure. This allows you to selectively illuminate foreground elements, add dramatic highlights, or even create abstract shapes and patterns within your photograph. It’s an excellent way to add creative flair and bring out details that would otherwise be lost in the darkness.
To execute light painting, set your camera for a long exposure (e.g., 20-60 seconds or more), start the exposure, and then quickly and smoothly move your light source across the areas you wish to illuminate. The key is to keep the light source moving so that it doesn’t create bright spots, and to experiment with different light intensities and durations. For instance, you could softly illuminate a foreground tree in a starry landscape or highlight architectural details in an urban scene. The possibilities are truly endless, limited only by your imagination and the duration of your shutter speed.
Capturing Star Trails: Long Exposures Explained
Star trails are mesmerizing streaks of light created by the apparent movement of stars across the night sky due to the Earth’s rotation. This effect is achieved through very long exposures, often lasting several minutes or even hours, or by stacking multiple shorter exposures in post-processing.
For a single long exposure, you’ll need a camera with a “Bulb” mode, a sturdy tripod, and a remote shutter release. Set your aperture relatively wide (e.g., f/2.8-f/5.6) and your ISO relatively low (e.g., 100-800) to minimize noise, then open the shutter for an extended period. The longer the exposure, the longer the star trails will be. An alternative, and often preferred method for beginners, is to capture a series of consecutive shorter exposures (e.g., 30 seconds each) and then stack them together using specialized software in post-processing. This method offers greater control over the final image and can help reduce noise. This specific night photography tips and tricks guide for beginners will help you master this captivating technique.
Milky Way Photography: A Beginner’s Approach
Capturing the majestic Milky Way is a pinnacle for many night photographers. While it seems complex, with the right night photography tips and tricks guide for beginners, it’s achievable. To photograph the Milky Way, you need three main ingredients: a dark sky location, the right timing, and specific camera settings.
- Dark Skies: Get away from light pollution as much as possible. Use light pollution maps to find truly dark-sky sites.
- Timing: Shoot during a new moon phase or when the moon is below the horizon, as moonlight can overpower the faint glow of the Milky Way. Plan your shoot when the galactic core is visible in the sky using apps like PhotoPills.
- Camera Settings:
- Camera: A full-frame camera is ideal due to its superior low-light performance, but modern crop-sensor cameras can also yield good results.
- Lens: A wide-angle lens with a fast aperture (f/2.8 or wider, 14-24mm focal length) is crucial to gather enough light.
- Aperture: Set it wide open, typically f/2.8 or faster.
- Shutter Speed: Use the “500 Rule” to determine your maximum shutter speed to avoid star trailing. For a 20mm lens on a full-frame camera, this would be around 25 seconds (500/20). Generally, keep it between 15-30 seconds.
- ISO: Start with a higher ISO, around 3200 to 6400, and adjust based on your camera’s noise performance and the ambient darkness.
- Focus: Manually focus on a bright star or set your lens to infinity (and verify with Live View).
- Shoot in RAW: Always.
This approach, along with a sturdy tripod and remote shutter, forms the foundation of a successful night photography tips and tricks guide for beginners for capturing the cosmos.
Post-Processing Your Night Photos
The journey of a night photograph doesn’t end when you press the shutter button. Post-processing is a vital step in enhancing your images, bringing out details, managing noise, and truly making your nocturnal vision come to life. Shooting in RAW format is particularly beneficial here, as it preserves a wealth of image data, allowing for greater flexibility in editing. This night photography tips and tricks guide for beginners includes essential post-processing steps.
Basic Adjustments: Exposure, Contrast, and White Balance
Once you import your RAW files into editing software like Lightroom or Photoshop, start with fundamental adjustments.
- Exposure: Night photos can often appear underexposed straight out of the camera, especially when shooting for low noise. Carefully increase the overall exposure to brighten the image, paying attention to the histogram to avoid clipping highlights or shadows. The goal is to make the night scene look bright enough to reveal detail while still clearly conveying that it was taken at night.
- Contrast: Enhance the contrast to give your image more depth and punch. This can be done with the contrast slider, but also by subtly adjusting highlights and shadows. Raising highlights and lowering shadows can add drama, making brighter areas pop and darker areas recede.
- White Balance: If you shot in Auto White Balance or want to fine-tune the mood, now is the time to adjust the color temperature and tint. You can cool down the image for a more ethereal night feel (bluish tones) or warm it up slightly to enhance urban lights. The flexibility of RAW files means you can experiment without fear of destroying image quality. This night photography tips and tricks guide for beginners emphasizes non-destructive editing.
Noise Reduction: Cleaning Up Your Images
High ISO settings, often necessary for night photography, inevitably introduce digital noise. Post-processing software offers powerful tools to combat this, helping you achieve cleaner, smoother images.
- Luminance Noise: This appears as random speckles of brightness and darkness. Apply luminance noise reduction carefully, as too much can lead to a loss of fine detail and a plastic-like appearance.
- Color Noise: This manifests as colored speckles, typically red, green, or blue, in darker areas. Color noise is usually easier to remove without affecting detail, and most software does a good job of eliminating it automatically.
It’s a delicate balance to reduce noise while preserving textures and details, especially in areas like stars or intricate foreground elements. Zoom in to 100% to assess the impact of your noise reduction settings and find the sweet spot for your image. Some programs also offer selective noise reduction, allowing you to apply it only to the areas that need it most.
Enhancing Details and Colors
After basic adjustments and noise reduction, focus on enhancing the details and colors to make your night photos truly stand out.
- Sharpening: Apply sharpening to bring out fine details, especially in stars or crisp city lights. Again, be judicious, as over-sharpening can introduce artifacts or accentuate noise.
- Clarity and Dehaze: These sliders can add punch and definition to your image, enhancing textures and making details pop. Be careful not to overdo clarity, as it can create halos around high-contrast edges.
- Color Grading and Saturation: Subtly adjust the vibrance and saturation to make colors richer and more appealing without making them look unnatural. For instance, you might enhance the blue tones of the night sky or the warm oranges of city lights. Creative color grading can significantly impact the mood and visual appeal of your night photography.
- Local Adjustments: Use brushes or radial/graduated filters to make localized adjustments. For example, you might brighten a specific foreground element, darken overly bright highlights, or apply targeted noise reduction to a particularly noisy area. This precise control allows you to guide the viewer’s eye and refine your composition.
Post-processing is an iterative process, and practice will help you develop your unique style and master these techniques to get the most out of your night photography. This night photography tips and tricks guide for beginners provides a roadmap for your post-processing journey.
Common Mistakes and How to Avoid Them
Embarking on any new photographic journey comes with its share of missteps, and night photography is no exception. Being aware of common pitfalls can save you time, frustration, and help you produce better images right from the start. This night photography tips and tricks guide for beginners highlights critical errors to sidestep.
Forgetting Extra Batteries
One of the most frequently made, yet easily avoidable, mistakes in night photography is running out of battery power. Long exposures and cold temperatures, which are common companions for night photographers, significantly drain camera batteries. Imagine setting up the perfect shot of the Milky Way, only for your camera to die midway through your sequence. It’s incredibly frustrating and entirely preventable.
Solution: Always carry multiple fully charged spare batteries, especially if you plan an extended shooting session or if the temperature is expected to drop significantly. Keep spare batteries in a warm pocket to preserve their charge. Some photographers even bring portable power banks to recharge batteries on location if needed. Making sure you have adequate power is a fundamental night photography tips and tricks guide for beginners.
Rushing Your Setup
Night photography demands patience and precision. Rushing your setup can lead to a myriad of problems, from a wobbly tripod to improper focus, resulting in blurry, poorly composed, or technically flawed images. In the dark, it’s easy to overlook small details that can make a big difference.
Solution:
- Scout during the day: If possible, visit your shooting location during daylight hours. This allows you to identify interesting foreground elements, plan your composition, find safe pathways, and understand the general layout without the challenge of darkness.
- Take your time: Set up your tripod carefully, ensuring it’s stable on solid ground. Attach your camera securely. Perform your manual focus meticulously, verifying sharpness with zoomed-in Live View and test shots. Double-check all your camera settings – aperture, shutter speed, ISO, and white balance – before committing to your final shot. A slow, deliberate approach will yield much better results, reinforcing the importance of this night photography tips and tricks guide for beginners.
Overlooking Your Surroundings
When engrossed in your camera’s viewfinder or LCD screen, it’s easy to become oblivious to your surroundings. This can lead to safety concerns, missed compositional opportunities, or even accidental damage to your gear.
Solution:
- Be aware of your environment: Always be mindful of your footing, potential hazards (e.g., uneven terrain, wildlife, bodies of water), and other people in the vicinity. Use a headlamp for navigation when not actively shooting to ensure safety.
- Look for foreground interest: A common mistake in landscape night photography, especially astrophotography, is to only focus on the sky. However, a compelling foreground element, such as a lone tree, a striking rock formation, an old building, or a body of water, can add immense depth and context to your image. Use your headlamp or a small flashlight to “paint” light onto these foreground elements during a long exposure to reveal their details.
- Minimize light pollution: If shooting stars, seek out locations far from city lights, as light pollution can significantly reduce the visibility of celestial objects. Even small sources of artificial light nearby can affect your exposure and create unwanted light flares.
By anticipating these common mistakes and adopting these solutions, you can significantly improve your night photography experience and the quality of your images. This night photography tips and tricks guide for beginners aims to prevent frustration and foster success.
A Final Word of Advice for Your Night Photography Journey
Embarking on the path of night photography is an exciting and rewarding endeavor. It’s a genre that stretches your technical understanding and pushes the boundaries of your creative vision. The world after dark offers an infinite canvas for unique photographic expression, from the quiet majesty of a starlit landscape to the vibrant energy of a neon-soaked cityscape. This night photography tips and tricks guide for beginners is just the beginning.
Remember that practice is paramount. The more you venture out under the cover of night with your camera, the more comfortable you will become with your gear, the settings, and the unique challenges presented by low light. Don’t be afraid to experiment with different compositions, lighting techniques, and post-processing approaches. Each outing is a learning opportunity, and every photograph, regardless of its perceived success, contributes to your growth as a photographer.
Embrace the quiet, the mystery, and the sheer wonder of the nocturnal world. Let your curiosity guide you, and allow yourself the freedom to play and discover. With dedication, patience, and the insights from this night photography tips and tricks guide for beginners, you’ll soon be capturing breathtaking images that truly illuminate the beauty of the night. So, pack your bag, charge your batteries, and step out into the darkness—your next stunning photograph awaits.
—
FAQ (Frequently Asked Questions)
Q: What are the absolute essential items for a beginner in night photography?
A: For beginners, the absolute essential items include a camera that offers full manual control over settings, a sturdy tripod to prevent blur during long exposures, and a lens with a wide aperture (f/2.8 or faster) to gather sufficient light. A remote shutter release and a headlamp with a red-light mode are also highly recommended for a smoother experience. This night photography tips and tricks guide for beginners emphasizes these core components.
Q: How do I know what camera settings to use for night photography?
A: There’s no single “perfect” setting, as it depends on your subject. However, a good starting point for capturing stars is Manual mode with a wide aperture (e.g., f/2.8), a shutter speed of 15-30 seconds (using the 500 Rule), and an ISO between 1600-6400. For cityscapes, you might use a narrower aperture (e.g., f/8-f/11), longer shutter speeds (30-60 seconds), and a lower ISO (100-800). Always shoot in RAW and adjust based on test shots. Mastering these settings is a key part of this night photography tips and tricks guide for beginners.
Q: Why do my night photos look blurry or grainy?
A: Blurry night photos are often caused by camera movement during long exposures (ensure your tripod is stable and use a remote shutter) or incorrect focus (use manual focus on a bright distant object). Grainy photos usually stem from using too high an ISO setting; while some noise is unavoidable, strive for the lowest ISO that still provides adequate exposure, and utilize noise reduction tools in post-processing. This night photography tips and tricks guide for beginners helps troubleshoot such issues.
Q: Can I do night photography with a smartphone?
A: Modern smartphones, especially newer models, have significantly improved low-light capabilities and often include a “Night Mode” or manual controls that allow for longer exposures and higher ISOs. While they can capture interesting night scenes, they generally cannot match the image quality, detail, and low-noise performance of dedicated cameras with larger sensors and fast lenses. For a true deep dive into night sky or detailed urban photography, a dedicated camera is superior, but a smartphone is a great starting point for experimentation. Even with a phone, a mini tripod is essential to keep it steady during longer exposures.
—