Welcome to the ultimate Shading Techniques For Drawing Guide For Beginners! Taking a flat outline and transforming it into a piece that suggests volume and depth is perhaps the most magical part of learning to draw. This comprehensive guide will break down the essential methods, tools, and practices you need to master. By understanding how light interacts with objects, you can imbue your sketches with a stunning, lifelike three-dimensionality. This journey from simple lines to sophisticated form is what sets impressive artwork apart, and we are here to show you how to do it.
The Foundation: Understanding Value and Light
If you are looking for the fundamental steps to creating depth in your artwork, the most important concepts to master are value and how light source works. Value simply refers to the lightness or darkness of a color or tone, and it is the single most important element in any Shading Techniques For Drawing Guide For Beginners. Mastering the value scale allows you to accurately represent shadows and highlights, which tricks the eye into seeing a flat surface as a three-dimensional form. You must first practice seeing the world in terms of shades of grey, ranging from pure white (the brightest highlight) to solid black (the deepest shadow).
Featured Snippet Answer: Essential Shading Techniques
What are the five essential shading techniques for beginners?
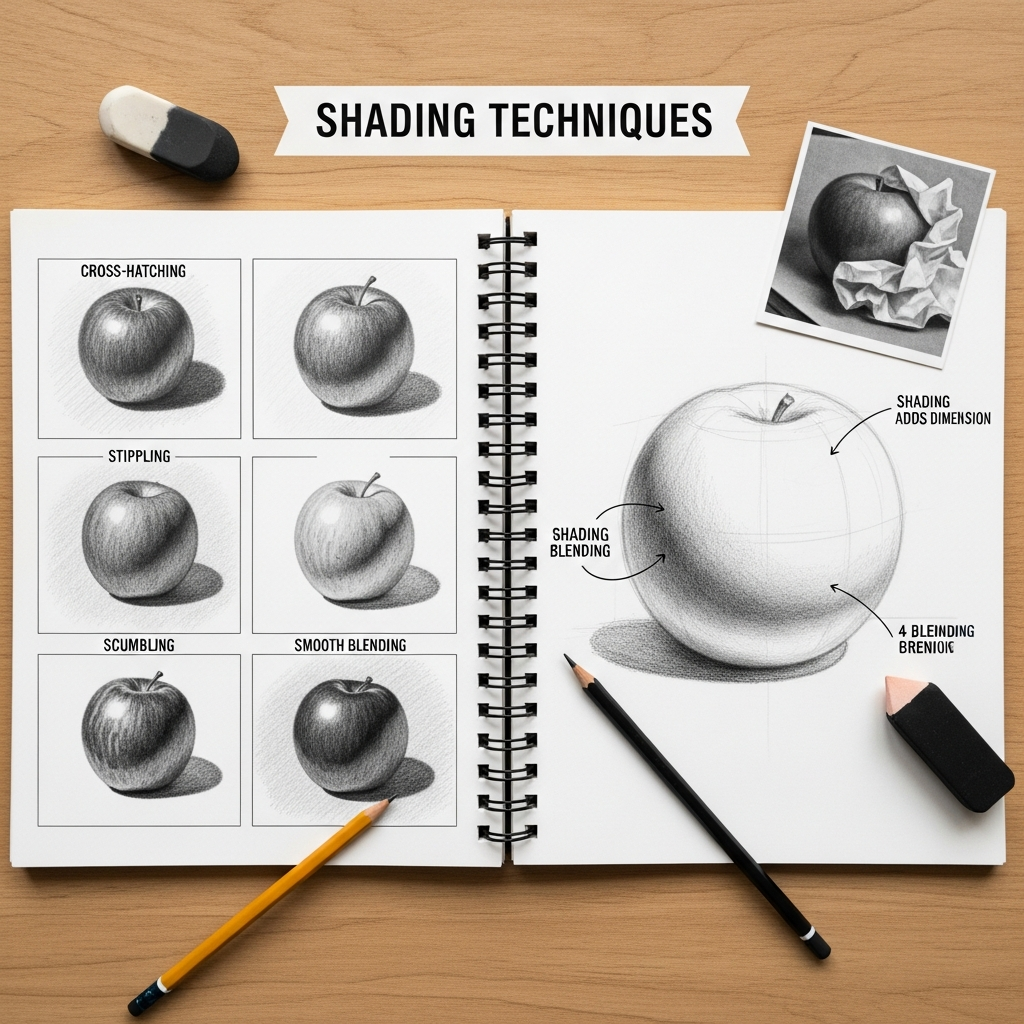
The five essential Shading Techniques For Drawing Guide For Beginners are:
- Hatching: Creating value with parallel lines.
- Cross-Hatching: Creating darker value by layering parallel lines in a criss-cross pattern.
- Blending (Smudging): Smoothing pencil marks for a gradient, seamless transition.
- Stippling (Pointillism): Using small dots to build up tonal density.
- Scribbling (Scumbling): Applying random, circular, or loose strokes to generate texture and tone.
This list represents the core methods that form the basis of almost all pencil and ink drawing, making them the perfect starting point for any Shading Techniques For Drawing Guide For Beginners.
The Anatomy of a Shadow: 5 Key Zones
To truly master Shading Techniques For Drawing Guide For Beginners, you need to understand the five key zones that appear on a shaded form. These zones are constant, regardless of the object’s shape, and understanding them is crucial for rendering realism. This is a foundational concept that every aspiring artist must internalize.
- Highlight: This is the brightest spot on the object, where light reflects most directly off the surface. It should be the lightest value, often left as the paper’s white.
- Mid-tone (Local Color): This represents the object’s natural color or tone, uninfluenced by direct light or deep shadow. It is the middle ground on your value scale.
- Core Shadow: The darkest part of the shadow that appears on the object itself. It is the area furthest away from the light source and where the surface begins to curve away dramatically.
- Reflected Light: A slightly lighter area found within the core shadow, caused by light bouncing back onto the object from surrounding surfaces. Do not make this area too bright; it must still remain darker than the mid-tone.
- Cast Shadow: The darkest value in the entire composition, this is the shadow thrown by the object onto the surface it is resting on. It is darkest right where the object meets the surface and fades out as it moves away.
Understanding the relationship between these zones and practicing them diligently is paramount. For instance, in a study of a simple sphere, the gradient from highlight to core shadow and the presence of reflected light are what create the illusion of roundness. This concept is a central pillar in any robust Shading Techniques For Drawing Guide For Beginners.
Choosing Your Tools: The Pencil Grades
Before you can apply any Shading Techniques For Drawing Guide For Beginners, you need the right instruments. Pencil grades are marked with ‘H’ (Hard) and ‘B’ (Black/Soft). The hardness determines how light or dark the mark will be and how easily it can be blended.
- H-Pencils (Hard): Ranging from H to 9H, these pencils are good for sketching, light shading, and precise details because they keep their point sharp longer. They produce lighter, finer lines.
- HB and F: These are the standard middle-of-the-road pencils, versatile for light lines, writing, and basic sketching. They are often a good starting point for very initial light tone blocking.
- B-Pencils (Soft/Black): Ranging from B to 9B, these are soft, dark, and ideal for deep shading and smooth coverage. The higher the number, the softer and darker the graphite, making them perfect for creating the core shadow and cast shadow zones. Using a 6B or 8B can achieve a truly dark black without damaging the paper.
To truly benefit from this Shading Techniques For Drawing Guide For Beginners, it is recommended that you acquire a set ranging from 2H to 6B. This range gives you all the tonal possibilities necessary to create a full value scale, from the lightest initial sketch to the deepest final shadow.
Mastering the Core Shading Techniques
Now that we have covered the foundational concepts of value and the right tools, we can dive into the various Shading Techniques For Drawing Guide For Beginners. Each technique offers a unique texture and visual language, allowing you to choose the best method for the subject you are drawing.
1. Hatching and Cross-Hatching: The Power of Lines
Hatching and cross-hatching are perhaps the oldest and most fundamental Shading Techniques For Drawing Guide For Beginners, particularly for artists using ink or technical pens. These methods use simple straight lines to build up tonal density.
Hatching: Parallel Power
Hatching involves drawing a series of parallel lines that are close together. The closeness of the lines determines the darkness of the value. If the lines are far apart, the value is light, representing a mid-tone or a diffused light area. As you bring the lines closer, the paper’s white disappears, and the value darkens, suggesting a deeper shadow. For a beginner, the key is consistency: practice keeping your lines evenly spaced within a specific tonal area. Try drawing simple geometric shapes, like a cube, and using only hatching to define the planes. This practice, a staple in any effective Shading Techniques For Drawing Guide For Beginners, forces you to think geometrically and systematically about tone. You should always try to make your lines follow the contour or curve of the object to reinforce the illusion of form and volume.
Cross-Hatching: Building Depth
Cross-hatching takes the hatching technique one step further, achieving darker tones by layering a second set of parallel lines across the first set. This crossing pattern rapidly builds up density. To create even darker shadows, you can add a third or fourth layer of lines, changing the angle each time. The more sets of lines you overlay, the denser and darker the resulting value will be. This method is incredibly versatile, allowing for the quick creation of very dark core and cast shadows. It is crucial to remember that the lines do not have to be perfectly perpendicular (90 degrees); varying the angle slightly can give the shadow a richer, more textured look. Many masters of illustration relied heavily on cross-hatching to define muscle tone, fabric folds, and architectural features, making it a cornerstone skill in any Shading Techniques For Drawing Guide For Beginners.
2. Blending (Smudging): The Seamless Gradient
Blending is one of the most popular Shading Techniques For Drawing Guide For Beginners because it allows for the creation of smooth, almost photographic transitions between light and shadow. Unlike the linear texture of hatching, blending results in a seamless gradient.
Technique and Tools
The blending technique involves applying graphite to the paper and then smoothing it out to eliminate the individual pencil strokes. You must first apply a light, even layer of graphite using the side of a soft B-grade pencil. It is vital to apply the tone lightly and gradually build up the intensity; attempting to lay down a dark tone immediately will result in a messy, hard-to-blend surface. Once the graphite is down, you use a blending tool to gently work the tone. Common blending tools include:
- Tortillon or Blending Stump: Tightly rolled paper tools that allow for precision blending in small areas.
- Chamois or Soft Cloth: Excellent for smoothing large areas quickly, often used for background tones.
- Cotton Swabs or Q-Tips: Good for small to medium areas, offering a softer blend than a stump.
- Your Finger: While readily available, using your finger is often discouraged because the oils on your skin can transfer to the paper, creating an uneven blend that yellows over time.
The direction of your blending movements should follow the form of the object. For a sphere, you blend in a circular motion; for a cylinder, you blend with vertical strokes. This thoughtful movement is what separates a skilled artist from one merely smudging. For those starting with a Shading Techniques For Drawing Guide For Beginners, practice blending a value scale: a long rectangle transitioning smoothly from white to black, which will hone your control over the pressure and blending tool.
The Gradual Build-Up
The secret to successful blending lies in the gradual build-up of tone. Do not blend all at once. Apply a light layer, blend it, then apply another slightly darker layer over the shadow area, and blend again. This iterative process allows you to maintain control and ensure that the transition remains smooth and without harsh lines. This measured approach is a key lesson in every professional Shading Techniques For Drawing Guide For Beginners. Blending is particularly effective for organic shapes like faces, bodies, and soft fabric, where hard edges are absent and subtle tonal shifts define the structure.
3. Stippling (Pointillism): The Patient Dots
Stippling is a labor-intensive but visually stunning technique that builds value entirely through small, distinct dots. This technique is often seen in pen and ink drawings, engravings, and historical illustrations.
Building Tone with Density
In stippling, the viewer’s eye mixes the tones. The darkness of a shaded area is determined by the density of the dots, not by the darkness of the mark itself.
- Light Tones: The dots are sparse, with plenty of white paper visible between them.
- Dark Tones: The dots are packed extremely close together, overlapping slightly to almost completely obscure the paper.
The patience required for stippling is significant, making it a test of artistic discipline. However, the resulting texture is distinct and beautiful, lending a timeless quality to the artwork. This is a unique method in the landscape of Shading Techniques For Drawing Guide For Beginners because it entirely avoids lines, relying purely on shape and form to be defined by tonal masses of dots. Practicing stippling on a simple fruit, like an apple, can be an excellent exercise to see how dot density can successfully describe roundness and volume.
4. Scribbling (Scumbling): Texture and Energy
Scribbling, or scumbling, is an expressive and energetic method that utilizes random, circular, or overlapping loop-like marks to create tone and texture. It is one of the more forgiving and fun Shading Techniques For Drawing Guide For Beginners.
The Expressive Mark
Unlike hatching, which is neat and systematic, scribbling is loose and chaotic. The goal is not to hide the lines but to use their chaotic nature to suggest texture. The density of the scribbles determines the value: tightly layered, frenetic scribbles create dark shadows, while looser, more open marks create lighter tones. This technique is often perfect for:
- Textured Surfaces: Drawing things like tree bark, tangled hair, rough fabric, or aged stone.
- Expressive Styles: Artists looking for a dynamic, energetic feel in their work, rather than a polished, smooth finish.
When using scribbling, it is helpful to vary your pencil pressure and the direction of your loops often to avoid any accidental patterns, keeping the texture randomized and rich. The expressive nature of scribbling makes it a unique and powerful tool in the arsenal of Shading Techniques For Drawing Guide For Beginners.
Advanced Concepts for a Beginner’s Mind
Once you are comfortable with the core Shading Techniques For Drawing Guide For Beginners, it is time to think about concepts that add realism and depth, pushing your art beyond the basics.
Understanding Atmospheric Perspective (Aerial Perspective)
Atmospheric perspective is a crucial concept for drawing landscapes or scenes with depth, and it applies directly to how you shade. Simply put, as objects recede into the distance, they appear lighter, less detailed, and their colors (or values) shift toward the ambient color of the atmosphere (often a lighter blue or grey).
In the context of shading:
- Foreground Objects: These objects should have high contrast—very dark shadows and very bright highlights. The value range is wide.
- Background Objects: These objects should have low contrast—soft, light shadows and subtle highlights. The value range is compressed.
If you are drawing a forest scene, the tree trunks closest to you will have deep, dark core shadows (using your 6B pencil), while the trees far in the distance will only have light grey, blended shadows (using your 2H pencil). By manipulating your shading to reflect this atmospheric effect, you can dramatically increase the sense of space and distance in your two-dimensional artwork. This mindful application of value is an advanced step in mastering Shading Techniques For Drawing Guide For Beginners.
Applying Shading to Complex Forms and Textures
Moving past the basic sphere and cube, the real challenge in Shading Techniques For Drawing Guide For Beginners is applying these principles to complex, textured forms.
Drapery and Fabric Folds
Fabric is a masterclass in dynamic light and shadow. The folds create complex, flowing shapes, resulting in distinct, sharp core shadows and bright highlights right next to each other. When shading fabric:
- Identify the Apex: Find the points where the fabric is stretched tightest or closest to the light. These will have the sharpest highlights.
- Identify the Trough: Find the deepest pockets and curves of the fabric. These areas will hold the darkest core shadows and often have reflected light bouncing up from the fabric underneath.
- Use Blending and Sharp Edges: Use blending for the soft, flowing parts of the fabric, but use sharp, distinct lines to define the edges of deep folds or creases, which is where the value shift is most sudden.
A common exercise in any advanced Shading Techniques For Drawing Guide For Beginners is to sketch a cloth draped over a simple box, paying close attention to how the light source dictates the shape of the shadows.
Metal and Reflective Surfaces
Shading reflective materials like chrome or polished metal requires a completely different approach. These surfaces are not shaded with soft gradients; instead, they display sharp, sudden changes in value. You will see:
- High Contrast: Bright highlights and pitch-black shadows sit directly adjacent to each other with minimal transition.
- Abstracted Reflections: The shape of the shadows and highlights will be distorted and fragmented, often reflecting the shapes of the environment around the object.
For this type of surface, blending is often unnecessary. Instead, you use crisp, graphic blocking of solid, contrasting values. Learning to draw a chrome sphere by only using blocks of pure white, solid black, and maybe one or two mid-tones is an excellent test of your Shading Techniques For Drawing Guide For Beginners.
Practice Routines: Making Shading a Habit
No Shading Techniques For Drawing Guide For Beginners is complete without a dedicated practice schedule. Consistent application is the only way to move from understanding the theory to mastering the skill.
The Value Scale Drill
The single most important drill you can do is the Value Scale.
The Drill:
- Draw a long rectangle and divide it into 7 to 10 equal squares.
- Leave the first square pure white (the paper).
- Fill the last square with the darkest value you can achieve (pure black, using a 6B or higher pencil).
- Fill the squares in between with a smooth, consistent transition of tones from light to dark.
- Repeat this drill using each of the major Shading Techniques For Drawing Guide For Beginners:
- One scale using only blending.
- One scale using only hatching.
- One scale using only cross-hatching.
- One scale using only stippling.
By repeating this drill, you train your eye to distinguish subtle tonal differences and train your hand to achieve precise, consistent pressure. The ability to control your graphite pressure is paramount, and the value scale is the best practice tool for this.
The Geometric Forms Study
The second essential practice involves the Geometric Solids. Every complex object in the world—a face, a hand, a tree—can be broken down into simple geometric forms (spheres, cubes, cylinders, cones).
The Drill:
- Set up a real-life arrangement of 2-3 simple objects (e.g., a ball, a box, and a cup) under a single, strong light source (like a desk lamp).
- Draw and shade the forms, focusing intently on the five key zones of shadow (Highlight, Mid-tone, Core Shadow, Reflected Light, Cast Shadow).
- Repeat this study multiple times, but each time change the position of the light source. Notice how radically the shadows shift.
- As an advanced step in this Shading Techniques For Drawing Guide For Beginners, draw the arrangement using a different shading technique each time: draw it once with blending, once with cross-hatching, and once with stippling.
This practice forces you to observe and apply the principles of light and shadow, not just copy a flat image. This is how you develop true observational skill.
Final Thoughts: The Journey to Mastery
The journey of mastering Shading Techniques For Drawing Guide For Beginners is not a race; it is a steady, deliberate process of observation and practice. Do not be discouraged by initial results that look messy or flat. Every celebrated artist has spent countless hours practicing value scales and geometric forms.
Remember to keep your sketches light and loose at the beginning, defining the basic forms and the light source with a light H-pencil. Then, slowly and systematically, build your value, moving toward the softer B-pencils for the core and cast shadows. The art of shading is the art of seeing—seeing not lines, but tonal masses, and learning to translate that information onto the paper. Continue to practice the various Shading Techniques For Drawing Guide For Beginners until they become second nature, and soon you will be creating pieces that truly leap off the page.
*
FAQ (Pertanyaan yang Sering Diajukan)
# Shading Techniques For Drawing Guide For Beginners
What is the difference between shading and rendering in drawing?
Shading is the fundamental process of using value (lightness and darkness) to create the illusion of form and volume on a two-dimensional surface. Rendering is a broader term that encompasses shading but also includes the detailed application of texture, color (if applicable), and fine detail to achieve a high degree of realism. In essence, shading is a core component of rendering, which is the final, highly polished stage of a drawing.
Which pencil grade is best for a beginner learning shading techniques?
For a beginner learning Shading Techniques For Drawing Guide For Beginners, the most effective range is a set of pencils spanning from 2H to 6B. The 2H and HB pencils are perfect for light initial sketches and soft mid-tones, while the 4B and 6B pencils are crucial for achieving the necessary dark values for core and cast shadows. This range allows you to explore the full spectrum of the value scale essential for effective shading.
How do I make my shadows look smoother without blending tools?
To create smoother shadows without tools like a blending stump, you must focus on light pressure and layering. Use the side of a soft B-grade pencil and apply the graphite in many, very light, circular, or overlapping layers. Each successive layer should be applied with the same light pressure. This gradual build-up eliminates the harsh start and stop of individual strokes, naturally creating a soft, smooth tonal transition.
Should I always use an actual light source when practicing my shading techniques for drawing?
Yes, absolutely. To truly master Shading Techniques For Drawing Guide For Beginners, you should always draw from life using a single, strong light source on your subject (like a desk lamp or a strong window). Relying on an actual light source trains your eye to identify the five key zones of light and shadow and teaches you how the shape of a shadow changes based on the object’s form and the light’s direction, which is a skill that cannot be learned from copying photographs.