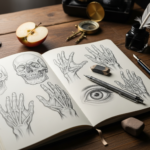
The act of bringing a two-dimensional surface to life rests entirely on the illusion of depth, form, and light. Without proper shading, even the most perfect outline remains flat and unconvincing. This necessary artistic skill transforms a simple shape into a dimensional object, making it appear solid and real. Mastering various shading techniques for drawing is the single most effective way to communicate volume and establish a distinct mood within your artwork. It is the crucial bridge between line work and realistic representation.
—
What is Shading and Why Does It Matter for Artistic Form?
Shading is fundamentally the manipulation of value—the lightness or darkness of a color or tone—to create the visual effect of light falling upon an object. When executed correctly, shading tricks the viewer’s eye into perceiving a three-dimensional form on a flat plane.
The various shading techniques for drawing are essential because they provide structure and emotional weight to a piece. The technique an artist chooses directly impacts the texture, mood, and overall style of the work. For instance, a soft, blended approach suggests smoothness, while a technique using deliberate, harsh lines can convey intensity or rough texture.
Key Roles of Shading in Art:
- Defines Form and Volume: It establishes which parts of an object recede and which come forward.
- Establishes Light Source: It clearly indicates where the light originates, which is vital for consistency.
- Creates Texture and Materiality: It helps distinguish between rough bark, polished metal, or soft skin.
- Enhances Mood and Drama: High contrast shading creates a sense of drama (Chiaroscuro), while low contrast creates softness.
For those looking to achieve maximum realism in their work, a complete understanding of the core shading techniques for drawing is non-negotiable.
The Foundation of Form: Understanding Light and Value
Before diving into the actual application methods, every artist must first understand the fundamental relationship between light and value. Shading is not about haphazardly darkening areas; it is a calculated effort to replicate how light behaves in the real world. This requires knowledge of the Value Scale and the specific elements of shadow and light.
Mastering the Value Scale
The value scale is the map that guides all shading techniques for drawing. It ranges from pure white (the brightest highlight) to pure black (the deepest shadow), usually broken down into nine or ten distinct steps of gray in between.
If you visualize this scale as a staircase, the top step is pure white (the paper itself), and the bottom step is the darkest graphite or charcoal you can apply. Most of the effective shading occurs on the middle steps. An artist’s goal is to accurately translate the various light conditions of a subject onto this scale. Failure to use the full tonal range often results in “muddy” or flat drawings that lack impact. Only by pushing the contrast between the lightest lights and the darkest darks can an artist inject true dynamism into their artwork.
The Five Key Elements of Light and Shadow
Effective shading techniques for drawing rely on the accurate placement and representation of five distinct areas of light and shadow that occur on any illuminated three-dimensional object. Understanding these elements is often cited as the single biggest leap forward for new artists.
- Highlight: This is the brightest spot on the object, where the light source hits it most directly and reflects the most intense light back to the viewer. It should be the lightest value on your scale.
- Mid-tone (or Local Tone): This is the natural color and tone of the object itself, falling between the highlight and the shadow. It represents the areas where light hits but is not intensely reflected. This is often the largest area of the object.
- Core Shadow: This is the darkest part of the object. It is the area facing away from the light source, receiving no direct illumination. This zone is what fundamentally defines the object’s form.
- Reflected Light: A slightly lighter band found within the core shadow, closest to the surface the object rests on. This light bounces off the surrounding environment (like a table or a wall) back onto the object. Crucially, reflected light is always darker than the mid-tone; it prevents the core shadow from becoming a stark, unrealistic black void.
- Cast Shadow: The darkest part of the entire scene, this shadow is projected onto the surrounding surfaces by the object itself. Its edges become softer (fuzzier) the further it moves away from the object, an effect known as penumbra.
To produce a realistic drawing, the artist must use various shading techniques for drawing to clearly demarcate and transition between these five zones. Misplacing the core shadow or ignoring reflected light will instantly flatten the image, regardless of the quality of your lines.
Essential Shading Techniques for Drawing: The Core Methods
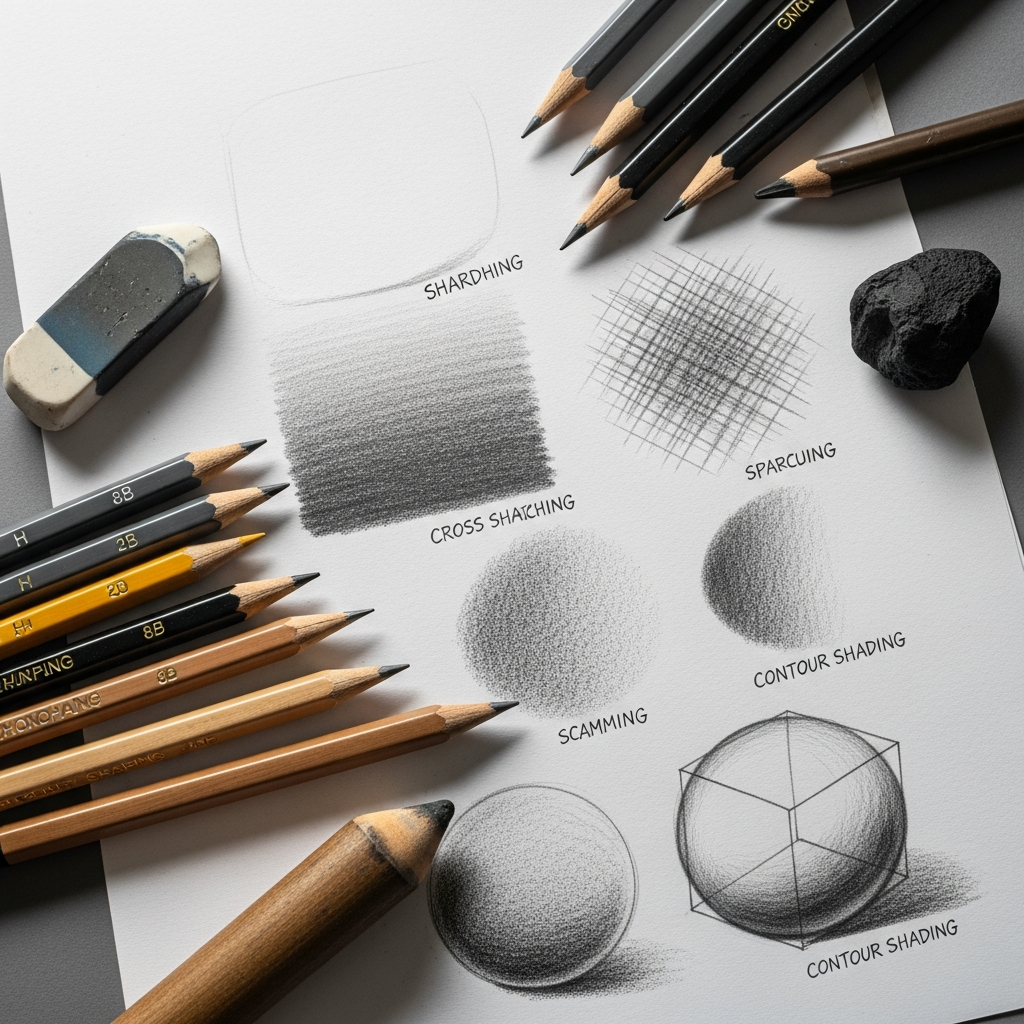
When we discuss the fundamental methods for applying tone, we find four major categories. Each method uses a different approach to pencil or charcoal application to build up value, and each delivers a unique textural quality to the final piece. Mastery of these essential shading techniques for drawing provides the necessary versatility for any subject matter.
1. Hatching
Hatching is arguably the most straightforward and traditional method, relying on the application of parallel lines. To create a lighter tone, the lines are spaced further apart. To darken an area, the lines are drawn closer together, increasing the density of the marks.
The beauty of hatching lies in its clarity and precision. It maintains the energy of a sketch while still establishing form. When working on highly defined textures, such as wood grain or hair, hatching allows the artist to follow the form of the object with their lines, a technique called contour hatching. The direction of the line provides both value and a subtle textural cue about the surface curvature. Furthermore, the deliberate, visible nature of hatching lines often lends a classic, illustrative quality, popular in pen-and-ink or comic book art.
2. Cross-Hatching
Cross-hatching is an expansion of the hatching technique, adding a second (and often third or fourth) layer of parallel lines that intersect the first set at an angle. This technique is extremely powerful for quickly building up dark values and creating a rich, woven texture.
The darker the required tone, the more layers of crossing lines are added, and the closer those lines are placed. For a deep core shadow, an artist might apply four layers, perhaps crossing at 90, 45, and 135 degrees. This layering mechanism makes cross-hatching one of the most efficient shading techniques for drawing when high contrast is desired. It’s a favorite in graphic novel illustrations and master drawings from the Renaissance period, where its angularity provides a dynamic, energetic feel that blending cannot match. The overlapping lines create a fascinating visual complexity that digital artists often try to replicate when using traditional textures.
3. Stippling (Pointillism)
Stippling, also known as Pointillism in its painted form, involves creating value solely through tiny dots. The density of the dots determines the lightness or darkness of the area. Lighter areas have widely spaced dots; darker areas are achieved by placing the dots extremely close together, sometimes overlapping slightly.
This is arguably the most time-consuming of all shading techniques for drawing, but the resultant texture is completely unique—a soft, almost photographic graininess. Because the viewer’s eye automatically blends the dots from a distance (a principle called ‘optical mixing’), stippling can produce incredibly smooth tonal transitions while still maintaining a distinctly handmade, textural quality. Modern artists use stippling extensively in technical and scientific illustration, where sharp definition and precise value control are necessary. The patience required for this shading technique is immense, but the results offer unparalleled micro-texture control.
4. Scumbling (Circular Technique)
Scumbling uses tiny, overlapping, circular or scribbled motions to build up value. Instead of relying on straight lines or dots, the artist uses a continuous, light, chaotic application to gradually fill in the tonal area.
The primary benefit of this shading technique for drawing is the ability to maintain an even, soft texture while avoiding visible straight lines. It is particularly effective for rendering surfaces that are inherently soft or irregular, like wool, clouds, or certain skin textures. While it can appear messy up close, from a distance, the overlapping circles merge, creating a beautiful, diffused light effect. Scumbling offers a middle ground between the deliberate texture of hatching and the seamlessness of blending, providing a vibrant, slightly “busy” surface texture.
The Tonal Approach: Blending and Smudging for Realism
While the ‘Core Four’ techniques rely on distinct marks to create value, the tonal approach seeks to eliminate marks entirely, aiming for a smooth, continuous gradient. This is often the preferred path for artists focusing on hyper-realism or photo-realistic portraits. Learning to transition from the core methods to seamless blending is a crucial part of mastering shading techniques for drawing.
The Blended Gradient: Achieving Seamless Transitions
Seamless blending requires more than simply rubbing the graphite; it demands patience and control over pencil pressure. A smooth gradient—the transition from light to dark—should feel like a gentle slope, not a series of distinct steps.
The process often begins with the Scumbling technique, using the side of a soft pencil (like a 4B or 6B) applied very lightly. The darkness is built up through multiple, feather-light layers, rather than one heavy application. The key to success is to avoid pressing too hard on the paper at any point, as the pressure can compress the graphite fibers, making blending difficult or impossible later on. When creating complex shading techniques for drawing for things like human skin or smooth metal, this layering approach ensures the final surface remains luminous and not overly dark or flat.
Tools and Materials for Blending Success
While you can technically blend with your finger, doing so often introduces oils from the skin, which can stain the paper and make the graphite appear shiny and uneven. Professional artists rely on specialized tools to manage this delicate process.
- Tortillon (or Blending Stump): Tightly rolled paper tools with a pointed tip. These are essential for blending small, detailed areas and achieving sharp edges on cast shadows. They are excellent for precise value manipulation.
- Chamois Cloth: A very soft leather or synthetic equivalent, perfect for gently blending large areas of charcoal or graphite, such as backgrounds or large geometric shapes.
- Kneaded Eraser: While technically an erasure tool, it is paramount in shading. It can be molded into various shapes to lift (lighten) graphite, creating specific highlights or cleaning up edges without harsh rubbing. The controlled subtraction of value is as critical to realistic shading techniques for drawing as the initial application.
- Makeup Brushes: Modern artists have increasingly adopted soft, inexpensive cosmetic brushes to sweep and blend powdered graphite or charcoal. This method allows for the creation of extremely subtle, atmospheric tones that are impossible to achieve with standard paper blenders.
The mastery of these tools allows the artist to transition between the linear shading techniques for drawing and the tonal, blended effects with high precision, giving them full command over the finished texture.
Advanced Realism: Mastering Reflected Light and Form
To move past a basic understanding of light and shadow and into the realm of truly realistic drawing, an artist must fully grasp the nuances of light interaction. This involves studying how light bounces around the environment and how complex forms break down the light. These concepts separate competent draftsmen from masters of the craft, and they rely heavily on subtle application of the various shading techniques for drawing.
The Crucial Role of Reflected Light
As mentioned earlier, reflected light is the light that bounces off surrounding objects and surfaces back onto the shadowed side of the subject. Beginners often fail to include this, resulting in core shadows that are too dark and objects that appear cut out or floating in space.
Integrating reflected light correctly is a subtle challenge. The artist must remember two strict rules:
- It is always brighter than the Cast Shadow. The light bouncing onto the object is brighter than the shadow the object is projecting.
- It is always darker than the Mid-tone. It is still a shadow area, just illuminated slightly.
The application of reflected light requires the most delicate of all shading techniques for drawing, typically soft blending or very light scumbling, to ensure a gentle, atmospheric glow. A common technique is to draw the entire core shadow area as one dark value, then use a kneaded eraser to lift the graphite along the edge closest to the resting surface. This small, deliberate lifting action creates the illusion of light bouncing back up, firmly anchoring the object in its environment.
Understanding Form and Volume through Contour
When applying any of the core shading techniques for drawing—especially hatching and cross-hatching—the direction of the line should follow the contour of the form. This is known as contour shading.
For example, if you are drawing a sphere, your hatching lines should slightly curve, mimicking the spherical surface. If you are drawing a cylinder, the lines should be curved horizontally to wrap around the form. When lines are drawn flatly, they work against the illusion of depth, even if the values are correct. The deliberate choice of line direction enhances the three-dimensionality, allowing the marks themselves to assist in the rendering of volume. This integration of line direction and value is a hallmark of sophisticated shading techniques for drawing.
The Power of Grisaille and Monochromatic Study
Grisaille is a technique derived from painting, where a work is executed entirely in shades of gray or a single color. In the context of drawing, a successful grisaille means focusing purely on value and form, ignoring color entirely.
Many drawing masters recommend this monochromatic approach to students learning shading techniques for drawing. By removing the complexity of color, the artist is forced to concentrate solely on the accuracy of their value scale. A drawing that works well in a monochrome scale will always translate successfully into color later on. This study is paramount for realistic drawing because the human eye is easily distracted by hue, making it harder to discern subtle value differences. Practicing studies using only a value scale ensures the artist’s eye is trained to see and replicate true lightness and darkness, regardless of the subject’s local color.
Trends and Evolution of Shading Techniques in Drawing
While the fundamental principles established by Renaissance masters remain the bedrock of the field, the modern application of shading techniques for drawing continues to evolve, heavily influenced by digital tools and the proliferation of shared content. Today’s artists often blend traditional methods with contemporary approaches to achieve effects that were previously unattainable.
Digital Influence on Traditional Methods
The rise of digital art hasn’t eliminated traditional media; rather, it has informed and sometimes simplified it. The digital world popularized techniques like halftone dots (or Screentone), which is a pre-printed dot pattern used in traditional manga. Now, traditional artists, inspired by this clean, graphic look, are intentionally using ultra-fine stippling or precise cross-hatching to mimic the aesthetic of digital screen tones, creating a stylized version of realism. Furthermore, the ability to instantly check values in a drawing by converting a reference image to grayscale on a tablet has accelerated the learning curve for mastering the tonal scale, directly impacting the precision used in traditional shading techniques for drawing.
Emphasis on Texture and Materiality
A current trend in realistic drawing is an intense focus on highly specific texture rendering, which requires a nuanced combination of shading techniques for drawing. Artists are no longer satisfied with general blending for skin; they are using micro-level scumbling combined with precise lifting (using the kneaded eraser) and tiny stippling marks to replicate the exact texture of pores, wrinkles, or stubble. This demand for hyper-texture has elevated the importance of blending control and the proper use of specialized tools.
For example, to draw the smooth, reflective surface of glass or chrome, the artist must use the sharpest possible contrast between the highlight and the core shadow, often achieved with sharp-edged blending stumps, while leaving the reflected light perfectly clean and white. Conversely, rendering a rough surface like concrete requires the controlled application of coarse stippling and visible cross-hatching to mimic the grainy surface. This specialized application of shading techniques for drawing demonstrates the evolution toward material-specific rendering.
The Rise of Simplified, Graphic Shading
On the other side of the realism spectrum, there is a strong contemporary trend toward simplified, graphic shading techniques for drawing. This approach, often called “cel shading” (borrowed from animation), uses flat, distinct blocks of value with no blending or gradients. The shadow shape is defined by a hard, crisp edge, making the art look stylized, bold, and dynamic.
This style, which requires incredible precision in shape definition, proves that effective shading does not always mean seamless blending. The artist’s challenge is to accurately draw the shadow shape before filling it in, ensuring the edge placement is perfect to still convey the form without the assistance of gradual transitions. Many professional concept artists and illustrators use this quick and impactful method to communicate form efficiently.
—
Conclusion: The Path to Mastery of Shading Techniques for Drawing
The journey to mastering shading techniques for drawing is continuous, but the rewards are transformative. Shading is not a single skill, but rather an umbrella term for a dozen interlocking principles—value theory, light physics, and tool handling—all brought together through a handful of core application methods. Whether you favor the energetic cross-hatch of a sketch or the ethereal blend of a hyper-realistic portrait, your effectiveness is measured by your ability to control the value scale and accurately interpret the five elements of light and shadow.
By diligently practicing the foundational methods—hatching, stippling, scumbling, and blending—and then applying the advanced concepts of reflected light and form contour, any artist can move their work from flat sketches to three-dimensional creations. Consistent study and practice of these diverse shading techniques for drawing will inevitably lead to more evocative, realistic, and successful artwork.
*
FAQ (Pertanyaan yang Sering Diajukan)
## What are the main shading techniques for drawing?
The main shading techniques for drawing are:
- Hatching: Using parallel lines to create value.
- Cross-Hatching: Using intersecting parallel lines for darker value and texture.
- Stippling (Pointillism): Using dots, where density determines value.
- Scumbling (Circular Technique): Using tiny, overlapping scribbles for a soft, even tone.
- Blending: Using tools like stumps or cloth to smooth graphite or charcoal into seamless gradients.
## What is the easiest shading technique for beginners?
For beginners, the easiest and most controlled shading technique for drawing to start with is Hatching. It simplifies the process by requiring only straight, parallel lines, allowing the artist to focus entirely on maintaining uniform line spacing and direction to control the value. This methodical approach is less intimidating than achieving a perfect, seamless blend.
## How do professional artists achieve realistic shading?
Professional artists achieve highly realistic shading by doing two key things: 1) Mastering the Value Scale, ensuring they utilize the full range from pure white to pure black, and 2) Accurately defining Reflected Light and Cast Shadows. They rely on layering soft graphite (scumbling/light blending) and often use precision tools like kneaded erasers and sharp blending stumps to sculpt the light, rather than just filling in the shadow.
## What is reflected light and why is it important in shading?
Reflected light is the light that bounces off the surrounding environment (like a table or wall) and subtly illuminates the shadowed side of an object. It is crucial because it keeps the shadows from looking like a flat, dark void, helps to define the object’s form even in the dark areas, and convincingly anchors the object to the surface it is resting on.
## Can I use blending and hatching together in one drawing?
Absolutely. Expert artists frequently combine different shading techniques for drawing to achieve complex effects. For instance, they might use a soft blend (tonal shading) for smooth areas like skin, and then use precise cross-hatching to render a rougher texture like clothing or hair. This combination adds depth and visual interest by contrasting textures.